Download
1 / 81
830 likes | 1.08k Views
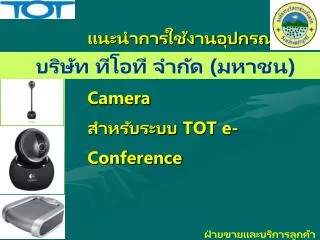
บริษัท ที โอที จำกัด (มหาชน). แนะนำการใช้งานอุปกรณ์ Speakerphone & Web Camera สำหรับระบบ TOT e-Conference. ฝ่ายขายและบริการ ลูกค้าภาคเหนือตอนล่าง. หัวข้อบรรยาย. DUET USB Speakerphone Logitech Quickcam Sphere AF. DUET USB Speakerphone. Overview การใช้งาน

E N D
บริษัท ทีโอที จำกัด (มหาชน) แนะนำการใช้งานอุปกรณ์Speakerphone & Web Cameraสำหรับระบบ TOT e-Conference ฝ่ายขายและบริการลูกค้าภาคเหนือตอนล่าง
หัวข้อบรรยาย • DUET USB Speakerphone • Logitech Quickcam Sphere AF
DUET USB Speakerphone • Overview • การใช้งาน • การ SettingSound and Audio Devices • Windows xp • Windows 7 • ปัญหาการใช้งาน
Speakerphone Specifications • Weight • 0.55 lbs Carrying with USB cable • Power • USB power for PC and Laptop • Audio • 100% Full Duplex Performance • Acoustic Echo Cancellation >40 db High-end Performance : conforms to ITU-T G.167 Standard • Noise Cancellation >10db • Low delay (10 ms) • Bandwidth 20 – 7500 KHz • Integrated Loudspeaker • Mute button and loudspeaker volume control buttons
การเชื่อมต่อ USB port • เชื่อมต่อสาย USB Cable ข้างหนึ่งกับ USB port ของ Duet กับ Personal Computer • Duet จะเริ่มทำงาน
การเชื่อมต่อ External Speakers / Amplifier • ที่จุดเชื่อมต่อ External Speaker connector สามารถต่อกับชุดลำโพงหรือ Line in เครื่องขยายเสียงได้ Duet จะ ปิดการทำงานของ internal speaker แต่ internal microphone ยังทำงาน
Volume Up / Down / Mute • เมื่อต่อ Duet กับ USB port แสงสีฟ้าจะติดสว่าง • ปุ่มลูกศรขึ้น - ลง คือ เพิ่ม - ลดเสียงของลำโพง • ปุ่มกลาง (microphone icon) คือ การปิด microphone และแสงสีฟ้าจะกระพริบ
การปรับแต่งอุปกรณ์ Speakerphoneบน windows XP
การ Setting Sound& Audio Devices (win xp) • Click“Start” , “Control Panel” • เลือก “Sounds and Audio Devices”แล้ว Double click
การ Setting Sound& Audio Devices (ต่อ) • เลือก Tab “Audio” • ให้ดูที่ Sound playback และ Sound recording Default device ต้องเป็น Phnx MT202pcs • Click ที่ Volume เพื่อดู Default device ทั้ง Sound playback และ Sound recording คือ Phnx MT202pcs (หน้าต่อไป)
การ Setting Sound& Audio Devices (ต่อ) Sound playback Sound recording
การ Setting Sound& Audio Devices เมื่อใช้อุปกรณ์อื่นๆ • Playback (เสียงย้อนกลับ)ให้ปิด Microphone และ Line in • Record (เสียงเข้าระบบ)ให้เลือก Microphone อย่างเดียว อย่าเลือก Stereo Mix หรือ Wave Out Mix
การ Setting Sound& Audio Devices (ต่อ) การ Test Hardware • เลือก Tab “Voice” • ให้ดูที่ Voice playback และ Voice recording Default device ต้องเป็น Phnx MT202pcs • Click ที่ Test hardware
การ Setting Sound& Audio Devices (ต่อ) การ Test Hardware • เมื่อการ Testing Sound Hardware เสร็จแล้ว ระบบจะข้ามไปทำ Microphone Test ทันที
การ Setting Sound& Audio Devices (ต่อ) • การทำ Microphone Test ต้องพูด เพื่อให้ทราบว่า Microphone สามารถรับสัญญาณได้หรือไม่ แต่จะไม่ได้ยินเสียง แล้วจึง Click Next • การทำ Speaker Test ต้องพูดเช่นเดียวกัน ระบบ Audio จะแสดงสัญญาณให้เห็น และจะได้ยินเสียง แสดงว่าการ Test Hardware เสร็จสมบูรณ์ ให้ Click Next 1 2
การปรับแต่งอุปกรณ์ Speakerphoneบน windows 7
1 Click Start Click Control Panel Click Hardware and Sound Click Sound 2
เลือก Playback เพื่อ Set ลำโพง 1 Click เลือก Phnx Click Set Default 2 Phnxเป็นอุปกรณ์Default ของเครื่องฯ แล้ว
ทดสอบเสียงลำโพง Phnx 1 2 3
ปรับระดับความดังของเสียงปรับระดับความดังของเสียง
เลือก Recording เพื่อ Set ไมโครโฟน อุปกรณ์อื่นเป็นอุปกรณ์Default ของเครื่องฯ 1. Click เลือก Phnx 2.Click Set Default
Phnxเป็นอุปกรณ์Default ของเครื่องฯ แล้ว 2.Click Properties 1.ระหว่างทดสอบเสียง ให้ติ๊ก 2.เมื่อทดสอบเสียงเสร็จแล้ว แนะนำให้เอา ออก
ปิดเสียงของไมโครโฟนตัวอื่นปิดเสียงของไมโครโฟนตัวอื่น เลือกอุปกรณ์ไมโครโฟน ตัวอื่น แล้ว click properties
การตรวจสอบในระบบ e-Conference • เข้าระบบ e-Conference • Click ที่ Setting
การตรวจสอบในระบบ e-Conference (ต่อ) • Click ที่รูป Microphone • ดูที่ Microphone ต้องเป็น Phnx MT202pcs
ปัญหา Echo ของ Sound ปัญหา Echo ก็คือ ปัญหาเสียงสะท้อนกลับมา โดยเสียงจะออกทางลำโพงแล้วย้อนกลับมาเข้าMicrophone อีกครั้ง
อุปกรณ์ที่ไม่ควรใช้ Microphone และ Speaker บน Notebook ชุดเครื่องเสียงสำหรับ Computer ตั้งโต๊ะ
ทางเลี่ยง กรณีที่ไม่สามารถใช้อุปกรณ์ช่วยกัน Echo ได้ ให้หันลำโพงออกไปจากตัว เบาเสียงลำโพงลง ใช้ Microphone ที่สามารถปิดเสียงได้ ถ้าไม่ได้พูด
ปัญหาเบื้องต้น ที่อาจพบ และวิธีการแก้ปัญหา
เสียงกระตุกหรือขาดหายเสียงกระตุกหรือขาดหาย Bandwidth อาจจะไม่เพียงพอ หรือมีการทำ Network policy management แจ๊คเสียงอาจจะไม่ดี ผู้พูดอยู่ไกล Microphone ใช้ Microphone จากกล้อง Web Cam กรณีได้ยินเสียง “ฮึ่มม” ตัวแจ๊คของผู้พูดอาจจะไม่แน่นหรือสกปรก
ไม่ได้ยินเสียง ตรวจดูสายลำโพง หรือดูว่าลำโพงเปิดอยู่หรือไม่ Admin เปิด Microphone ของผู้พูดแล้วหรือยัง ตรวจสอบแจ๊คที่เสียบเข้าระบบ ดูสถานะว่ามีสัญญาณเสียงหรือไม่จาก Setting เลือกอุปกรณ์ Microphone ให้ตรงกับที่ใช้ เปิด Microphone ของ Windows
Logitech Quickcam Sphere AF • Overview • การปรับแต่งใช้งาน • windows xp • windows 7 • ปัญหาการใช้งาน
Overview Performance • Motorised tracking: Automatically follows your every move, keeping you right in the middle of the picture. • Carl Zeiss® optics: Get more detail and clarity from Logitech’s glass lens designed in collaboration with Carl Zeiss, the global leader in camera optics. • Premium autofocus: Your images stay razor sharp, even in closeups. • HD video: Video and images have never looked so real at 960 by 720 pixels. • Higher-megapixel performance: A true 2-megapixel sensor, with up to 8-megapixel* photos (enhanced). • RightLight™ 2 Technology: Adjusts intelligently to produce the best possible images in dim or poorly backlighted settings. • Integrated microphone with RightSound™ Technology: Enjoy crystal clear conversations, free from annoying background noise.
Overview Convenience and Style • Logitech® Video Effects™: Personalise your conversations with hundreds of avatars and face accessories that mirror expressions and motion. Use Fun Filters to add playful photographic effects such as fisheye, ‘50s Movie Reel, neonize, and more. • Video Masks: Transform yourself. New Logitech Video Masks add personality to your video calls. Pair your eyes and mouth with the Mona Lisa, a lion, clouds, and much more. • Bonus software: Use bundled HP Photosmart Essential software to capture, edit, customise, and print images. • 23cm stand: Brings the webcam up to eye level. • Works with your favourite IM application: Use QuickCam® Sphere AF with Skype™, Windows Live™ Messenger, Yahoo!® Messenger, AOL® Instant Messenger (AIM®), and other popular instant messaging applications
Overview System Requirements • Windows® XP • Pentium® 4 (or compatible) processor, 1.4 GHz (2.4 GHz recommended) • 128 MB RAM (256 MB recommended) • 200 MB available hard disk space • 16-bit color display adapter • Windows®-compatible sound card and speakers (full-duplex sound card recommended) • USB port • CD-ROM drive • Windows® Vista™ • Pentium® 4 (or compatible) processor, 2.4 GHz (2.8 GHz recommended) • 512 MB RAM (1 GB recommended) • 200 MB available hard disk space • 16-bit color display adapter • Windows®-compatible sound card and speakers (full-duplex sound card recommended) • USB port • CD-ROM drive
Overview Technical Specifications • Carl Zeiss® optics • Autofocus system • Ultra-high resolution 2-megapixel sensor with RightLight™ 2 Technology • Color depth: 24-bit true color • Video capture: Up to 1600 by 1200 pixels (HD quality) • Frame rate: Up to 30 frames per second • Still-image capture: 8 megapixels (with software enhancement) • Built-in microphone with RightSound™ Technology
การปรับแต่งอุปกรณ์ Logitech QuickCamบน windows XP