Download
1 / 4
40 likes | 206 Views
3. In the top window of the Rules Wizard , click Move messages sent to a distribution list to a folder .

E N D
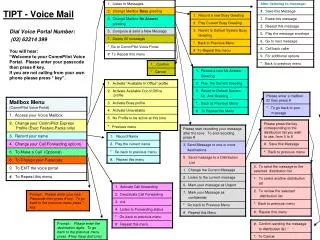
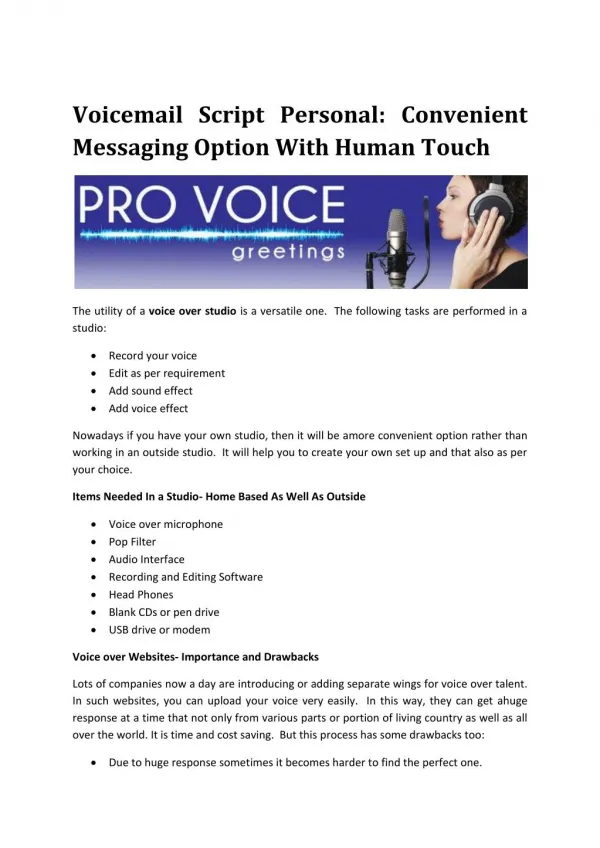
3 In the top window of the Rules Wizard, click Move messages sent to a distribution list to a folder. Managing your e-mail can take a lot of time and energy. Create specific rules in Outlook 2007 to route mail into folders, forward mail to other people and devices, and to receive notifications when mail arrives from specific parties. Topics in this guide: • Route E-mail from Distribution Lists • Organize Voice Mail Messages • Collect Responses for a Meeting Request • Flag E-Mail Messages • Create Customized Rules 4 In the bottom window of the Rules Wizard, click people or distribution list. Route E-Mail from Distribution ListsA distribution list (DL) is a mailing list dedicated to a particular subject. Automatically route DL messages into special folders so you can browse them when you have time. This lets you save the mail for later, and helps keep your Inbox organized, too. Note This procedure familiarizes you with the Outlook 2007 Rules Wizard. Subsequent topics explain general approaches to rules, but do not go through the Rules Wizard in the same detail. 1 In Mail view, on the Tools menu, click Rules and Alerts. 2 In the Rules and Alerts dialog box, click New Rule.
10 5 On the What do you want to do with the message page, select actions you want the rule to perform, and then click Next. Note The check box for the move it to the specified folder action is selected already. If you select other actions, you may be prompted to supply further information. In the Rule Address window, search for the DLs you subscribe to, select them, and then add them to the To line. When you have finished, click OK. 6 In the bottom window of the Rules Wizard, click specified. 7 Do one of the following: Browse to a folder in your Mailbox, and then click OK. –OR– Click New to create a new folder, follow the prompts, and then click OK. 11 On the Are there any exceptions page, select any exceptions you want to make to this rule. When you have finished, click Next. Exceptions you specify will not be affected by the rule. For instance, if you make an exception for mail marked with high importance, the rule will not apply to messages with this status. 8 Click Next. 12 On the Finish rule setup page, confirm your rule specifications and make changes as necessary. When you have finished, click Finish. 9 On the Which conditions do you want to check page, select conditions you want the rule to check, and then click Next. Note The check box for the sent to people or distribution list condition is selected already. If you select other conditions, you may be prompted to supply further information. • Notes • Get a head start on creating a rule by clicking Create Rule at the top of a message. This opens a dialog box with options specifically related to the message. • Rules apply to new mail you receive or send. To apply a rule to mail already in your Inbox, in the toolbar of the Rules and Alerts dialog box, click Run Rules Now. • To change or delete existing rules, select the rule, and then click the appropriate buttons in the toolbar of the Rules and Alerts dialog box.
Organize Voice Mail MessagesTo keep your voice mail messages together, automatically route them into a special folder and listen to them when you are ready. Use the Rules and Alerts Wizard to create a rule that scans the subject line of your incoming mail, looking for voice mail messages. These messages will be routed into a folder of your choice. For more details on using the Rules and Alerts Wizard, see the first topic in this guide. Collect Responses for a Meeting RequestWhen you schedule meetings, tracking responses can be distracting and time consuming. By automatically routing such replies into a special folder, you can review them at a time that works best for you. Use the Rules and Alerts Wizard to create a rule that scans the subject line of your incoming messages, looking for replies to a meeting request. These replies will be routed into a special folder. For more details on using the Rules and Alerts Wizard, see the first topic in this guide. 1 Open the Outlook Rules Wizard. In the top section, click Move messages with specific words in the subject to a folder. In the bottom section of the Rules Wizard, click specific words. In the Search Text box, type voice mail message. (The Search Text box is not case sensitive.) 1 Open the Outlook Rules Wizard. In the top section, click Move messages with specific words in the subject to a folder. 2 2 3 4 3 In the bottom section, click specific words. Go to your meeting request, copy the Subject line, and return to the Wizard and paste the line into the Search Text box. Click ADD, and then click OK. Click Next, and then follow the rest of the wizard until the rule is complete. 4 5 Click ADD, and then click OK. Click Next, and then follow the rest of the wizard until the rule is complete and activated. 6 5
Flag E-Mail MessagesYou might want to automatically convert a certain class of mail—messages from a manager, for instance—into tasks to ensure you follow up. A rule can be set up that will perform this conversion automatically, saving you time and trouble. Use the Rules and Alerts Wizard to create a rule that identifies characteristics in your messages and then flags them for follow up. For instance, you can flag mail from a particular person or DL, or you can flag mail with certain words in the Subject line or body. For more details on using the Rules and Alerts Wizard, see the first topic in this guide. Create Customized RulesIn addition to pre-formatted rules, you can create customized rules. 1 Open the Outlook Rules Wizard. Under Start from a blank rule, determine whether you want a rule for incoming messages or sent messages, and then click the link. Click Next, and then follow the rest of the wizard until the rule is complete and activated. 2 3 Note You can also click Create Rule at the top of a message. This opens a dialog box with options specifically related to the message. 1 Open the Outlook Rules Wizard. In the top section, click Flag messages from someone for follow-up. 2 3 Click Next, and then follow the rest of the wizard until the rule is complete.