Download

1 / 6
0 likes | 1 Views
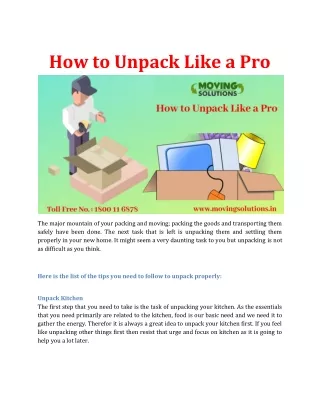
Thorough installations with attention to valley splash guards and end returns, preventing overshoot and edge-related leaks.

E N D
Gutter leaks rarely start in the middle of a run. They start at the corners, where two miters meet, and at the end caps, where water and debris slam into a dead end. Those small seams take the most abuse, and they fail first. If you know how to read the signs and use the right materials, you can stop most leaks with a few hours of steady work and keep rainwater where it belongs. This guide covers aluminum and steel K-style and half-round gutters, since those are the most common on homes. Vinyl and copper behave differently in a few key ways, and I’ll call out those differences when it matters. Expect a practical walk-through, with real-world tips that come from performing and overseeing hundreds of repairs for homeowners and small commercial buildings. What usually goes wrong at corners and end caps Corner miters are a puzzle of angles, metal memory, and sealant. Over time, expansion and contraction open hairline gaps you can barely see from a ladder. Those gaps become channels once the old sealant chalks up, dries, and separates from the metal. End caps fail for two main reasons: the crimp was weak or rushed during installation, or the cap has taken repeated impacts from ice and debris that relax the crimp and fracture the seal. On homes with trees, silt builds along the back lip of the gutter, holding moisture against the seam and accelerating corrosion under the sealant bead. On south-facing runs, UV breaks down cheap sealant faster, and leaks show up a season or two earlier. Pay attention to the joint design. Some installers use box miters, which are factory-formed corner pieces that overlap the gutter ends. Others hand-cut strip miters or use a custom-shop welded miter. Box miters have more seams, which means more places to leak, but they install quickly and are easy to reseal. Hand-cut miters have fewer seams and look cleaner, but they depend on the skill of the installer. Welded or soldered copper miters, when done correctly, have no sealant to fail, though they can crack with movement if they lack expansion joints. End caps vary too. A good end cap connection includes a tight mechanical crimp, a continuous interior sealant bed, and a cleaned surface before sealing. If you see only a bead of sealant smeared around the outside, assume it will leak. Tools and materials that earn their keep You can do this repair with a minimal kit, but a few upgrades make the job faster and the results longer-lasting. I keep a caulk gun with a smooth rod, tin snips, aviation snips for tight curves, a 5-in-1 painter’s tool, a narrow wire brush, a roll of butyl gutter tape, rivet gun with 1/8-inch aluminum rivets, a hand seamer, and mineral spirits for cleanup. Safety gear includes a Type IAA ladder, stabilizer standoff, gloves with grip, glasses, and a helper when possible. A cordless drill with a 1/8-inch bit is optional but speeds up rivet work. Most important is the sealant. For aluminum and steel gutters, choose a high-quality tripolymer or polyurethane gutter sealant rated for wet-surface application and UV exposure. Geocel 2320/2300, OSI Quad Max, or similar pro-grade products stick to metal even if you can’t get it bone-dry, and they stay flexible for years. Silicone is a common DIY choice, but it tends to peel from
painted aluminum over time and complicates future repairs. For copper, use solder on new work or a butyl-based sealant that’s compatible with copper if you’re doing a stopgap repair. For belt-and-suspenders reliability at old seams, I add 2-inch butyl tape along the interior joint before sealing. Butyl remains tacky and moves with the metal. Acrylic tapes and asphalt-based patch products stiffen and fail early on gutters, especially where temperature swings are strong. The prep that makes or breaks the repair Most leak fixes fail in the first year because the substrate wasn’t clean. You can’t stick fresh sealant to mildew, chalky paint, oxidized aluminum, or wet grit. The difference between a three-year patch and a ten-year repair is surface prep. Start by cleaning the run. Scoop out debris with a gloved hand, then flush the gutter with a hose to push out silt packed in the corners. Let it drip dry while you set up your tools. At the joint, scrape off old sealant with a 5-in-1 tool, working down to bare metal. A narrow wire brush helps lift oxidized aluminum. If you see white powder on aluminum, that is oxidation. Brush until the surface feels metallic again. For steel gutters, look for rust at the seam, especially where water pools. If it is only surface rust, sand it to shiny metal and treat with a rust-inhibiting primer rated for topcoat in 30 to 60 minutes. If the steel is pitted through, plan for replacement in that section. Rinse the area and wipe it with a rag dampened in mineral spirits. Avoid lacquer thinner near painted surfaces; it can lift paint. Let it air-dry. If you have shade and still air, you can speed the process with a heat gun on low or a hair dryer, but do not overheat; you just want to chase off moisture. Check the fasteners. Loose spike-and-ferrule hangers or hidden hangers near the joint will let the gutter flex, which reopens the seam. Tighten or replace hangers within 18 inches of a corner or end cap. If the fascia is punky or rotten, a sealant fix will not last. Address the wood first. Diagnosing an inside miter leak versus a wall leak Before you open a tube of sealant, confirm the source. Water can travel along the hem of the gutter and appear to leak at a corner even when the entry point is upstream. With the gutter clean, run a gentle stream from a hose starting five to six feet away from the corner and watch the seam. If it stays dry and only starts dripping when the water reaches the miter, the leak is local. If you see drip lines before water reaches the corner, look for a hanger screw hole, a pinhole in the run, or a seam in the straight section. At inside corners, leaks can also originate from splash-over if the downspout cannot handle peak flow. Evidence is streaking on the fascia and staining on the soffit without wetness at the seam itself. Sealing the corner will not solve overflow. You need capacity or flow changes, which might mean a larger downspout, an additional outlet, or a diverter upstream. Step-by-step: resealing a leaking corner miter This is the bread-and-butter repair for aluminum gutters with box or strip miters. The sequence stays the same whether you are on a first-story ranch or a two-story colonial. Take your time on each move. Cut away every trace of old sealant inside the miter, including the thin film that looks bonded. Use the 5-in-1 to lift the bead, then a wire brush to scrub. If the miter is a box style with overlapping flanges, clean the overlap edges where butyl tape will sit. Rinse or wipe with mineral spirits and let dry. Check the fit. If the two gutter runs have drifted and created a visible gap, loosen nearby hanger screws or spikes and pull the runs back into alignment. Use a hand seamer to tweak the flanges. Drill and install two 1/8-inch aluminum rivets through the overlapping metal at the top and midway down the miter to stabilize it. Do not over-compress and pinch the water channel. Lay butyl tape. Apply a continuous strip of 2-inch butyl tape along the interior seam lines, bridging each joint. Press it firmly with your thumb or a seam roller to avoid channels where water can creep. Overlap ends of tape by at least 1 inch.
Bed the joint in sealant. Run a generous, continuous bead of tripolymer or polyurethane sealant over the butyl tape and along any exposed seams. Push the sealant into the joint with a gloved finger or a caulk tool, keeping it slightly crowned. Feather edges so water does not catch. Do not leave gaps or pinholes at the top hem. Cure and test. Most tripolymer products skin over in 20 to 40 minutes and fully cure in 24 to 48 hours, depending on temperature and humidity. After it skins, run a controlled hose test, starting low volume. Watch for weeping. If you see any, add a small touch-up bead while the surface is still green. That sequence gives you a redundant seal: mechanical alignment, butyl adhesion, and flexible sealant. On older homes where framing moves seasonally, that redundancy is why the repair lasts. Step-by-step: tightening and sealing an end cap End caps are simpler but less forgiving. A bad crimp hides under a thick smear of sealant, and the leak returns at the first freeze- thaw cycle. Approach it like sheet metal, not caulking. Expose the joint. Scrape off all old sealant from the inside corner where the cap meets the gutter body. Clean the metal to bright, sound surface. Re-crimp the edges. Use a hand seamer or duckbill pliers to fold the gutter’s back and front flanges tightly over the end cap. Work from the hem toward the bottom, applying steady pressure to avoid kinks. If the cap wiggles after crimping, drill two 1/8-inch holes through the flange and cap and set aluminum rivets to lock it. Seal the interior. Run a continuous, modest bead of tripolymer around the entire inside seam where the cap meets the gutter. Press the bead into the seam and feather the edges. On half-round gutters, add a narrow strip of butyl tape first, then a bead to prevent sliding. Do not rely on exterior goop. You can add a cosmetic bead on the outside for belt-and-suspenders, but the waterproofing should happen inside. Exterior-only sealing is the reason most end cap repairs fail. Test for both drip and wicking. After skinning, run water toward the cap and watch not just for drips but for moisture wicking along the seam. If you see a damp line but no drip, top off the interior bead. End caps on copper should be soldered for a permanent fix. If soldering is not in your skill set, a high-quality butyl-based sealant can buy time, but expect to revisit it. The case for replacing a corner or cap instead of resealing Sometimes the smart move is to replace the miter or cap. Consider replacement when you see perforation from corrosion, the miter is crushed from a ladder impact, the geometry is off enough that water pools, or the metal has creased and lost spring. Box miters cost modestly and swap out quickly. With the run supported by hangers, drill out old rivets, slice sealant, remove the old miter, clean the mating surfaces, dry-fit the new piece, rivet at the overlaps, then follow the butyl-and-sealant process. A fresh miter removes hidden cracks and distorted seams that would keep telegraphing leaks. End caps are even easier to replace. Cut away the old crimp with snips if it is stubborn, clean, dry-fit the new cap, crimp tightly, add two rivets for insurance, then seal inside. Match material: aluminum cap on aluminum gutter, steel on steel, copper on copper. Mixing metals invites galvanic corrosion, especially where water sits. When to call a gutter services pro There is a point where a repair crosses into small-scale remodeling. Multi-story access is the obvious threshold; few homeowners have the ladders and safety setup for a third-story corner. Less obvious is the system-wide issue. If you see multiple leaks, sagging runs, undersized downspouts, and joints that have been sealed several times, you are past the quick fix phase. A pro can assess pitch, hanger spacing, outlet sizing, and tree exposure, then recommend targeted upgrades or gutter replacement. Another trigger for a professional is copper work, which is best soldered, and any slate or tile roof where ladder placement risks breaking expensive materials.
On labor and cost, resealing a single corner typically runs a modest amount when done by a contractor, depending on access and market. Replacement of a box miter and cap can double that. Whole-house reseal jobs are often priced by the hour or by the number of corners. If a contractor insists on wholesale replacement without explaining why the existing gutters cannot be saved, ask for a leak-by-leak assessment. Many older systems can be put back in reliable service with maintenance-grade repairs. Weather and timing: work with the forecast, not against it Sealants hate cold and standing water. If you can, plan repairs for a 48-hour dry window with temperatures in the 50 to 80 degree range. Most tripolymer products will set in cooler weather, but they stay soft longer and attract dust. If you must repair during a wet spell, choose a sealant rated for wet application and use a heat gun on low to dry the joint right before sealing. Wind is your enemy when working at the corner; it pushes the ladder and whips debris into your bead. A calm morning beats a breezy afternoon. In freeze-prone areas, aim to finish corner and end cap repairs by mid-fall. Anything you leave to November risks trapping water in a seam that will expand as ice and lift your fresh bead. In hot climates, avoid the midday sun. The metal can get hot enough to thin certain sealants and cause slump. What to do about stained fascia and moldy soffit after a leak Stopping the leak is step one. The stain lingers. If the fascia paint has bubbled or the wood swelled, let it dry for a week after repair. Sand lightly, spot-prime with an exterior primer that blocks tannin stains, and topcoat. For soffits with mildew, mix a cleaning Click here for more solution of water and a small amount of detergent, then a light pass with a mildewcide cleaner. Avoid bleaching bare wood near aluminum; it can streak. If you have ongoing staining even after a tight seam, check for splash-out. A hidden culprit is a high roof valley feeding directly into the corner without a splash guard. A small, factory-finished aluminum diverter set on the shingle above the corner slows the water and keeps it in the gutter. Install it with roofing sealant and short roofing nails under the shingle tabs, not through the gutter. Common mistakes that shorten the life of a repair Over and over, I see the same errors. People smear silicone over dirty metal and call it good. They miss the top hem, where capillary action starts. They leave gaps under the bead, creating little culverts. They ignore a loose hanger two feet away that flexes the corner every time it rains. They apply asphalt roof cement inside a gutter, which cures to a brittle scab and cracks within a season. They forget expansion and run a rigid, thick bead across a joint that needs to move. Another mistake is forgetting about slope. If a corner holds a half inch of water after the rain, the sealant sits submerged for days. Eventually, even the best chemical bond will surrender. Re-pitch the run by lifting or lowering hangers: a fall of about one quarter inch every 10 feet usually works. On long runs, add an additional outlet to split the distance. Aluminum, steel, copper, and vinyl: material-specific notes Aluminum dominates because it is light, resists rust, and matches the cost target for most homes. It oxidizes, though, and that chalky surface is the enemy of adhesion. Brush it clean, and avoid silicone. Steel is strong and can hold pitch better on long runs, but the inside coating matters. Once the coating is breached, rust starts. For steel, be meticulous about priming any bare metal before sealing. Copper is the jewel. The right fix is solder. If you must seal, choose butyl-based products that respect copper chemistry. Avoid smearing patina with harsh solvents. When you plan a permanent repair, hire a craftsperson who solders with proper flux and cleans the joint so it ages without verdigris blotches. Vinyl gutters are a different animal. They snap together with gaskets or rely on proprietary sealants. Heat and cold work vinyl hard, and the joints open as the plastic moves. If a corner leaks repeatedly, consider swapping to a new gasket or upgrading to aluminum where sun exposure is strong. Many vinyl systems are budget-friendly but short-lived under UV.
Maintenance that prevents the next leak Gutters are not a set-and-forget system. The cheapest way to avoid corner and cap problems is boring: keep them clean and reduce the load on those joints. Twice a year is a baseline for homes without heavy trees. In leaf-heavy neighborhoods, count on three to four cleanings. Screens and covers reduce debris but do not eliminate maintenance. Small silt still migrates to corners, and that silt holds moisture against seams. During cleaning, watch the seams. Hairline cracks show up as dark lines in the bead. Probe with a plastic pick. If the bead lifts easily, plan a reseal before the rainy season. Check hanger spacing. Hidden hangers should be no more than 24 inches apart in snow zones and no more than 36 inches apart elsewhere. Add a hanger within a foot of every corner and end cap to reduce flex. If your downspouts run full during heavy storms, upgrade to a larger size or add an extra outlet two or three bays away from the corner to reduce pressure on the miter. A field example: two corners, two different fixes A house I serviced had twin inside corners feeding a single downspout. The upstream corner leaked in a thin line during moderate rain. The downstream corner dumped water off the roof edge during storms. Same general area, two distinct problems. At the upstream corner, the box miter was intact but the bead had shrunk. I cleaned to bare metal, aligned the overlap, added two rivets, laid butyl tape, and sealed with tripolymer. The hose test showed a clean interior flow, no weeping. That corner has stayed dry through three winters. The downstream corner looked similar from the ladder, but watching in a storm told the story. Water from a 20-foot valley hit the corner like a fire hose, outrunning the downspout. The fix was not sealant. I added a low-profile splash diverter on the shingles to spread the flow, upsized the downspout from 2x3 to 3x4, and added a second outlet two rafter bays away. After that, no overflow, and the existing seam stayed intact once it was no longer overloaded. The lesson: repair the leak, but also fix the forces that caused it. When gutter replacement is the wise choice There is a point of diminishing returns with gutter repair. If multiple corners leak, seams are patched with a rainbow of old sealants, the gutters sit out of level, and the paint is chalking off in sheets, you are a candidate for new gutters. Gutter replacement allows you to correct pitch, increase downspout capacity, and choose seamless runs that reduce the number of joints. In many markets, seamless aluminum installed by a reputable gutter services company is cost-effective, especially compared to chasing leaks that return every season. If you do replace, specify details that prevent future corner and cap trouble. Ask for hand-cut miters with continuous interior sealing, or high-quality box miters installed with butyl backing and interior sealant. Require rivets at overlaps, not just screws, and insist on a compatible sealant by name. Place hidden hangers within 12 to 18 inches of corners and caps. On long runs, plan outlets to keep water moving and prevent it from stacking at corners. Final checks before you climb down After any corner or end cap repair, run a full-length hose test. Start low volume to spot weeping, then increase to simulate heavy rain. Watch for slow-forming beads at the underside of the joint, which signal wicking through a channel you missed. Confirm that water flows cleanly to the outlet without pooling. Sight the run for pitch. Make small adjustments at hangers while you are set up, not the next day in the rain. Leave a note with the date and the product used. It sounds fussy, but when you or someone else returns years later, knowing the sealant type matters. Some products layer well with themselves but reject other chemistries. A short, practical checklist you can print
Clean to bare metal at the seam, remove oxidation, and dry the joint. Align and stabilize the miter or end cap with crimps and rivets as needed. Lay butyl tape along the interior seam for a flexible underlay. Apply a continuous, pressed-in bead of tripolymer or polyurethane sealant. Test with a hose after skinning and adjust slope or outlets if overflow shows. The payoff Repairing gutter corners and end caps is not glamorous work, but it protects fascia, foundations, and landscaping that cost far more to fix than any seam. Do the prep right, use materials proven for gutters, and think about flow, not just the leak in front of you. Whether you are a homeowner handy with tools or a property manager coordinating gutter maintenance, the approach is the same: control the variables you can, respect the ones you cannot, and build in redundancy. Your gutters will reward you by going quiet in the next storm, which is what they are supposed to do. Power Roofing Repair Address: 201-14 Hillside Ave., Hollis, NY 11423 Phone: (516) 600-0701 Website: https://powerroofingnyc.com/