Cabling a Residence
Cabling a Residence. Starting at the Telephone Network Interface. 2 sections, Customer access and Teleco access. Wiring the Telephone Network Interface. Unscrew the Network Interface cover at the Customer Access point with a screwdriver and open.


Cabling a Residence
E N D
Presentation Transcript
Wiring the Telephone Network Interface • Unscrew the Network Interface cover at the Customer Access point with a screwdriver and open. • Disconnect your inside wiring from Service Electric Telephone Company's network by removing the modular plug from the jack. • If you are installing new wiring, punch a hole through the grommet and pass the wiring through the hole. Route the wire up and behind the hinge pin as shown below. • Loosen the terminal screws on the customer wiring bridge one full turn. • Strip off 3/4" of insulation from the wires you are using and connect them to the colored terminals (see the list below.), wrapping each wire clockwise between the washers on the screws. Tighten the screws securely, then tuck the excess wire in the wiring trough. • Re-insert the modular plug into the jack. Close the cover and screw the fastener down until the cover is snug and tight.
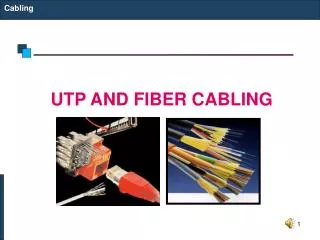
Cable type • 4 wire cable – Old style cable, may run into it on occasiongreen wire to green terminalred wire to red terminalblack wire to green terminal - for second line if usedyellow wire to red terminal - for second line if used • 8 wire CAT 5 and above standard cablewhite/blue to green terminalblue/white to red terminalwhite/orange to green terminal- for second line if usedorange/white to red terminal- for second line if used
Deciding on method of distribution • Circuits are in Parallel • Star topology • If one line opens then the rest are unaffected • Use more cable • Branching and daisy chaining • More convenient for multiple runs across a residence • Less cable • More distribution blocks • If a feed circuit goes down then branches are down too
LIN Telephone Patching Expansion Board by Leviton Bridge up to 4 telephone lines to 7 locations. • Features: Printed circuit board module • One incoming 4-pair 110-type IDC punch down and 7 outgoing RJ-45 jack connections • Combine with a Category 5e Board to route telephone to remote locations
Etcon DD1-K - Residential/SOHO Phone Distribution Block • Serves as Cat. 5 distribution Device (DD) as required by ANSI/TIA/EIA. • Accommodates up to 4 incoming phone lines. Allows up to 48 Outlet cables or phone home runs (12 for each incoming line). • Insulation Displacing connectors (IDC) • Economical solution for residential and commercial installations. • Dimensions: 7.25" by 5.5" by 1" molded engineering grade plastic. Includes identifier labels and mounting screws.
Etcon DD1X1 - Residential/SOHO Phone/Video Distribution Block • Accommodates up to 4 incoming phone lines. Allows up to 48 stations or phone home runs. • For use with standard 110 punch or push down tool. • 8-way 2050 MHz (2GHz) splitter for CATV cable runs. • Internally bridged and NO bridging clips needed. • Dimensions: 7.25" by 7.50" by 1" molded engineering grade plastic. Includes identifier labels and mounting screws.
Location of distribution point • Where do you enter the building • Can you get to a central distribution point • Basements are a good location because • Easy access to other rooms on the above floor • Routing in a basement can be easier if you have access to the floor joists • Entrance to a basement is low to the ground and less unsightly • Each sight may have unique needs and you will need to adjust to meet those needs
Cable supports every 4 to 5 feet Bridal rings, Drings, wire staples Wire staples
Safety • Safety glasses with side shields for overhead drilling • Safety glasses in general • Wire clipping can travel a distance and has wound up in another's eye • Proper bit selection • Bits with a hole in the end offer a fast means of pulling a cable through the hole • If the bit binds, will you be ready for the full torque of the drill? • Clear work area, avoid slips, trips, and falls
Time to Drill Visible Cautions Hidden dangers • What dangers are nearby • Electrical • Gas lines • Water lines • Go cordless if at all possible • Measure from where you want to come through to a reference point • Check and re-check measurement • Electrical ran within a wall • Piping in a wall • What else can you think of?
Sealing up the hole after the cable has been ran through it!