Download

1 / 22
220 likes | 268 Views
Laminate flooring is easy to install. Here are some simple instructions on how to install laminate flooring in your house. Read this blog site.

E N D
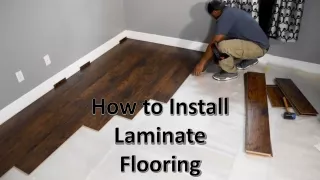
Install laminate flooring in your home with these simple instructions. Step 1 Remove Tongue Inspect each plank before beginning installation. For the first row along straight walls, remove the tongue on all long side joints and the short side of the first plank using a table saw.
Step 2 Trace and Cut For uneven walls, trace contour with a compass on the tongue side of the plank, and cut with a jigsaw.
Step 3 Assemble First Row Assemble the first row with tongue side way from the wall. Insert the end tongue into the end groove and rotate downward to assemble. Keep planks aligned and joints closed.
Step 4 Provide Space for Expansion Provide a 3/8” space for expansion on all sides using wooden spacers. Note: Two spacers, thick-side to thick-side, are 3/8”.
Step 5 Cut for New Rows Cut the first piece at least 8” long using a table saw. Start new rows using pieces trimmed from the previous row, ensuring at least a 12” end joint offset.
Step 6 Assemble Second Row Insert the tongue of the second-row plank into the groove of the first-row plank at a slight angle until the laminate edges meet. Next, rotate down until the joints lock (Image 1). For the next plank, join the short end of the plank first (Image 2). You will see a gap on the long-side joints when the plank is rotated down. Raise the outside edge of the plank upward approximately 1”. Keep this angle as you push the plank in until the laminate edges meet. Rotate downward on the plank until the joint locks (Image 3). Repeat previous steps to complete installation.
Step 7 Try This Alternative Method Align tongues into the grooves of the long and short sides of the planks. Install the long side first by placing a tapping block no closer than 8” from either end. Tap lightly along the long side until the joint is closed tightly (Image 1). Next, tap the end using the tapping block into a locked position (Image 2).
Step 8 Check for Gap Use a tape measure to ensure there is a 3/8” gap (after the joint is closed) from the wall to allow for expansion.
Step 9 Install Last Row Align the plank you'll connect to the second to last row. Using a full-width plank as a spacer, trace the contour of the wall, and cut the plank to size. Install the long side tongue into the groove with the end joint aligned. Work evenly along the length of the plank, and lightly tap the joint closed using a pull bar and rubber mallet. After tapping the long side joint closed, tap the short side closed using a tapping block or pull bar. Remove all spacers.
Step 10 Apply Sealant Apply a flexible, 100-percent silicone sealant to the entire perimeter to create a watertight seal.
RESOURCES: bestbuyflooringcenter.com DIY NETWORK