Download
1 / 19
190 likes | 514 Views
Drawings, Tables, and Graphs. Understanding when to use different graphs and how to create them Chapter 2 section 3 in your book. Different types of Graphic Representations. Drawings – these can be used to easily represent a concept that is difficult to explain in words.

E N D
Drawings, Tables, and Graphs Understanding when to use different graphs and how to create them Chapter 2 section 3 in your book
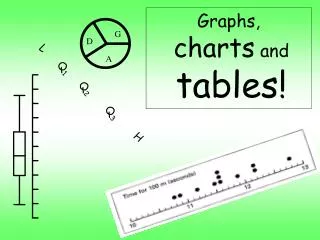
Different types of Graphic Representations • Drawings – these can be used to easily represent a concept that is difficult to explain in words. • Line Graphs – these can be used to show a change of one quantity over time • Bar Graphs – these can be used to show the relationship among different categories of variables • Circle Graphs – these can be used to show the parts of a whole It is extremely important to choose the right type of graph to represent your information.
Drawings • When to use a drawing: • When you are wanting to show details. • When you are wanting to show something you can’t usually see. • When you are wanting to show hidden things. This drawing shows things you can’t normally see and hidden things. It is a good example of an easy to follow drawing.
More Drawings The drawing below was used to show something that is normally hidden. This is a wiring diagram for an electronic fireworks igniter. You can’t normally see these things inside a firework. The picture above is an example of a Bohr model of an atom. It shows something you wouldn’t normally be able to see.
Line Graph • When to use a line graph: • When you are wanting to show the relationship between two variables. • Each variable must be a number. • When you are showing the change of a quantity over time. The graph at the left is a line graph. Notice that both the variables along the x-axis and the variables along the y-axis are numbers. This graph shows that as the variable along the x-axis increases the variable along the y-axis also increases. This is called a positive trend or positive relationship.
How to make a line graph • Determine which of the variables is the independent variable and which is the dependent variable. (If you have time as one of the variables it is always the independent variable.) • Place the independent variable along the x-axis using a reasonable scale. Remember each interval on the scale must be the same amount. • Place the dependent variable on the y-axis using a reasonable scale. Remember each interval on the scale must be the same amount. • Label your axes. • Give your graph a good title. • Plot your data and connect the data points to form a line.
Let’s make a line graph We are going to use the data table at the left to make a simple line graph. The table shows the amount of rainfall at my house over a period of 8 weeks. • Following our steps we identify the following things: • Independent Variable – Time in weeks • Dependent Variable – Rainfall Total in centimeters.
Continuing Line Graph Notice that the independent variable (weeks) is placed on the x-axis and the dependent variable (rainfall) is placed on the y-axis. Notice that a proper scale was used for the graph. On the y-axis the scale goes from 0-12 because the data goes from 0-11. On the x-axis the scale includes all of the data points. Notice that each axis was given a label and the label included measurement units where applicable. Also notice that the graph was given a proper title.
How are graphs graded in this class? • Anytime you are asked to create a graph in this class it will be worth 35 points unless you are told otherwise. That means a single graph is often worth more than a homework assignment or quiz. You need to take your time and do good work on graphs that are assigned. The 35 points is broken down as follows: • 5 points for a good title • 5 points for a correctly labeled x-axis • 5 points for a correctly labeled y-axis • 5 points for a reasonable scale/category labels on the x-axis • 5 points for a reasonable scale on the y-axis • 5 points for plotting your data accurately • 5 points for presentation
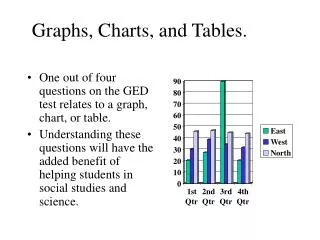
The graph below is a bar graph. Notice that the dependent variable on the y-axis is in number form, but the independent variable on the x-axis is in category form. This is very typical for bar graphs. Bar Graph When to use a bar graph: 1) When you have categories of information you want to compare. 2) When only one of the variables is a number quantity.
How To Make A Bar Graph • Determine which of the variables is the independent variable and which is the dependent variable. (If you have time as one of the variables it is always the independent variable.) • 2) Place the independent variable along the x-axis giving each category it’s own spot for a bar. Leave space in between the bars. • 3) Place the dependent variable on the y-axis using a reasonable scale. Remember each interval on the scale must be the same amount. • 4) Label your axes. • 5) Give your graph a good title. • 6) Plot your data and draw the bars up to the proper heights to show your data.
Let’s Make a Bar Graph We are going to use the data table at the left to make a simple bar graph. The table shows the number of county championships won in each sport here at Otter Creek over the last 15 years. Following our steps we identify the following things: Independent Variable – Sport Dependent Variable – Number of County Championships
Continuing Bar Graph Notice that the independent variable (sports) is placed on the x-axis and the dependent variable (# of championships) is placed on the y-axis. Notice that a proper scale was used for the graph. On the y-axis the scale goes from 0-10 because the data goes from 0-9. On the x-axis the scale includes all of the categories.
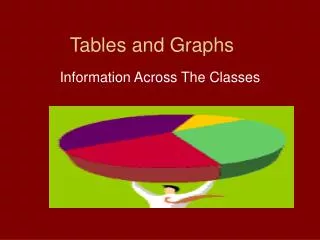
Circle Graph When to use a circle graph: 1) When you are trying to show parts of a whole. 2) When you are going to convert all the number quantities to percentages. The graph above is a circle graph. Notice all of the numbers are represented as percents.
How To Make A Circle Graph • Determine the number of “tallies” within each category of data. • Determine the total number of “tallies” in the entire survey. • Divide the tallies in each category by the tallies in the whole to determine the percentage for each category. • Multiply the percentage by 360 to determine the number of degrees of the circle for the category. • Use a protractor to make each section of the circle the correct size. • Label each section with a percentage and a category. • Give the graph a good title.
Let’s Make A Circle Graph We are going to use the data table at the left to make a circle graph. The table shows the number of students surveyed who voted for each of the classes as their favorite. The first step is to determine the total number of students surveyed. So …. 22+47+38+19+24+44 = 194. Now divide each piece of data by the total to get the percentage for each category. For example … 22 ÷ 194 = 11% The 11% is the number we will use in the graph.
Continuing Circle Graph The percentages for each section should be as follows: Math 11% Science 24% Social Studies 20% Language Arts 10% Literature 12% Health 23% This is a really good spot to check your work so far. If you’ve done everything right your percentages should total very close to 100. So… 11+24+20+10+12+23 = 100. Sometimes you might get 99 or 101 due to rounding, but this is obviously correct. Now multiply each percentage by 360 to determine the number of degrees in the circle go with that category. For example … 11% · 360 = 39.6 degrees, which I am going to round to 40.
Completing the Circle Graph The degrees for each section should be as follows: Math 40º Science 86º Social Studies 72º Language Arts 36º Literature 43º Health 83º This is another good spot to check your math. If you’ve done it correctly, your total should be very close to 360º. So… 40+86+72+36+43+83 = 360. Here again, if you’re off by 2 degrees or less it’s just due to rounding. If it’s more than that you’ve got a mistake somewhere. Now use a protractor to make the graph and you should get something like this.