Ideal Casting Procedures for Optimal Precast Shape Properties
260 likes | 279 Views
Learn ideal casting techniques for precast shape properties in this comprehensive guide. Explore temperature control, material handling, and quality procedures to enhance your precast parts.

Ideal Casting Procedures for Optimal Precast Shape Properties
E N D
Presentation Transcript
Ideal Casting Procedures for Optimal Precast Shape Properties William L. Headrick Jr., Missouri Refractories Company, Inc. (MORCO) Dale Zacherl, Almatis, Inc. Andreas Buhr, Almatis GmbH, Germany
Introduction • Optimizing precast shape properties requires ideal casting procedures. • This paper attempts to be a practical primer on variables that need to be observed, evaluated and controlled. • Many refractory parts require different materials, which thus require different processing (ideal casting procedures) to develop the optimum properties for that specific part. • This paper takes experimental results from Almatis and Missouri Refractories then combines them with field trials, results and well over 100 years of combined experience in helping our customers produce optimal precast parts.
Contents • Casting • Mixing • Casting • Vibration • Curing • Drying • Cleaning
Casting - Temperature • Casting area temperature is critical for optimum properties. • Between 20°C and 27°C (70°F and 80°F). • Should be controlled to be greater than 20°C as phase formations are known to convert from CAH10 (<20°) to C2AH8 (20°-30°C). • Formation of CAH10 is to be avoided, as this is the cement hydration phase with the lowest density and highest water content, which leads to high shrinkage, porosity and lowest strength of all the cement phases. • Conditions for the workers and their productivity must be taken into account. • Heating and cooling control are recommended for the casting area.
Casting – Temperature Anomaly • An anomalous behavior regarding setting time and strength development occurs around 28°C (82°F). • The reason for this anomaly is not fully understood and would require future research. • In practice, this temperature range of 27-30°C (81°F-86°F) should be avoided in precast shape manufacturing • Temperatures between 20 and 25°C (70°F-77°F) are recommended for the casting area and the dry materials. The curing after casting may be done at higher temperatures.
T [°C] 70 60 38 50 29 31 40 14 * 30 25 20 10 0 60 360 420 480 540 600 660 720 120 180 240 300 780 840 time [min] Calcium Aluminate Cement testing - Exothermic Reaction Tabular mix, 15% CAC, tested at ambient temperatures 10 50°C *) Setting anomaly with mix cured at 30°CLate strength development (600 min) and low strength (14 MPa) Numbers at peaks= max CCS,test values of crushed Vicat cone fillings
Casting – Material and Water Temperature • Dry castable temperature should also be controlled to between 20°C and 27°C (70°F and 80°F). • This can be accomplished by using temperature-controlled shipping containers or staging dry materials in either the casting area or temperature controlled storage areas such that they can attain equilibrium temperature. • Water temperature is secondary to dry material temperature. • Dry material temperature dominates the mix temperature in most low water castables. • Tempering tanks to bring water temperature up to casting room temperature. • Water heaters may be used if tempering tanks are not adequate to raise the water temperature.
Casting – Water • Water should be potable. • May need to be filtered for optimum results. • Standard home water filters for removing rust and sediment may be used to filter water. • If high in dissolved solids, water may need to be deionized. • Dissolved ions in the water can effect set time, final strength and refractoriness. • Resin filled deionizers have been found to work well at a reasonable cost.
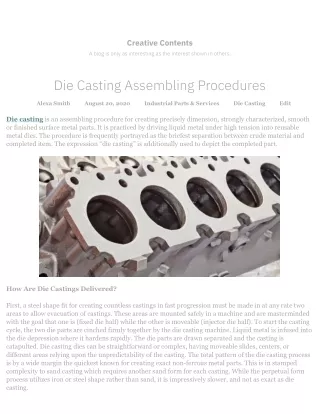
Casting - Procedures • Optimum casting procedures are difficult to define and are generally determined by trial and error. • Improper casting procedures may lead to rejected parts due to dry joints, wet joints and voids. • Slight improvements in casting procedures could lead to improved strength and surface finish with less segregation. • Transport mixed wet material from mixer bowl to transfer hopper or mold. If using a transfer hopper, vibrators may be required to assist flow from hopper.
Casting - Filling Mold • Fill the mold in a slow controlled manner. • Vibration should be at the maximum level that does not cause the material in the mold to roll over or segregate. If the material starts to roll in the mold it may entrain air. • After the mold is full continue to vibrate material with decreasing vibration energy to de-air wet material. • Watch bubbles appearing at top surface and control vibration energy to maximize bubble rate without causing segregation. • Generally, about 25 to 75% of the filling energy is required for de-airing. • De-airing should be complete in 3 to 5 minutes after the mold is full but may take longer for deep molds and viscous mixes. • Troweling of exposed surfaces is not recommended. • Screeding should be used if necessary to trim surfaces.
Casting - Pulling Internal Mandrels • Cast a sample of material while casting the precast part. • Monitor the sample for hardening either by exothermic profile or a measure of stiffness such as sonic velocity or, as an easy alternative, perceived hardness by applying pressure to the sample. • Internal mandrels should be pulled as soon as material in sample is firm. • A handy in plant test is to attempt to push a nail into the sample or indent the sample by hand pressure. • Early removal of mandrels is easier and better for the part as the castable will probably shrink during setting and curing. • If internal mandrels are left in place too long during the setting and curing process, mandrels may be difficult to remove or radial cracking may occur around mandrels due to shrinkage.
Casting - Demolding • Remove cast part from the mold after the material develops adequate strength. • This point can be indicated by exothermic profile or a measure of strength. • A handy in plant test is to hit the corner of the sample with a hammer at about the force required for demolding and check for cracking. • Also, a cast part that rings when hit with a hammer should have adequate strength for demolding. • If necessary, parts may be left in the mold indefinitely if internal mandrels are removed. • If curing area is adequate, most castables should have developed adequate strength for demolding overnight or after 24 hours.
Mixing - Water Addition • General practice in industry is to add dry material to mixer, begin mixer, then add water. • Mixing and properties can be improved by adding either part or all the required water to the mixer prior to adding dry material. • The dry material is then added to the mixer in the first 2-3 minutes of mixing time. • This has been shown to reduce strain on mixer, reduce dust in the area, reduce wet out time and increase flow. • Water should be added according to the manufacturer’s recommendations. • The minimum amount of water required to produce high quality parts should be used to optimize precast part properties. • If more water than recommended by the manufacturer is needed to produce high quality parts, the manufacturer should be consulted to assist with mixing or casting problems.
Mixing - Time • Mix for an amount of time necessary as found through trials. • Mix time is determined by watching material for optimum flow. • Mixing intensity may be controlled to influence mix time and entrained air. • Material will initially begin to wet out. • Material should be mixed for an additional 2+ minutes after wetting out to distribute all constituents, even if maximum flow is achieved earlier. • Longer mixing tends to accelerate set time and increase viscosity after the maximum flow point.
Mixing - Mixer Size • At least twice the capacity of mixer as the largest batch to be mixed is recommended as the density of refractory mixes vary greatly and mixer capacity is sometimes understated or misunderstood. • A half to three quarters full mixer seems to mix best if the mass of the mix is low enough that the drive does not bog down due to inadequate motor torque. • Too large a mixer may be as bad as too small of a mixer, as many mixers will not adequately mix with too little material in them. • High intensity mixing is usually important to good mixing. A planetary mixer, pan mixer or paddle mixer are recommended. Pan mixers tend to mix faster and generate more dust.
Vibration • Optimum densification of materials is generally found to occur with a high level of vibration during filling with vibration tapering off with time for de-airing the casting. • Vibration must be adequate to fill, level and consolidate the mass of castable in precast parts. • The required vibrators and induced energy must be determined on a case by case basis often by trial and error. • Some materials may require little to no vibration. • Some materials may require intense vibration for complete filling and consolidation.
Vibration • Amplitude and/or frequency controlled vibrating table. • Sized for the maximum size mold. • Designed for worker safety and fatigue. • Strap or weld on vibrators on the mold. • Work almost as well as a table. • True for very large castings. • Large molds may require vibrators that are on in the beginning then turned off during filling and casting while other vibrators remain in operation. • Stinger vibrators • Will assist in flow and densification in cases where mounted vibrators are not able to provide adequate vibration.
Curing • Cast parts may be cured in the casting room if kept above 20°C. • Elevated temperature curing of castables has been shown to improve green and dried strength. • 40°C (100°F) is a recommended initial temperature for curing. • The authors are not aware of any decrease in properties from curing at 40°C. • Strength increased by more than 33% by curing at 40°C • Tabular based high, low and ultra-low cement castables • 70 MPa (10 ksi) to 100 MPa (15 ksi) for Conventional Castable
Curing – Things to try • Increased setting time and decreased strength anomaly at 30°C needs additional fundamental and field research. • As curing temperature is increased up to 90°C (200°F) dried strength may be increased. • Trials curing small lab scale samples (<0.003 m3 (0.125 ft3)) at temperatures up to 200°C (400°F) led to increased strength. • More studies are warranted on the effect of curing temperature on all classes of castables. • Optimum curing temperature will be a combination of precast shape size, aspect ratio and worker safety.
Curing – CC • Curing at temperatures below 20°C will lead to lower density and strength in conventional castables. • Curing should be for a minimum of 24 hours at 100% relative humidity for conventional castables. • 100% relative humidity may be attained through: • Control of the room humidity • Wrapping the cast part in damp cloth • Wrapping the part in plastic • Impermeable curing compound.
Curing – LCC, ULCC, NCC • Curing at temperatures below 20°C will lead to lower strength in LCC, ULCC and NCC. • There is disagreement on if LCC, ULCC and NCC should be cured at elevated humidity. • LCC and ULCC do not show a variance in cured strength depending on humidity. • NCC (Alphabond and phosphate based) show a marked decrease in strength when cured in high humidity for lab samples. • Increased chance of surface cracking due to surface dehydration and shrinkage for large samples.
Drying • Controlled drying is critical. • Manufacturer data sheets list drying schedules based on part thickness. • Manufacturer can provide faster drying schedules • Accelerated schedules will be at the expense of degraded properties and shortened service life. • Drying schedules are designed to allow safe drying and optimized properties. • Casting water added must be removed during drying. • During drying water must have a path for removal. • Weep holes may be necessary for water to get out of steel containers.
Cleaning • All devices should be cleaned ASAP. • Cleaning time may be extended by rinsing or placing in water. • It is difficult to clean hardened concrete from equipment. • Even refractory mixes with very long set times will air harden if thin films are left in place for a short amount of time. • Local regulations should be checked for disposal of waste. • Waste water may need to be filtered and neutralized or handled by a specialized waste disposal company. • Waste water may have a high pH and may need to be neutralized by acid additions.
Conclusion • Precast shapes are an important part of the shaped refractory industry. • Optimized precast shape properties requires ideal casting procedures. • Laboratory testing and laboratory sized samples may not adequately represent industrial use due to the multitude of factors in industrial use that laboratory scale testing cannot replicate. • Starting point toward improving the quality, properties and useable life of consumable parts. • Areas that need more study, either fundamental theoretical knowledge and/or in-house practical testing.
References • Kopanda, J.E. and MacZura,G., “Production processes, properties, and applications for calcium aluminate cements”, Alumina Science and Technology Handbook, ed. By LeRoy D. Hart, American Ceramic Society, 1990, 171-183. • Parr, Christopher, et.al., “The Impact of Calcium Aluminate Cement Hydration Upon The Properties Of Refractory Castables”, TARJ Meeting, September 2004, Ako, Japan, http://www.secar.net/documents/TP_GB_RE_LAF_043.pdf. • Bushnell-Watson, S.M. and Sharp, J.H., “On the Cause of the Anomalous Setting Behaviour with Respect to Temperature of Calcium Aluminate Cements”, Cement and Concrete Research, Vol. 20, pp. 677-686, 1990. • Van Garsel, Doris, “High Alumina Cements and Chemical Binders”, Institute of Refractories Engineering (IRE) Seminar Refractories Technology – An Introduction and Update, South Africa, 8. March 1996. • Zacherl, Dale, et.al., “Cement Hydration and Strength Development – How Can Reproducible Results by Achieved?”, 50th Annual St. Louis Section / RCD Symposium on Refractories (2014). http://www.almatis.com/media/1351/cement-hydration-and-strength-development-how-can-reproducible-results-be-achieved.pdf • Kuiper, Stefan, et.al., “Setting Shrinkage Measurement During Cement Hydration”, 61st International Colloquium on Refractories; Aachen (2018).
Thank you Missouri Refractories Almatis St. Louis Section Of The American Ceramic Society Refractory Ceramics Division Of The American Ceramic Society George MacZura Kent Weisenstein & Jose Luis Mendoza Bedolla