Download

1 / 28
290 likes | 643 Views
OpenGL Picking and Quaternions. Project Miscellaneous Topics. Agenda. GL_SELECT picking review Alternative picking methods Based on the colour buffer Based on the depth buffer Quaternions Bonus topics Basic skybox Texture-mapped text overview Basic height-mapped terrain.

E N D
OpenGL Picking and Quaternions Project Miscellaneous Topics
Agenda • GL_SELECT picking review • Alternative picking methods • Based on the colour buffer • Based on the depth buffer • Quaternions • Bonus topics • Basic skybox • Texture-mapped text overview • Basic height-mapped terrain
Picking: GL_SELECT • Concept: • the scene is rendered in a simplified way • objects have IDs • IDs of objects drawn inside the picking (view) volume are returned in a hit record • Uses of IDs: • Each object has a unique name • At the time when an object is drawn, the name stack represents the object’s position in the hierarchical scene tree
GL_SELECT: Start a Pick glSelectBuffer(512, selectBuf); // buffer glRenderMode(GL_SELECT); // mode glInitNames(); // name stack // pick matrix glMatrixMode(GL_PROJECTION); glLoadIdentity(); GLint viewport[4]; glGetIntegerv(GL_VIEWPORT, viewport); gluPickMatrix((GLdouble) screen_x, (GLdouble) (viewport[3] - screen_y), 2.0, 2.0, viewport); if ( // 3D picking) // setup standard perspective else // setup ortho perspective
GL_SELECT: Process Hits glFlush(); GLint hits = glRenderMode(GL_RENDER); pick_result result; int offset_to_cur_record = 0; int cur_stack_len; int min_depth = 0xFFFFFFFF; int cur_depth; for (int h = 0; h < hits; ++h) { cur_stack_len = *(selectBuf + offset_to_cur_record); cur_depth = *(selectBuf + offset_to_cur_record + 1);
GL_SELECT: Process Hits (Cont’d) if (cur_depth < min_depth) { min_depth = cur_depth; result.names.clear(); int i; for (i = 0; i < cur_stack_len; ++i) { if (i > 2) break; result.names.push_back( *(selectBuf + i + 3 + offset_to_cur_record) ); } result.depth = (double) min_depth / 0xFFFFFFFF; } offset_to_cur_record += cur_stack_len + 3; }
// in scene::draw(…) glPushMatrix(); // here: apply transforms // here: draw the current node for ( // children) { glPushName(i); // call draw(…) for the children glPopName(); } glPopMatrix(); } Notes: It is also necessary to have a way to query the scene for a particular node, given a sequence of names This is easy to do since each name is the number of the branch taken on the path from the root to the query node In the code on the left, the root is not picked GL_SELECT: Hierarchical IDs
Problems with GL_SELECT • GL_SELECT (outrageous) slow down • ATI: http://www.it.usyd.edu.au/~tapted/slow_glselect.html (useful info) • NVIDIA: http://forums.nvidia.com/lofiversion/index.php?t24035.html (evidence of the problem and forum drama only) • OpenGL 3.0: GL_SELECT deprecated? • Xiachunyi host abuse hack • Insert empty glBegin(GL_LINES); glEnd(); after glPushName(…); • Additional Technical Problem: • GL_SELECT does not respect per fragment operations; therefore incorrectly picks transparent objects.
Alternative: Colour-based Picking • Most similar to GL_SELECT: • Instead of the special GL_SELECT render mode, render each object in a unique flat colour • Get the colour of the pixel under the cursor • Query for the object given the colour • Need to make sure that the specified unique colours are actually drawn. • Render to the back buffer (and don’t swap), so that the user can’t see the special rendering operation. • No perspective changes are necessary.
Colour-based Picking: Colours • From OpenGL FAQ: • Obtain the number of bits that can be used for each channel using glGetIntegerv; • Turn off features that affect colour and use GL_FLAT shading model; • Use glColor3ui() to set the colour; • Details at http://www.opengl.org/resources/faq/technical/color.htm#0050 ;
using glReadPixels: void glReadPixels( GLint x, GLint y, GLsizei width, GLsizei height, GLenum format, GLenum type, GLvoid *pixels) ; Notes: x, y are in r.t. to the lower left corner of the screen width, length are the size of the area to be read format is GL_RGB type is GL_UNSIGNED_BYTE – the data type of the pixel data pixels is the location to save the data Colour-based Picking: Reading the Colours Colour Picking Example: http://www.lighthouse3d.com/opengl/picking/index.php?color1
Alternative: Depth-based Picking • Proposed here: http://blogs.agi.com/pointbreak/index.php/2008/03/05/picking-using-the-depth-buffer/ • Basic idea: RenderSceneForPick() { modify the view frustum to just cover the picked pixel; scissor out everything except the picked pixel; for each visible object { clear depth buffer; render object; read depth buffer at pick location; if (depth value != clear value) { add object to list of picked objects; } } sort list of picked objects near to far; }
Depth-based Picking: Performance Considerations • Scissoring everything out except the one pixel: • Makes drawing objects and clearing the buffers faster • All vertices are processed but only a few of the fragments • Using the smallest possible view frustum: • Implies the need for culling with bounding volumes, etc.
Quaternions Practical Introduction
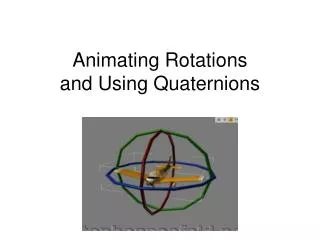
Motivation • Quaternions as representation of rotations • vs. Matrices: • easier to construct • use fewer numbers (4 vs. 9) • require fewer multiplications • Make interpolation for smooth rotations easier • Rotations are specified using unit quaternions
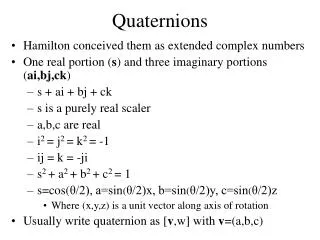
Basic Quaternion Math • A quaternion is like a complex number with 3 complex components: q = r + a*i + b*j +c*k; • i^2 = -1 and so on • i*j = -j*i = k • Addition and Multiplication: follow basic algebra rules • Magnitude: obvious generalization of complex number magnitude • Inverse: 1/(abs(q)^2)*(r - a*i - b*j - c*k)
Rotation Using Quaternions • Given axis and angle: Quaternion(const Vector3D &axis, const double angle) { double t = angle / 180 * M_PI; Vector3D u = (1 / axis.length()) * axis; real = cos(t / 2); complex = sin(t / 2) * u; } • Rotating a point represented by a vector (very informal…): Vector3D operator* (const Vector3D &v) const { Quaternion P(0, v); return (*this * (P * this->conjugate())).complex; } • Converting back to a rotation matrix • http://www.j3d.org/matrix_faq/matrfaq_latest.html#Q54
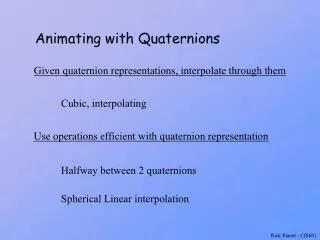
A Note about Interpolation • Interpolation between two quaternions representing rotations has to produce intermediate unit quaternions • This makes spherical interpolation a straightforward way to do it • However, there are some complications • http://www.theory.org/software/qfa/writeup/node12.html
Example: Arcball thing Vector3D track = track_vec(mouse.old_x - track_center_x(), (sts.video.resolution_h - mouse.old_y) - track_center_y()) .cross(track_vec(mouse.new_x - track_center_x(), (sts.video.resolution_h - mouse.new_y) - track_center_y())); double len = track.length(); if (len < 0.0001) return; track.normalize(); objh->rot = Quaternion(track, len / M_PI * 180) * objh->rot; objh->need_recalc = true;
4 “advance” functions: void advance_right(float sec) { Vector3D delta (sec * speed, 0, 0); pos += rotation * delta; } 4 “move” functions: void move_right() { anim_on = true; dir = 0; } void tick(float sec) { if (anim_on) switch(dir) { case 0: advance_right(sec); break; case 1: advance_forward(sec); break; case 2: advance_left(sec); break; case 3: advance_back(sec); break; default: break; } } Example: Camera
inline void look_h (int pix) { look_h(-pix * act.pix_to_deg); } inline void look_v (int pix) { look_v(-pix * act.pix_to_deg); } void look_h (double deg) { rotation = Quaternion(Vector3D(0, 1, 0), deg) * rotation; } void look_v (double deg) { rotation = rotation * Quaternion(Vector3D(1, 0, 0), deg); } Example: Camera (Cont’d)
Example: Camera: Cont’d void apply_to_world() { glMatrixMode(GL_MODELVIEW); glMultTransposeMatrixd((const GLdouble *) rotation.conjugate().asMatrix().begin()); glTranslated(-1*pos[0], -1*pos[1], -1*pos[2]); }
Bonus: Basic Skybox // save old camera position Point3D oldp = cam.get_position(); Quaternion oldr = cam.get_rotation(); // move camera to skybox cam.set_to(oldr, sky_pos); glMatrixMode(GL_MODELVIEW); glPushMatrix(); glLoadIdentity(); cam.apply_to_world(); glPushAttrib(GL_ENABLE_BIT); glDisable(GL_DEPTH_TEST); glDisable(GL_LIGHTING); glDisable(GL_BLEND); // here: draw the sky glPopAttrib(); glPopMatrix(); // restore camera cam.set_to(oldr, oldp); Note: texture mapping a sphere in a straightforward way will produce a lot of distortion;
Bonus: Texture-mapped text • Based on: http://nehe.gamedev.net/data/lessons/lesson.asp?lesson=17 • Create a texture made up of equally-spaced white letters on transparent background • Generate the display lists like in the Red Book, one for each letter • Each list makes a small textured rectangle and uses the appropriate texture coordinates • Use glTexEnvi(GL_TEXTURE_ENV, GL_TEXTURE_ENV_MODE, GL_MODULATE);
Bonus: Texture-mapped Text (Cont’d) glDepthFunc(GL_LEQUAL); glBlendEquation(GL_FUNC_ADD); glBlendFunc(GL_SRC_ALPHA, GL_ONE_MINUS_SRC_ALPHA); glEnable(GL_BLEND); glMatrixMode(GL_MODELVIEW); glPushMatrix(); glLoadIdentity(); // here set up the font’s colour with glMaterial while (*txt) { // here call the list for the letter glTranslated(cur_width, 0, 0); ++txt; } glPopMatrix(); glDisable(GL_BLEND); glDepthFunc(GL_LESS);
Bonus: Height-mapped Terrain • Based on particle deposition described at: http://www.lighthouse3d.com/opengl/terrain/index.php3?particle • Implementation details: • Better to use triangles (triangle strip) • Each vertex is adjacent to 6 others (4 close and 2 farther away) • Smoothing the normals by averaging the 6 neighbours helps • Improvement suggestion: experiment with depositing “large” particles, to create the terrain faster and avoid having to scale the heights afterward