Download
1 / 31
330 likes | 638 Views
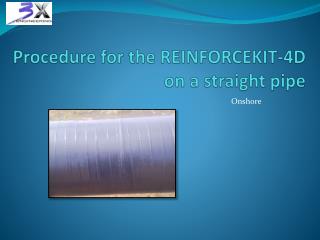
Procedure for the REINFORCEKIT-4D on a straight pipe. Onshore. REINFORCEKIT 4D on a straight pipe. General method to use a REINFORCEKIT-4D :. - Be sure that this is the good defect place Read the 3X procedure to know the length to fix Check the presence of pits and high corroded aeras

E N D
Procedure for the REINFORCEKIT-4D on a straight pipe Onshore
REINFORCEKIT 4D on a straight pipe • General method to use a REINFORCEKIT-4D : • - Be sure that this is the good defect place • Read the 3X procedure to know the length to fix • Check the presence of pits and high corroded aeras • Thanks to a tape measure, define the correct area to treat and repair • The REINFORCEKIT 4D must be centered on the defect • Delimit the area thanks to an adhesive tape • Wear your personal protective equipments (PPE) • Create a roughness SA 2½ (about 60µm) by using MBX bristle blaster • Once the roughness is created, remove the adhesive tape • Degrease the treated surface with adequate degreaser (aceton) • If the surface is not smooth, fill the pits with 3X filler • Before the filler cures, cover the pipe with the 3X resin • Put the aramid tape on the pipe and overlap the first layer • Wrap respecting the gap and tightening the tape as strong as possible
How to use the Monti MBX ? • Surface roughnessafter MBX bristlebalstingtreatment :
How to use the Monti MBX ? • How to start ?
How to use the Monti MBX ? • Change of system components ?
How to use the Monti MBX ? • How to operate ?
How to use the Monti MBX ? • How to operate in corners?
DEFINE THE AREA TO BE TREATED • Define the correct area to be treated : Lrepair • Define the surface that have to be fixed as below • The repaired area must be centered on the defect Lrepair/2 Lrepair/2 Ldefect/2 Ldefect/2
How to apply the 3X filler ? • Degrease perfectly the surface • Mix the two components of the filler • Apply strongly the filler onto the surface with a spatula • Do not let any corroded area free from filler • Create a dome with the filler • Apply the REINFORCEKIT aramid tape before the mastic has cured
About the resin / the filler • Resin made of two components : - the resin • the hardener • When not mixed : no chemicalreaction • When mixed : polymerizationreaction • Polymerizationreaction time depends on the resin, T°, mixing ratio… • To have a good reaction, youshould : • mix the correct ratio of resin and hardener • scrape the bucketswithspatula (correct ratio) • have a good mixture of the two components • (no marbling, no lumps…) • mix quickly the components to have time for application !
How to wrap the aramid tape ? • Description of the aramid tape : • Differentwidth for 3X aramid tapes : - 50 mm • 100 mm • - 300 mm • Kind of weaving High tensileresistance • Colored threads are sewn on the tape to help the worker to wrapcorrectly • Respect the thread Blue & red threads
How to wrap the aramid tape ? • The aramid tape is wrapped helicoidally over the pipe • In order to move forward the tape, the new lap must cover a part of the previous one • The gap is the percentage of covering of the previous aramid lap • Example : gap = 1 : the new lap is shifted of 100% of the width of the previous one • gap = 2 : the new lap is shifted of 50% of the width of the previous one • gap = 3 : the new lap is shifted of 33% of the width of the previous one • The gap determines the final number of layers of the repair system • We always use gap = 2 • Note : It is easier to unroll the tape as shown on the picture below : • What is a gap ?
How to wrap the aramid tape ? • Once the filler is applied, cover the pipe with resin • Place the aramid tape at the beginning of the area to be fixed • Impregnate the aramid tape with the resin by using a paintbrush • Overlap the first layer • Wrap the tape helicoidally respecting the gap • Impregnate the outside face of the fiber gradually as shown on the picture below • Tighten strongly the tape on the pipe after each half tour (to avoid folds) • Repeat the previous steps until the tape is finished • Note : Mix the resin and the hardener only when you need it! • 1st step of wrapping:
How to wrap the aramid tape ? • - Fold : when the tape is not perfectly stuck over the pipe • Folds can create a loss of mechanical properties in the composite material • How can folds be created? • What are folds? How to avoid them ? !
How to wrap the aramid tape ? • How to begin again a new tape ? • How to finish an aramid tape? • Impregnate the end of the previous tape with the resin • Cover the previous tape with the new one on half the circumference of the pipe to avoid discontinuities • Overlap the first layer • Continue to wrap as previously • Tighten as strong as possible the aramid tape • Impregnate the two sides of the tape in order to be sure that no fiber appears free from resin
How to wrap the aramid tape ? • Wrap not only in one way : • When arriving at the end of the repair length : • cut the aramid tape if it is not finished (for the Ltaper) • wrap helicoidally in the other way • always keep the same direction of rotation • permits to cross the directions of fibers • increases the REINFORCEKIT-4D resistance to pressure Wrapping way Wrapping way
How to wrap on a weld / a bump ? • Whenarriving on a weld : impregnate generously the weld with the resin continue to wrap as before without modifying the thread tighten strongly to stick the aramid tape on the pipe
How to wrap on a weld / a bump ? • Whenarriving on a bump : cut the aramid tape with scissors as shown below pass the bump through the aramid tape If needed : cover generously the bump (already treated with Monti MBX) with resin cut a piece of aramid tape and wrap it around the bump do not leave any area uncovered on the bump to avoid corrosion
How to wrap the aramid tape ? • Lover, Ltaper : • According to the ISO 24817, the total axial length of the repair is : • Lrepair = Ldefect + 2 x Lover + 2 x Ltaper • With : • Ldefect : axial length of defect • Lover : axial extent of design thickness of repair • Ltaper : axial length of taper • - Ltaper reduces axial loads
REINFORCEKIT 4D on a bend • The procedure is the same as for a straight pipe : • - Be sure that this is the good defect place • - Read the 3X procedure to know the length to fix • Thanks to a tape measure, define the correct area to treat and repair • The REINFORCEKIT 4D must be centered on the defect • Delimit the area thanks to an adhesive tape • Wear your personal protective equipments (PPE) • Create a roughness SA 2½ (about 60µm) by using MBX bristle blaster • Once the roughness is created, remove the adhesive tape • Degrease the treated surface with adequate degreaser (aceton) • Check the presence of pits and high corroded aeras • If the surface is not smooth, fill the pits with 3X filler • Before the filler cures, cover the pipe with the 3X resin • Put the aramid tape on the pipe and overlap the first layer • Wrap respecting the gap and tightening the tape as strong as possible
REINFORCEKIT 4D on a bend • Define the correct area to treat • Treat the surface that have to be fixed • The repair area must be centered on the defect • A bend is alway fixed from weld to weld (or more)
REINFORCEKIT 4D on a bend • How to respect the gap on a bend ? • The gap determines the final number of layers of the repair system • The gap must be the same on the whole bend • Measure the thread on the outside surface of the bend • Avoid folds on the inside surface of the bend by : • using a smaller tape width if possible a a a a a a a a a
REINFORCEKIT 4D on a bend • How to wrap correctly on a bend ? • Imagine the curve center of the the bend • Always place the tape in that direction
REINFORCEKIT 4D on a Tee • The procedure is the same as for a straight pipe : • - Be sure that this is the good defect place • - Read the 3X procedure to know the length to fix • Thanks to a tape measure, define the correct area to treat and repair • The REINFORCEKIT 4D must be centered on the defect • Delimit the area thanks to an adhesive tape • Wear your personal protective equipments (PPE) • Create a roughness SA 2½ (about 60µm) by using MBX bristle blaster • Once the roughness is created, remove the adhesive tape • Degrease the treated surface with adequate degreaser (aceton) • Check the presence of pits and high corroded aeras • If the surface is not smooth, fill the pits with 3X filler • Before the filler cures, cover the pipe with the 3X resin • Put the aramid tape on the pipe and overlap the first layer • Wrap respecting the gap and tightening the tape as strong as possible
REINFORCEKIT 4D on a Tee • Define the correct area to treat Lrepair Lrepair/2 Lrepair/2 Ldefect/2 Ldefect/2 Lrepair/2
Understanding a R4D procedure • How to understand the R4D implementation procedure? - See the attached example