Download
1 / 11
120 likes | 345 Views
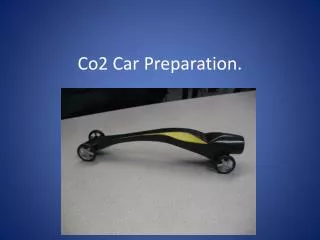
Co2 Car Preparation. . Use scissors to cut out your Co2 car. . Co2 Car tracing. Place cutout on the Co2 car block Use a marker to trace around the cutout . Make use to put the cutout correctly on the block. . Wheel Location.

E N D
Co2 Car tracing. Place cutout on the Co2 car blockUse a marker to trace around the cutout. Make use to put the cutout correctly on the block.
Wheel Location Use this tool to mark the location of the holes to be drilled. Press just hard enough to leave a mark.
Marked Hole This is how it should look.
Ready to Drill Have you passed the safety Test? Use the drill press to drill the holes for the axels.
Recycle Paper If you are making cuts to the top view of your car, cut out the top view and save it in your backpack or binder. After cutting out your designs, recycle your scrap paper in the blue recycle box.
Scissors Put the scissors you uses back where they belong.
Storing Your Co2 Car Make sure your name is on your Co2 car and place it in the blue cabinet at the end of class
Clean Up Your Area No one will be excused from class until your area is clean and tools put away.