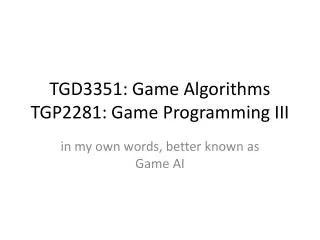
Game Programming Algorithms and Techniques
Learn about menu systems, buttons, HUD elements, waypoint arrows, and more user interfaces in game programming. Explore menu flow, button implementations, typing mechanics, and waypoint arrow calculations. Enhance your game development skills with this comprehensive guide.

Game Programming Algorithms and Techniques
E N D
Presentation Transcript
Game Programming Algorithms and Techniques Chapter 10 User Interfaces
Chapter 10Objectives • Menu Systems • How a stack can be used for basic menus • Implementing buttons • Basic typing • HUD Elements • Implementing a waypoint arrow • Aiming reticule • Radar system • Other Considerations • Multiple resolutions • Localization • User experience
Menu Flow Sample console game menu flow Menu flow for a standard console game might look like:
Menu Stack One way to implement flow is with a stack. We push on new menu screens and can pop to go back to a previous one. Can support back-to-front rendering, so dialog boxes can be implemented.
Buttons • We need different visual states so it's clear when a button is being interacted with. • For console/PC: • Selected • Unselected • For touch devices: • Unselected • Pressed
Buttons, Cont'd • We could have a linked list of all the buttons, and to navigate with a keyboard/mouse simply move to the next element in the list. • When a button is pressed, we could have some code be executed: • This can be implemented with an action/function pointer.
Buttons, Cont'd A debug mode shows the hot zones of the main menu buttons in this game. To support a mouse, we need hot zones that represent the selection area for the button:
Typing The enums that represent the keycodes are sequential. So K_B would be one element after K_A, and so on. Combine this with the fact that “B” is one value greater than “A,” and we can then allow for typing on a keyboard.
Converting a Key Code to a Char function KeyCodeToChar(intkeyCode) // Make sure this is a letter key ifkeyCode >= K_A && keyCode <= K_Z // For now, assume upper case. // Depending on language, // may have to cast the difference to a char return ('A' + (char)(keyCode– K_A)) else ifkeyCode == K_SPACE return ' ' else return '' end end
Waypoint Arrow A driving game where a waypoint arrow instructs the player to turn left. Points in the direction the player must go
Waypoint Arrow, Cont'd • We need to store the following: • Facing of the arrow (vector) • Screen space position of arrow (vector) • Current waypoint • Initially, the arrow should face into the screen (+z in a left-handed coordinate system).
Waypoint Arrow, Cont'd Waypoint arrow calculations, assuming old and new are normalized. We need to calculate the angle/axis between the old and new arrow facing:
Waypoint Arrow Definition classWaypointArrow // Stores the current facing of the arrow Vector3 facing // 2D position of the arrow on screen Vector2 screenPosition // Current waypoint the arrow points at Vector3 waypoint // World transform matrix used to render the arrow Matrix worldTransform // Computes world transform matrix given position/rotation function ComputeMatrix(Vector3 worldPosition, Quaternion rotation) // Gets world position of the 3D arrow based on screenPosition function ComputeWorldPosition() function Initialize(Vector2 myScreenPos, Vector3 myWaypoint) function SetNewWaypoint(Vector3 myWaypoint) function Update(float deltaTime) end
Waypoint Arrow: ComputeMatrix Given the rotation and translation, set up transform: function ComputeMatrix(Vector3 worldPosition, Quaternion rotation) // Scale, rotate, translate // (but we don't have a scale this time) worldTransform = CreateFromQuaternion(rotation) * CreateTranslation(worldPosition) end
Waypoint Arrow: ComputeWorldPosition • Based on the desired screen position of the arrow, unproject it into a world position: function ComputeWorldPosition() // In order to do the unprojection, we need a 3D vector. // The z is the percent between the near and far plane. // In this case, I select a point 10% between the two (z=0.1). Vector3 unprojectPos = Vector3(screenPosition.x, screenPosition.y, 0.1) // Grab the camera and projection matrices ... // Call Unproject function to get the world position return Unproject(unprojectPos, cameraMatrix, projectionMatrix) end
Waypoint Arrow: Initialize Initializes the waypoint arrow: function Initialize(Vector2 myScreenPos, Vector3 myWaypoint) screenPosition = myScreenPos // For left-handed coordinate system with Y up facing = Vector3(0, 0, 1) SetNewWaypoint(myWaypoint) // Initialize the world transform matrix ComputeMatrix(ComputeWorldPosition(), Quaternion.Identity) end function SetNewWaypoint(Vector3 myWaypoint) waypoint = myWaypoint end
Waypoint Arrow: Update function Update(float deltaTime) // Get the current world position of the arrow Vector3 worldPos = ComputeWorldPosition() // Grab player position ... // The new facing of the arrow is the normalized vector // from the player's position to the waypoint. facing = waypoint–playerPosition facing.Normalize() // Use the dot product to get the angle between the original // facing (0, 0, 1) and the new one float angle = acos(DotProduct(Vector3(0, 0, 1), facing)) // Use the cross product to get the axis of rotation Vector3 axis = CrossProduct(Vector3(0, 0, 1), facing) Quaternion quat // If the magnitude is 0, it means they are parallel, // which means no rotation should occur. ifaxis.Length() < 0.01f quat = Quaternion.Identity else // Compute the quaternion representing this rotation axis.Normalize() quat = CreateFromAxisAngle(axis, angle) end // Now set the final world transform of the arrow ComputeMatrix(worldPos, quat) end end
Aiming Reticule An aiming reticule changes colors based on the target. Allows us to see whether a friend or foe is targeted:
Aiming Reticule, Cont'd • Unproject the reticule position at two locations: • z = 0 (near plane) • z = 1 (far plane) • Then perform a ray cast between these two points and see whether or not it intersects with characters.
Radar Radar (in the top-right corner) in Unreal Tournament 3 Allows us to see where enemies are in the world:
Radar, Cont'd First, we check to see whether or not a particular enemy is in range. Then we want to take a 3D offset in the world and convert it to a 2D one on the radar. We want to ignore the height component, which means we're projecting onto the plane of the radar.
Radar: Radar Blip • First, we should define a radar blip, or the actual dots that show up on the radar: structRadarBlip // The color of the radar blip Colorcolor = Color.Red // The 2D position of the radar blip Vector2position // Scale of the radar blip floatscale = 1.0f end
Radar Calculations Convert (x, y, z) (x, z). Rotate this point based on the player facing. Divide each component by the max radar range. Multiply each component by the onscreen radius of the radar.
Radar: Why Rotate? A top-down view of the player facing to the east (a), so east should correspond to the topmost point on the radar (b).
2D Rotation Find the angle between the initial player facing in 2D and the new player facing in 2D. Then solve the "which way to rotate" problem and apply a 2D rotation matrix:
Radar: Result An enemy 25 units directly in front on a radar with a max range of 50
Supporting Multiple Resolutions • We don't want to use absolute coordinates: • Specific (x, y) locations onscreen. • If something is at (1900, 1000), but the resolution is 1680x1050, it will be off the screen! • Instead, we support relative coordinates: • Relative to part of the screen (center, left corner, etc.).
Relative vs. Absolute Coordinates A UI element is positioned relative to the bottom-right corner of the screen.
Localization Should design your systems for localization early on. One easy way is to have a localization dictionary where keys are mapped to strings. So instead of having "Exit to Main Menu" in your code, you might have "ui_exit_main_menu," which corresponds to a value in the dictionary.
Localization – Text Size A Cancel button and the problems with localizing it Different languages might have different size text, so UI art must take this into account:
User Experience The reaction the user has while using the interface Very important when doing UI design