Download
1 / 39
390 likes | 486 Views
Learn to use Gradient Tool, add text and create backgrounds in Photoshop. Understand color models, apply Color Calibration, create animations, and design icons effectively. Enhance images with oil paint effects and text warping techniques. Explore advanced image manipulation methods for text and background design.

E N D
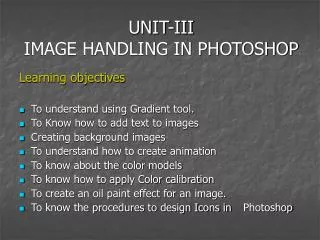
UNIT-IIIIMAGE HANDLING IN PHOTOSHOP Learning objectives • To understand using Gradient tool. • To Know how to add text to images • Creating background images • To understand how to create animation • To know about the color models • To know how to apply Color calibration • To create an oil paint effect for an image. • To know the procedures to design Icons in Photoshop
Gradient tool Gradient tool: The Gradient Tool is used to create gradient fills. Gradients are gradual shifts from at least one color to another or one color to transparency. Select from Linear, Radial, Angle, Reflected, and Diamond Gradient Tools . Click and drag to create the Gradient in a Layer or Selection. The Gradient drop-down has 15 Gradient combinations to select from.
Gradient tool Gradient Editor: The Gradient Editor consists of the Gradient Preset Menu, controls to create New Gradients, Rename Gradients, Remove Gradients, Duplicate Gradients, Load and Save Gradients, Adjust color or transparency, Color Stops to build Gradients, and the Gradient Bar.
Adding text to images Type consists of mathematically defined shapes that describe the letters, numbers, and symbols of a typeface. Use the Type Tool to create text in Photoshop. For the Web you’ll be using type to label buttons and as elements of typographic design. The two buttons in the first group toggle between creating a new type layer, and creating a type mask. The two buttons in the second group toggle between horizontal text and vertical text. Select the Type Tool and bring your mouse onto the Image Window. Photoshop creates a new TextLayer (indicated in the Layers Palette by a capital “T” at the edge of the Layer).
Adding text to images Typographic terminology: A typeface is a full set of characters (uppercase, lowercase, numerals, special characters, etc.) designed in a specific Style. The Baseline in text is an imaginary line that the characters effectively sit upon. Kerning is the space between a particular pair of characters. Tracking is the space between characters in a line of text.
Adding text to images Below is the options bar for text Below is the character palette and its options Character palette
Adding text to images Below is the Paragraph palette and its options The Paragraph Palette allows you to modify Paragraph Text. Paragraph text is that which occupies a pre-defined Paragraph Block. To create a Paragraph Block you must Click and drag in the Image Window with the Text Tool.
Adding text to images Text Warp:Text Warping allows the user to customize the appearance of text and still maintain the ability to edit it at all times. Ex: A text ‘ a scenic beach’ has been given a warp effect.
Adding text to images Working with Type layers: Some commands and tools--such as filter effects and painting tools--are not available for type layers. You must rasterize the type prior to applying the command or using the tool. Rasterizing converts the type layer to a normal layer and makes its contents uneditable as text. To convert a type layer to a normal layer: 1. Select the type layer in the Layers palette. 2. Choose Layer > Rasterize > Type.
Creating background images Using Paint Brush tool to create a background image: 1. Create a new document that is 5x5 inches and 72 pixels dpi. Make sure the color swatches at the bottom of the toolbox are at default Black/White setting by clicking the small squares. 2. Choose Edit>Fill and fill the document with the foreground color. The canvas is now painted with black.
Creating background images 3. Select the paintbrush tool. 4. If the color palette isn’t open, select window>show color to open it. Choose a nice shade of green. 5. Change the brush setting to soft round, 65 pixels. Make sure all of the brush dynamics settings are set to off. 6. create a pattern of your choice just by painting as you wish. Shown an example below. 7. Change the brush setting to sfot round, 35 pixels and select a shade of yellow color. Use the paint brush to paint over it.
Creating background images 8. Now select Filter>Distort>Twirl and set the angle to the maximum level of 999 in the text box of the twirl dialog. 9. Select Filter>Blur>Gaussian Blur and set the radius to 5 pixels. 10. Choose Filter>Render>Lighting effects. Choose 2 O’clock spotlight and light type as spot light, texture channel as ‘red’ and height ‘96’. You will see an effect similar to what is shown above (right).
Creating background images To specify current image as background do the following Select the ‘save for web’ option. Click the output settings option on the right. 1. Open the Output Settings dialog box and click ‘next’. select the Background option set. 2 For View As, select Background. (By default this is set as ‘image’ (as shown in the figure above) change it to ‘background’. 3 To select a solid color background to be displayed while the background image is downloading, or to be displayed through any transparent areas in the background image, click the Color box and choose a color using the color picker. Alternatively, click the triangle next to the Color box and select None, Foreground Color, Background Color, or Other (using the color picker), or select a color from the pop-up palette. 4 Click OK.
Color Models HSB color model (Hue, Saturation, Brightness): Hue is the color reflected from or transmitted through an object. It is measured as a location on the standard color wheel, expressed as a degree between 0° and 360°. In common use, hue is identified by the name of the color such as red, orange, or green. Saturation, sometimes called chroma, is the strength or purity of the color. Saturation represents the amount of gray in proportion to the hue, measured as a percentage from 0% (gray) to 100% (fully saturated). On the standard color wheel, saturation increases from the center to the edge. Brightness is the relative lightness or darkness of the color, usually measured as a percentage from 0% (black) to 100% (white).
Color Models RGB color model (Red, Green, Blue): Because the RGB colors combine to create white, they are also called additive colors. (shown below – left) CMYK color model (Cyan, Magenta, Yellow, Black): In theory, pure cyan (C), magenta (M), and yellow (Y) pigments should combine to absorb all light and produce black. For this reason these colors are called subtractive colors. The subtractive (CMY) and additive (RGB) colors are complementary colors. Each pair of subtractive colors creates an additive color, and vice versa. (shown above – right)
Color Models L *a *b color model: L*a*b color consists of a luminance or lightness component (L) and two chromatic components: the a component (from green to red) and the b component (from blue to yellow). Some more color models Bitmap - This mode uses one of two color values (black or white) to represent the pixels in an image. Grayscale - mode uses up to 256 shades of gray. Every pixel of a grayscale image has a brightness value ranging from 0 (black) to 255 (white). Duotone - This mode creates duotone (two-color), tritone (three-color), and quadtone (four-color) grayscale images using two to four custom inks. Indexed - This mode uses at most 256 colors.
Color Models Color Gamut: A gamut is the range of colors that a color system can display. Among the color models used in Photoshop, L*a*b has the largest gamut, encompassing all colors in the RGB and CMYK gamuts. Channels and Bit-depth: a CMYK image has at least four channels, one each for cyan, magenta, yellow, and black information. In addition to these default color channels, extra channels, called alpha channels, can be added to an image for storing and editing selections as masks. Bit-depth is the number of bits per pixel.
Color Calibration Knowing the Histogram of an image: A histogram illustrates how pixels in an image are distributed by graphing the number of pixels at each color intensity level. This can show you whether the image contains enough detail in the shadows (shown in the left part of the histogram), midtones (shown in the middle), and highlights (shown in the right part) to make a good correction.
Color Calibration Histogram: MeanRepresents the average intensity value. Standard deviation (Std Dev) Represents how widely intensity values vary. MedianShows the middle value in the range of intensity values. PixelsRepresents the total number of pixels used to calculate the histogram. LevelDisplays the intensity level of the area underneath the pointer. Count Shows the total number of pixels corresponding to the intensity level underneath the pointer. PercentileDisplays the cumulative number of pixels at or below the level underneath the pointer. This value is expressed as a percentage of all the pixels in the image, from 0% at the far left to 100% at the far right. Cache LevelShows the setting for the image cache. If the Use Cache for Histograms option is selected in the Memory and Image Cache preferences, the histogram displays more quickly and is based on a representative sampling of pixels in the image (based on the magnification), rather than on all of the pixels (equivalent to a cache level of 1). Deselect this option if you want to check for posterization in the image. You can press Shift while choosing Image > Histogram to generate the histogram using all pixels in the image.
Color Calibration The color adjustment tools are (Image>adjust>…..) • Levels • Auto Levels • Curves • Color Balance and Brightness/contrast • Hue/saturation • Desaturate and replace color • Channel mixer • Variations Levels: Levels let you change the color across the tonal range, modifying a composite image or individual color channels.
Color Calibration Auto Levels: This approach automatically optimizes the image in a basic way, setting a white point and black point and distributing the mid values throughout the range. After applying auto levels Original image
Color Calibration Curves: The Curves dialog box lets you adjust the entire tonal range of an image. with Curves you can adjust any point along a 0-255 scale while keeping up to 15 other values constant. Curves let you modify the entire image, or just one of the color channels, changing the highlights, mid-tones, or shadows in the image. The horizontal axis of the graph represents the original intensity values of the pixels (Input levels); the vertical axis represents the new color values (Output levels).
Color Calibration Curves: If you want to adjust the midtones while minimizing the effect on the highlights and shadows, click the quarter and three-quarter points on the curve. You can add up to 16 control points to the curve, locking those values. To remove a control point, drag it off the graph, select it and press Delete. Original Image After applying changes Using the above curve
Color Calibration Color Balance: The Color Balance option changes the overall mixture of colors in an image for generalized color correction. The images above are, on the left – the original image and on the right is the image after applying color balance command by dragging the middle slider to +50 while midtones is selected.
Color Calibration Brightness and Contrast: Hue and Saturation: The two color bars in the dialog box represent the colors in their order on the color wheel. The upper color bar shows the color before the adjustment; the lower bar shows how the adjustment affects all of the hues at full saturation.
Color Calibration • To colorize a grayscale image: • If you are colorizing a grayscale image, choose Image > Mode > RGB to convert • the image to RGB. • 2. Open the Hue/Saturation dialog box. • 3. Select Colorize. The image is converted to the hue of the current foreground color, if the foreground color is not black or white. The lightness value of each pixel does not change. • 4. Use the Hue slider to select a new color if desired. Use the Saturation and Lightness sliders to adjust the saturation and lightness of the pixels. The hue selected for the example shown below is 20, saturation – 50 and no change in lightness. • 5. Click OK. Original Image After applying colorize effect
Color Calibration Desaturate and replace color: Desaturate- This menu command eliminates all color in the image, reducing everything to Black and White. No controls in this one just select the command and stand back. Replace color - The Replace Color command lets you create a mask around specific colors and then replace those colors in the image.
Color Calibration Channel Mixer: It lets you modify a color channel by combining the data from another channel in the file.
Color Calibration Variations: The Variations command lets you adjust the color balance, contrast, and saturation of an image by showing you thumbnails of alternatives. This command is most useful for average-key images that don't require precise color adjustments. It does not work on indexed-color images.
Oil paint effect Example – 1 :( Using filters) Shown below is the original image, follow the steps below to see the oil paint effect for this image. 1. Click on Filter > Distort > Glass and apply the following settings to your photograph. Distortion -- 1Smoothness -- 4Texture -- CanvasScaling: -- 85%2. Next, click on Filter > Artistic > Paint Daubs and apply the following settings to your photograph. Brush Size -- 3Sharpness -- 3Brush Type -- Simple 3. Go to Filter > Brush Strokes > Angled Strokes and apply the following settings to your photograph. Direction Balance -- 20Stroke Length -- 5Sharpness -- 1
Oil paint effect Example – 1 :( Using filters) 4. In this last step, you want to click on Filter > Texture > Texturizer and apply the following settings to your photograph. This creates the appearance that your painting was done on canvas. To do this, we're going to go: Texture -- CanvasScaling -- 75%Relief -- 3Light Direction -- Top Right
Oil paint effect Example – 2 :( Using Art History Brush) 1. Load the original image and right click on it in the Layers palette. Select Duplicate and name this layer as the Paint layer. Then select the Art History brush from the Tools palette. Set the brush size to around 20 pixels, the opacity to 50%, the Style to Tight Short and the Area to 20 pixels. The brush size basically dictates the sampling area whereas the Area setting sets how wide the effect is applied. Select the Paint layer and then start making sweeping brushes in the direction of the texture. 2. The Art History brush will recycle continuously if you hold the mouse button down and keep it still. The idea is to drag in the direction that any features or texture run in. 3.Then increase the brush size to 75 and the Area to 75 and rapidly paint in the rest of the background. 4.Now to make it look more like oil-brush strokes. Select the Smudge tool and set the Size to 30 pixels and the Strength to 50%. Use short strokes, repeated often, to go over the textures again.
Oil paint effect Example – 2 :( Using Art History Brush) 5.Finally, create a new, duplicate layer of the Paint layer and call this Canvas layer. Then got to Filter > Texture > Texturizer. Select Canvas as the Texture and set Relief at 6. Apply this and then change the Opacity of the layer down until the effect looks natural. In this case it was just 25%. Merge the layers then and save.
Designing Icons Example – 1 :( Designing a Windows Media Player icon) 1. Start off by creating a new 100x100 image with a white background. Now create a new layer. Name it as ‘original’. Using the Elliptical Marqueetool create a circle as shown below. Fill it with any color. 2. Next right-click on the current layer and select Blending Options. Then apply the following Drop Shadow and Bevel & Emboss settings.
Designing Icons Example – 1 :( Designing a Windows Media Player icon) 3. Add a Stroke using the following settings (right). 4. Now we are going to use the rulers to pinpoint the center of the circle to make it easier to fill in each quadrant of the circle a different color. To begin this, create a new layer called Colored Circlethen select the Move tool. Verify that the rulers are visible. If they are not, go to View Rulers (Ctrl+R). To add the horizontal guide, click on the top ruler and drag your mouse down to the center of the circle. Do the same for the vertical guide, however instead of using the top ruler, use the ruler on the left side. (as shown above)
Designing Icons Example – 1 :( Designing a Windows Media Player icon) 5. Now we are going to add some color. Verify that Colored Circle is the current layer . Using the Rectangular Marquee Tool, fill in each quadrant as shown below. Next Ctrl+Click on the layer containing the original circle. Then go to Select > Inverse (Shift+Ctrl+I). Finally press the delete or go to Edit > Cut. Your icon should now look the image below on the right. We will no longer need the layer containing the old blue circle, so you may delete that layer. 6. Next right-click on the Colored Circle layer and select Blending Options. Use the following Bevel & Emboss Settings.
Designing Icons Example – 1 :( Designing a Windows Media Player icon) 7. Next create a new layer. Then grab the Elliptical Marquee Tool and draw a circle of smaller radius in the center and fill it in white. 8. Now create a new layer called Triangle. Select the Custom Shape Tool then in the tools palette at the top of the screen select the triangle shape. Then change the foreground color to black and create a triangle. Then go to Edit > Transform > Rotate. Rotate it till it looks like the image above (right)
Designing Icons Example – 1 :( Designing a Windows Media Player icon) 9. Finally apply the following Bevel and Emboss settings to the Triangle layer. Finally the layers palette will look like this