Proxy Server
ทดสอบบน Fedora Core4. Proxy Server. โดย … อดิศร ขาวสังข์. Proxy Server. เป็น Server ที่ทำหน้าที่เป็นตัวแทน หรือตัวกลาง นั่นคือ Proxy จะทำหน้าที่แทน Client ในการติดต่อกับ Server ตัวอื่น ๆ หรือเป็นสื่อกลาง (Mediator) สำหรับ Computer Communications


Proxy Server
E N D
Presentation Transcript
ทดสอบบน Fedora Core4 Proxy Server โดย… อดิศร ขาวสังข์
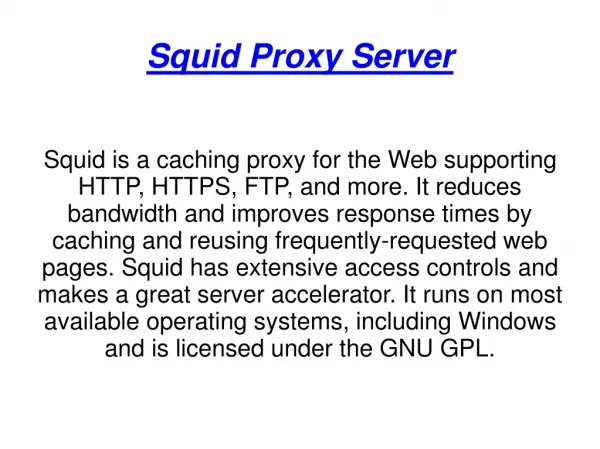
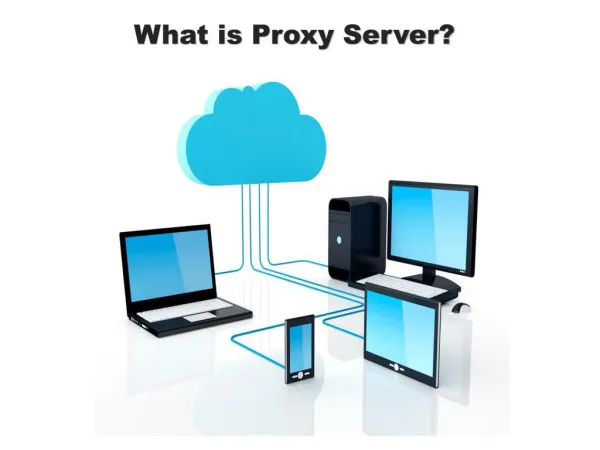
Proxy Server • เป็น Server ที่ทำหน้าที่เป็นตัวแทนหรือตัวกลาง นั่นคือ Proxy จะทำหน้าที่แทน Client ในการติดต่อกับ Server ตัวอื่น ๆ หรือเป็นสื่อกลาง (Mediator) สำหรับ Computer Communications • อาจะเรียกว่าเป็นการทำ Web Caching คือทำหน้าที่เก็บข้อมูลเว็บเพจที่ Client เคยเรียกใช้งานไว้ในฮาร์ดดิสก์ เพื่อเพิ่มความเร็วในการเรียกดูเว็บของเครื่อง Client ในครั้งต่อไป แต่เมื่อ Client เรียกใช้งานแล้วไม่มีข้อมูลในฮาร์ดดิสก์ ตัว Proxy Server จะทำหน้าที่แทนคือไปโหลดข้อมูลจากอินเตอร์เน็ตแล้วส่งต่อให้กับ Client พร้อมกับสำเนาข้อมูลเก็บไว้ • การใช้งาน Proxy Server ช่วยให้ประหยัด IP จริง (Registered IP) ได้
ลักษณะการใช้งาน Proxy Server • ทำหน้าที่เป็น Caching อย่างเดียว • เป็นทั้ง Caching + Gatewayเมื่อติดตั้ง Network Card บน Proxy Server มากกว่า 1 การ์ด และประยุกต์คำสั่ง iptables เข้าไปก็จะสามารถทำให้ Proxy Server เป็น Gateway ที่ควบคุมการติดต่อระหว่างเครือข่ายที่ต่าง Network กันได้ ซึ่งสามารถที่จะเพิ่มฟังก์ชันของ Firewall เข้าไปได้ด้วย
Proxy Server ที่เป็นทั้ง Caching +Gateway
ความสามารถเพิ่มเติมของ Proxy Server • Access List (ACL) • กำหนดวันเวลาในการใช้งาน • กรองเว็บไซต์ที่ไม่พึงประสงค์ • ห้าม IP หรือ Network ใด ๆ ใช้งาน • Transparent Proxy คือการใช้งาน Internet โดยที่เครื่อง Client ไม่ต้องระบุ IP ของ Proxy Server
การตรวจสอบและติดตั้ง Squid ผ่าน shell prompt • โปรแกรม squid จะอยู่แผ่นที่ 1 ของ FC4
การติดตั้ง squid ผ่าน GUI (Package Management) • ติดตั้งจากเมนู DesktopSystem SettingsAdd/Remove Applications • อยู่ที่รายการ Servers Web Server
การคอนฟิก Squid ขั้นต้น • แก้ไข Config File ที่ /etc/squid/squid.conf ดังนี้ • ให้เอาเครื่องหมาย # หน้าคำว่า acl our_network src ออก และใส่ค่า Network ที่จะอนุญาตให้ใช้งาน Squid ได้เข้าไป • เอาเครื่องหมาย # หน้า http_access allow our_networks ออก
การ Start Squid • Start จากเมนู Service • DesktopSystem SettingsServerSettingsServices • Start จาก shell prompt • service squid start/stop/restart • /etc/init.d/squid start/stop/restart • /etc/init.d/ link ไปยัง /etc/rc.d/init.d
การ Start Squid (ต่อ) • เมื่อมีปัญหาไม่สามารถ start squid ได้ให้ใส่ชื่อ hostname ในที่หัวข้อ visible_hostname ในไฟล์ /etc/squid/squid.conf ดังตัวอย่าง
การ Start Squid (ต่อ) • แล้ว start อีกครั้ง
Transparent Proxy บน Linux • คือวิธีการที่ทำให้ผู้ใช้งานไม่ต้องมีการกำหนดการใช้งานที่ browser ว่าจะให้ใช้งานผ่าน Proxy Server ตัวไหน • นั่นคือเมื่อ Packet ข้อมูลวิ่งผ่าน gateway ตัว gateway จะคอยตรวจจับดูว่า Packet ข้อมูลที่วิ่งผ่านเป็น http (TCP 80) หรือไม่ ถ้าเป็น http ก็จะบังคับให้ Packet ข้อมูลดังกล่าววิ่งผ่านไปยัง Proxy Server ด้วยการระบุ IP ของ Proxy Server และระบุพอร์ตของ Proxy Server (เช่น 3128) • ที่ Proxy Server จะต้องมีการคอนฟิกเพิ่มเติมในส่วนของ Squid ให้รองรับการทำงานแบบ Transparent Proxy
ขั้นตอนการทำ Transparent Proxy • ใช้คำสั่ง iptables เพื่อทำการตรวจสอบ Packet ที่วิ่งผ่าน Gateway ถ้าเป็นการเรียกใช้งาน http ให้ทำการ Redirect ไปยัง Proxy Server ดังนี้กรณี Gateway เป็นคนละเครื่องกับ Proxy Serveriptables -t nat -A PREROUTING -p tcp -i eth1 -s 192.168.1.0/24 -d ! 203.146.55.131 --dport 80 -j DNAT -- to-dest 203.146.55.132:3128กรณี Gateway กับ Proxy Server อยู่บนเครื่องเดียวกันiptables -t nat -A PREROUTING -p tcp -i eth1 --dport 80 -j REDIRECT --to-port 3128
กรณี Gateway เป็นคนละเครื่องกับ Proxy Server
กรณี Gateway กับ Proxy Server อยู่บนเครื่องเดียวกัน
ขั้นตอนการทำ Transparent Proxy (ต่อ) • ให้ทำการคอนฟิก Proxy Server (Squid) ให้รองรับ Transparent Proxy ด้วยการให้มีค่าต่อไปนี้อยู่ในไฟล์คอนฟิกhttpd_accel_port 80 httpd_accel_host virtual httpd_accel_with_proxy on httpd_accel_uses_host_header onหมายเหตุในกรณีที่ gateway ไม่ใช่ Linux Server เช่นอาจเป็น Router ทั่วไป ก็ต้องมีการคอนฟิก Router ดังกล่าวคอยตรวจจับ Packet ที่เป็น http และมีการบังคับให้ Redirect ไปยัง Proxy Server เช่นกัน
ข้อควรพิจารณาในการทำ Transparent Proxy • การทำ Transparent Proxy ต้องมีการเซ็ตค่า DNS ให้กับเครื่อง Client ด้วย (ทั้ง ๆ ที่การใช้งาน Proxy Server แบบกำหนดค่า Server เองไม่ต้องกำหนดค่า DNS Server ให้กับเครื่อง Client ก็ได้) • ถ้าเครื่อง Client ชี้ DNS Server ไปยังเครือข่ายภายนอก จะต้องมีการทำ Outbound NAT ด้วย • ในกรณีทีต้องการให้ Client สามารถใช้บริการอื่น ๆ ที่นอกเหนือจากเว็บควรจะทำ Outbound NAT + Transparent Proxy • การทำ Outbound NAT + Transparent Proxy ถ้า Proxy เกิด down ก็ไม่สามารถใช้งานเว็บได้เพราะถูกบังคับด้วยคำสั่ง iptables โดยไม่สนใจว่า squid จำทำงานอยู่หรือไม่
การตรวจสอบการใช้งาน Proxy Server • สามารถตรวจสอบการใช้งาน Squid Proxy ได้ที่ cache_access_log ของ Squid ซึ่งค่า Default จะอยู่ที่ /var/log/squid/access.log เป็นไฟล์ที่เก็บข้อมูล web site ที่ client ร้องขอ • โดยการตรวจสอบให้ใช้คำสั่ง tail ดังนี้ • tail –f /var/log/squid/access.log • และในตำแหน่งนี้จะมี log file อีก 2 ไฟล์คือ • /var/log/squid/cache.log เก็บข้อมูลทั่วไปเกี่ยวกับ your cache’s behavior • /var/log/squid/store.log //show which objects are ejected from the cache, and which objects are saved and for how long
ตัวอย่างการใช้คำสั่ง tail –f /var/log/squid/access.log
ความหมายจากไฟล์ access.log • TCP_MISS :ข้อมูลของเว็บไซต์นี้ยังไม่มีใน cache พร็อกซี่ต้องไป GET ข้อมูลจาก Web Site ปลายทาง • SINGLE_PAREN :กำลังมีการส่งข้อมูลไปยัง Parent Proxy • TCP_CLIENT_REFRESH_MISTCP_IMS_HIT : Proxy ต้องอัพเดตข้อมูลใหม่ ถ้ามีการ refresh ข้อมูลที่ client ตัว Proxy จะทำ การโหลดข้อมูลใหม่จากเว็บไซต์ทันที • TCP_MEM_HITTCP_HIT : มีข้อมูลของเว็บไซต์นี้ใน cache พร็อกซี่ไม่ต้องไป ดาวน์โหลดหรือ GET ข้อมูลจากเว็บปลายทาง
การทำ Access Control Lists บน Squid • You can limit users' ability to browse the Internet with access control lists (ACLs). • Each ACL line defines a particular type of activity, such as an access time or source network, they are then linked to an http_access statement that tells Squid whether or not to deny or allow traffic that matches the ACL. • Squid matches each Web access request it receives by checking the http_access list from top to bottom. If it finds a match, it enforces the allow or deny statement and stops reading further.
การทำ Access Control Lists บน Squid (ต่อ) • The final http_access statement denies everything, so it is best to place new http_access statements above it • The very last http_access statement in the squid.conf file denies all access. You therefore have to add your specific permit statements above this line. • In the course’s examples, I've suggested that you place your statements at the top of the http_access list for the sake of manageability, but you can put them anywhere in the section above that last line. • Squid has a minimum required set of ACL statements in the ACCESS_CONTROL section of the squid.conf file. It is best to put new customized entries right after this list to make the file easier to read.
ขั้นตอนการทำ Access ControlLists • สร้างกฏของ access list ไว้ในตำแหน่ง ACLs ของไฟล์คอนฟิก (/etc/squid/squid.conf) โดยควรวางไว้บนบรรทัด acl our_network เช่น • aclban_dst_domaindstdom_regexthumbnow.com japangirl.com newpicpost.com • นำกฏไปใช้งานด้วยการใช้คำสั่ง http_access ไว้หลังกฏในข้อ 1 เช่น • http_accessdenyban_dst_domainหมายเหตุ: ถ้าวางคำสั่งทั้งสองไว้ล่างบรรทัด acl our_network จะไม่มีผลต่อAccess Control
ตัวอย่างการทำ Access ControlLists • ตัวอย่างการบล็อก IP ต้นทาง • acl ban_src_ip src 192.168.1.1/255.555.255.255 • http_access deny ban_src_ip • ตัวอย่างการบล็อกโดเมนปลายทาง • acl ban_dst_domain dstdom_regex thumbnow.com japangirl.com หรือ acl ban_dst_domain dstdomain .thumbnow.com .japangirl.com • http_access deny ban_dst_domain • ตัวอย่างการบล็อก url ที่เป็นคำ/วลี • acl ban_word url_regex nude sucker porn • http_access deny ban_word
ตัวอย่างการทำ Access Control Lists (ต่อ) • ตัวอย่างการบล็อกโดเมนปลายทางโดยเก็บชื่อโดเมนเป็นไฟล์ไว้ • acl ban_dst_domain dstdom_regex ‘/etc/squid/ban_dst_dommain’ • http_access deny ban_dst_domain • ตัวอย่างการบล็อก url ที่เป็นคำ/วลี โดยเก็บคำ/วลี ไว้ในไฟล์ • acl ban_word url_regex ‘/etc/squid/ban_word’ • http_access deny ban_word • ข้อมูลในไฟล์อาจเป็นดังรูป
Restricting Web Access By Time • You can create access control lists with time parameters. For example, you can allow only business hour access from the home network. # Add this to the bottom of the ACL section of squid.conf acl home_network src 192.168.1.0/24 acl business_hours time M T W H F 9:00-17:00 # Add this at the top of the http_access section of squid.conf http_access allow home_network business_hours
Restricting Web Access By Time (Cont.) • Or, you can allow morning access only: # Add this to the bottom of the ACL section of squid.conf acl mornings time 08:00-12:00 # Add this at the top of the http_access section of squid.conf http_access allow mornings
Password Authentication Using NCSA Password Authentication Using NCSA
การสร้าง web page เพื่อแจ้งเตือนสำหรับ web ต้องห้าม • สร้างข้อความเตือนในรูปแบบ HTML จาก Editor หรือโปรแกรมสำหรับสร้าง Web page • นำไฟล์ที่สร้างเสร็จไปทับไฟล์ที่ /etc/squid/errors/ERR_ACCESS_DENIED
การทำ Cache Peer แบบ parent • A parent cache can get documents from another cache higher in the hierarchy or from the source, depending whether it has more parent or neighbor caches in its level. A parent cache should be used when there are no more opportunities to get the document from a cache on the same level. แบบ sibling • A neighbor (or sibling) cache is one that serves only documents it already has.
ตัวอย่างการทำ Cache Peer • ทำได้ด้วยการคอนฟิกในไฟล์ /etc/squid/squid.conf ซึ่งมีรูปแบบดังนี้ cache_peer hostname type http_port icp_port เช่น cache_peer parent.foo.net parent 3128 3130 [proxy-only] cache_peer sib1.foo.net sibling 3128 3130 [proxy-only] cache_peer sib2.foo.net sibling 3128 3130 [proxy-only] • [proxy-only] : to specify that objects fecthed from this cache should not be saved locally • เครื่องที่เป็น parent หรือ sibling ต้องอนุญาตให้ทำ cache_peer ด้วยการเปิดพอร์ต icp_port เป็น 3130 (default) ถ้าไม่อนุญาตให้กำหนด icp_port เป็น 0
Reverse Proxy Server (ต่อ) • In reverse proxy mode, the proxy server functions more like a web server with respect to the clients it services. Unlike internal clients, external clients are not preconfigured to access the proxy server. Instead, the site URL routes the client to the proxy as if it were a web server. Replicated content is delivered from the proxy cache to the external client without exposing the origin server or the private network residing safely behind the firewall. Multiple reverse proxy servers can be used to balance the load on an over-taxed web server in much the same way. • Reverse proxy servers are commonly used for secure web publishing. Having a proxy server accepting and filling outside requests allows you to keep your web server behind the firewall. You can then use the web server as a protected web site, staging documents for testing before they are published externally. When you are ready, you can publish selected content to the reverse proxy server's cache.