The Normal Distribution and Microsoft Excel
120 likes | 276 Views
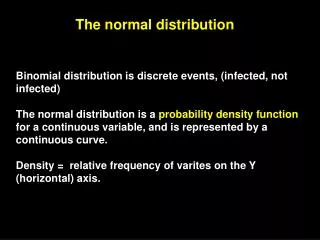
The Normal Distribution and Microsoft Excel. Say a company has developed a new tire for cars. In testing the tire it has been determined the distribution of miles driven is normal and that the mean tire mileage is 36,500 miles and the standard deviation is 5000 miles.

The Normal Distribution and Microsoft Excel
E N D
Presentation Transcript
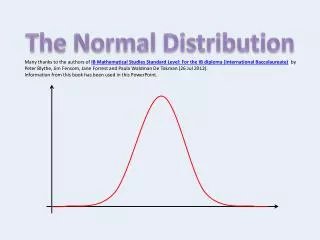
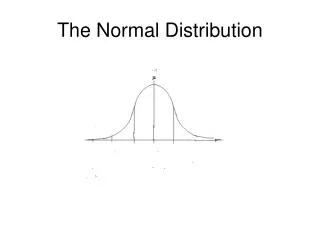
Say a company has developed a new tire for cars. In testing the tire it has been determined the distribution of miles driven is normal and that the mean tire mileage is 36,500 miles and the standard deviation is 5000 miles. Along the horizontal axis we measure tire mileage. The normal distribution rises above the axis. Note the highest point of the curve occurs above the mean - in our tire example we would be at 36,500. On the curve we have two inflection points, and these occur 1 standard deviation away from the mean. So, mileages 31,500 and 41,500 are 1 standard deviation for the mean and the inflection points occur above them.
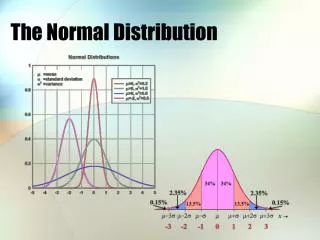
a b c d e f 26,500 31,500 36,500 41,500 46,500 miles -2 -1 0 1 2 z Note the Z values for each mile example. Now I want to show you how Excel can help find the answers we might need. I have added letters in the graph above to refer to areas we might be interested in.
The z values are found by the following formula: (x minus mean)divided by the standard deviation In Excel I found the z’s by the formula that I started in cell b4: =(a4 - $b$1)/$b$2. After I hit return I went back to cell b4 and pulled down on the bottom right of the cell down to cell b8. When you drag down, the parts of the formula that have $ signs do not change values.
Go back to the graph on slide 2. Now take your hand and put it real close to your face so you can see your palm (Do it). Next, without poking yourself in the eye, move your hand so that your thumb is close to your face. Let’s call this the profile of your hand. Take your hand in profile and go to the far left side of the graph. Now, move your hand to the right in the graph, but go slow. Note the area under the normal curve to the left of your hand is getting bigger. In other words, the area to the left of your hand is the cumulative probability of having the value where your hand is OR having a lower value. For example, if you move your hand to 26,500, area a is to the left of your hand and that area is the probability that a tire will last 26,500 miles or less.
From the graph before I have placed the areas here. The ‘based on x’ and ‘based on z’ columns have the same values, but for different reasons. The based on x is a new fangled way. The based on z is the old fashioned way. Let’s look at each on the next screen.
When you work with the data values, here tire mileage, you can find areas to the left with the function NORMDIST. As input you need to put the data value, the mean, the standard deviation and the word TRUE. For example, in the example I put in cell b11 the formula =NORMDIST(a4, $b$1, $b$2, TRUE). a4 points to the value 26,500 $b$1 points to the mean value 36,500 $b$2 points to the standard deviation 5,000 TRUE just means get the cumulative probability. So in cell b11 I found area a. After you get this you can go back to the cell and drag down for the others.
Remember z values are just data values transformed by the formula (value minus mean)/standard deviation. I have the z’s calculated. To get the areas to the left of a z we use the NORMSDIST function. As input you only need the z value. For example, in the example I put in cell c11 the formula =NORMSDIST(b4). b4 points to the value -2 So in cell c11 I found area a. After you get this you can go back to the cell and drag down for the others. Now, go to the z table in the book. Look at the z of 0.00. The value inside the table is .5000. In my table when z = 0 you see .5 as the area. Look in the table at the z = 1.00. Inside the table you have the value .8413. This is in my table as well.
Go to the z table. The z of 1.64 has a tabled value .9495 (tabled values are areas) and a z of 1.65 has a tabled value of .9505. In the table you see here I put areas to the left of a z and let the computer tell me the z. You will notice the area .95 has a z = 1.644853. So Excel gives us what is in the table either way. We can give a z to get the area or give an area to get the z. To get the z use the NORMSINV function. In cell b27 I put =NORMSINV(a27) and then I dragged the rest.
This table is similar to the previous one except instead of telling the z associated with a given area it tells us the data vale associated with the area. Use the NORMINV function. To get the x use the NORMINV function. In cell b18 I put =NORMINV=(a18, $b$1, $b$2) and then I dragged the rest.
In all my formulas I pointed to cells in the spreadsheet. An equally valid way would be to just type in the actual values into the formula. For example, to get the area to the left of 26,500 you could type =NORMDIST(26500, 36500, 5000, TRUE) Back on slide 2 I had areas a, b, c, d, e, f. We know a + b + c + d + e + f = 1. This can be useful because what if we need f? f = 1 – a - b – c – d - e. Note a = f, due to symmetry.