Download
1 / 18
180 likes | 551 Views
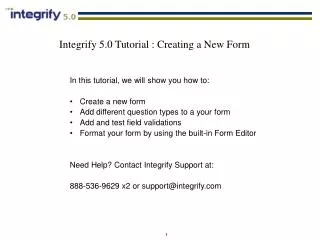
9.3 Creating a Multiple-Form Interface . Creating a Multiple-Form Interface . It is common that an application may have more than one form In addition, one form may be invoked by another form To add one more form to a project, we need to follow the steps below:

E N D
Creating a Multiple-Form Interface • It is common that an application may have more than one form • In addition, one form may be invoked by another form • To add one more form to a project, we need to follow the steps below: • Add one more form class to your project • Design the form layout • Set the properties of the GUIs in the new form • Update the program code of the original form. Each form has its own GUI
Example Radio button When the button Show Card is clicked, Form2 will be shown
Step 1: Specification of the program • A user is asked to select one and only one of the four cards • If the user does not check any of the radio button, no card will be shown • If the user clicks the Show Card button, another form (Form2) will be shown with the selected card • The user cannot access the original form (Form1) until he clicks the OK button of Form2. Form2 is known as the modal form. • If the user clicks on the picture, the card will toggle between face-up and face-down.
Project name: Chap9p5 Step 2: Develop Form1 groupBox All controls inside a group box will be grouped together radioButton For the radio buttons inside a group box, only one of them can be selected Make sure the TabStop property of the RadioButtons are False
Step 3: Develop Form2 • In the Solution Explorer, right click your project name and select Add New Item... • Select Windows Form. Give a name, say Form2, to your new form (Form2 will also be the class name of the form) • You will see another set of files added to your project, e.g. Form2.cpp, Form2.h.
pictureBox pictureBox allows you to put a picture into it. The picture can be obtained from a file We can add the controls we wanted to here
Base class View Code namespace chap9p5 // define the namespace of the class { public ref class Form2 : public System::Windows::Forms::Form { // The class name is Form2. public: Form2(void) // The constructor. Define the things { : // that will be done when the class } // is instantiated. TO BE WRITTEN LATER. : private: System::Windows::Forms::Button^ button1; : // The button is defined here private: System::Windows::Forms::PictureBox^ pictureBox1; : // The picture box is defined here private: void InitializeComponent(void) { : // Record the properties of the controls } }; } Derived class p. 72 Form2.h is used mainly for defining the class structure of this form
Rather than writing many lines of code, we can simply define the function of a button as OK (i.e. the form will close if it is clicked) in the DialogResult item of the Properties window Returned enumerated values of a dialog box
double-click Show Card Step 4: Implement the handler of Form1 #include "Form2.h"// Add to the beginning of Form1.h private: System::Void button1_Click(System::Object ^ sender, System::EventArgs ^ e) { // Called when button1 of Form1 is clicked int card = 0;// 0 = no card, 1 = sA, 2 = hA // 3 = cA, 4 = dA if (radioButton1->Checked) card = 1;// spade ace selected if (radioButton2->Checked) card = 2;// heart ace selected if (radioButton3->Checked) card = 3;// club ace selected if (radioButton4->Checked) card = 4;// diamond ace selected Form2 ^ F2 = gcnew Form2(card); //Form2 defined in Form2.h F2->ShowDialog(); // Show modal form, return DialogResult value }
An object of Form2 is created in the gc heap pointed by F2Usegcnewbecause Form2 is a reference type under Common Type System (CTS) Since we want to tell Form2 which card a user has selected, the constructor of Form2 has to be modified to accept one input parameter that indicates the selected card Form2 ^ F2 = gcnew Form2(card); F2->ShowDialog(); To show Form2, we need to call the member function ShowDialog() of the class Form2 • If ShowDialog() is called, Form2 will be a modal form • i.e. we cannot access other forms unless we close Form2 • If Show() is called instead, Form 2 will be a modeless form, i.e. we can access other forms without closing Form2.
InForm2.h Step 5: Implement the constructor and other functions of Form2 Form2(int c)// The constructor is modified by adding { // an input parameter InitializeComponent(); cd_no = c;// 0 = no card, 1 = sA, 2 = hA // 3 = cA, 4 = dA face = 0;// By default, the card is face up (0). // When the card is clicked, the // state will toggle from face-up to // face-down or vice versa ShowCard();// Show card based on the info in "card" } // Two private variables are added private: int cd_no;// To keep the info of the card selected int face;// See the comment above p. 68
Visible is a property of pictureBox. If it is 0, the pictureBox will not be visible. Add a member function at the end void ShowCard() { if (cd_no == 0) pictureBox1->Visible = 0; if (cd_no == 1) { pictureBox1->Visible = 1; pictureBox1->Image = Image:: FromFile("e:\\temp\\cards\\s1.gif"); } // codes for other cards follow The file for Spade Ace FromFile is a static member function of the Image class. It returns a file handler of an image stored at the specified location Image is another property of pictureBox. It defines the location where the picture can be found
Image property Visible property
The file for Heart Ace if (cd_no == 2) { pictureBox1->Visible = 1; pictureBox1->Image = Image::FromFile("e:\\temp\\cards\\h1.gif"); } if (cd_no == 3) { pictureBox1->Visible = 1; pictureBox1->Image = Image::FromFile("e:\\temp\\cards\\c1.gif"); } if (cd_no == 4) { pictureBox1->Visible = 1; pictureBox1->Image = Image::FromFile("e:\\temp\\cards\\d1.gif"); } } The file for Club Ace The file for Diamond Ace \ is a special character for escape sequence. If we want to use it as just the \ character, we have to use \\
Double-clickpictureBox1 // Define the thing to be done when pictureBox1 is clicked private: System::Void pictureBox1_Click(System::Object ^ sender, System::EventArgs ^ e) { if (cd_no != 0)// A card is selected { if (face == 0) // face = 0 means face-up { pictureBox1->Image = Image:: FromFile("e:\\temp\\cards\\b1fv.gif"); // Show the card as facing down, actually a // different file is shown face = 1;// Currently face-down }// codes for face==1 follow If user clicks on the pictureBox, it will change from face-up to face-down or vice versa It is controlled by the member variable “face”
else // It is face-down { ShowCard(); face = 0; // currently face-up } } } Step 6: Build and run the project
Exercise 9.3 Follow the above steps to build the project. Add one more button in Form1 such that if it is clicked, your program will randomly display one of the four cards, disregarding the selection of the user. Hint: We can generate a random number by using the function int rand(void), which returns a random integer between 0 to 0x7FFF. Remember to include stdlib.h before you use this function. Remark: On using rand(), the random sequence is repeatable on every execution of the program. If we don't want it to be repeatable, what should we do? (Hint: learn srand(unsigned int) )