Download
1 / 28
280 likes | 309 Views
Learn to create two basic "hello world" web pages using EGL and JSF in this educational module. Follow detailed steps to develop pages, edit EGL code, and test them on the server.

E N D
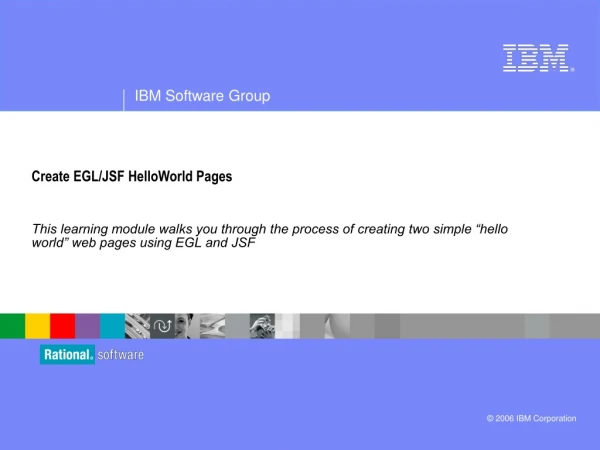
Create EGL/JSF HelloWorld Pages This learning module walks you through the process of creating two simple “hello world” web pages using EGL and JSF
Lab Assignment – Workbench “Test Drive” – 2 of 2 Do a bit more test driving: • From the Palette view – find (locate) the following (Note – you’ll need open a .JSP page in the Content Area, in order to see the Palette view) • Enhanced Faces Components: • Command Button, Input text, Image, • An HTML: Horizontal Rule, Table, Image • An EGL variable • From the Window menu, open the Debug Perspective • Using the icons (top right hand corner of Workbench) switch from the Debug to the Web Perspective • Close the Debug perspective • Reset your “current” (should be Web) Perspective • From the Servers view, start your application server • From Project Explorer, Run allcustomers.jsp on the server • From Help: • Search on the EGL topic: DataItem • From Tutorials Gallery/Tours run the Enterprise Generation Language tour • Find and open the EGL Cheat Sheets category. View one or more (time permitting) Lab
RBD Workbench UNIT Topics: • EGL and the Workbench terms and concepts • A Workbench Walk-Through • Creating an EGL “HelloWorld” Application
RBD Workbench UNIT Topics: • EGL and the Workbench terms and concepts • A Workbench Walk-Through • Creating an EGL “HelloWorld” Application
The Pages (you will create) • Following the detailed steps in this lab, you will build these two simple Web pages with EGL and the RBD tools.
The Workflow Process – From 10,000 Feet • The steps you will follow to create these pages consist of: • Launch RBD and select your Workspace – or start with product already running • Create a new web page from a pre-built template • Customize the page’s default layout • Edit the EGL code that enables the business logic for the page • Drag & drop EGL variables on the page to create new JSF Components • Run (test) the page on the server • Now begin the lab from the detailed instructions starting on the next slide…
Lab – Launch RBD and Select Your Workspace If RBD is not already running • From the Windows start menu launch RBD • From the initial prompt, specify or browse to and select your Workspace • Your EGLWeb project should open
Create a new Web Page Using a Page Template • From Project Explorer Right click over \WebContent\ and select: • New Web Page • Name the page: hello1.jsp • From: Sample Templates Family A (no navigation) Select A_gray.htpl • Click Finish
Customize the hello1.jsp Web Page • In the Content Area: Modify the default page header text and add a few line breaks (using the Enter key) After you’ve completed the above, • Right-click over the Web Page, …and select Edit Page Code
Add EGL Statements to the JSFHandler • When you create a new .JSP page with RBD, it automatically creates a JSFHandler for the page to allow you to call services and code your business logic. • Using the EGL Editor, code the following: • A string variable named field1 • A statement that assigns a “literal” to field1 • A new EGL function that forwards the field1 value to a new page (you will create the hello2.jsp page in the next step of this lab) • Press:Ctrl+Shift+F ( simultaneously ) • This will format your source as shown in the screen capture • To save your EGL statements, either: • Click the Save file icon in the top left section of the menu • Click your mouse inside the JSFHandler code, and press: Ctrl+S Don’t change this (even if it doesn’t match) Note the semi-colons ; that end your new EGL statements;
Add an EGL Field to the hello1.jsp Page – 1 of 3 Return to Page Designer for: hello1.jsp (hint: Click the hello1.jsptab in the Content Area) (From the Page Data view) Expand the Data folder Select: field1 - string Left-click and hold (the mouse button down) Drag and Drop it …onto the page next to a line break Note: When you drag and drop Page Data variables onto hello1.jsp, the RBD tooling automatically generates all of the Java/J2EE APIs needed to render Server-Side EGL data in the browser as HTML labels and values in the browser.
Add an EGL Field to the hello1.jsp Page – 2 of 3 (From Insert Control) create input/output fields by specifying: Updating an existing record Click the Options… button, (From Options)un-check the Delete button Click OK …then click Finish
Bind an EGL Function to the Submit Button on the .JSP Page – 3 of 3 (From Page Data) Expand the Actions folder Select (Left-click, hold) and drag and drop the fwd() function on top of the Submit Button
Run the .JSP Page 1. Right-click over the page and select Run on Server… 2. Save any un-saved resources 3. If you are using Tomcat 3a. Make sure that: Update context root… is checked – and…Click: Finish Note – if your page does not display, please go to the next slide to diagnose
What if I Get a Server Error When I Run My Page? If your page does not display and you are not using Tomcat, or if you get other Exception errors when trying to run: hello1.jsp, please: • Double-check to ensure there are no syntax errors in hello1.egl ( no X’s ) • If there are syntax errors, correct them and try again (mouse-over the X’s to see what’s wrong) • If there are no syntax errors, and you’re using WebSphere, and your page doesn’t display, please ask your instructor for assistance If you are using Tomcat, as your Application Server, And if, after trying to Run on server – you get an error like the following Restart the Tomcat server: (From the Servers tab) • Click the Restart the server icon • Then try running the: hello1.jsp page on the server again.
Lab – Part 2 – Create hello2.jsp Page and the hello2.egl Code • (From Project Explorer) Right-click over \WebContent\ and create a new web page – named: hello2.jsp • Select the same template for the new page (A_gray) • (Working with hello2.jsp in the Content Area) Customize the page’s default text • Right-click over the page and select: Edit Page Code From the EGL editor, add the following: A string variable named: field2 Add a parameter to: onConstruction(field1string) Add this assignment statement Add this new Function - Press Ctrl+Shift+F to format your code - Save your work (press Ctrl/S– or click the Save icon)
Add an EGL Field and Function to the .JSP Page 1. (From Page Data)Select (left-click, hold), Drag & Drop the field2 - string variable on the page • Configure the controls produced – and create an output (read-only) field: 2. (From Page Data) • Expand the Actions folder • Select (left-click, hold), Drag & Drop the returnToHello1() EGL function on the page. • This will create a Submit Button which fires off a call to your EGL business logic inside the returnToHello1 function, when the user clicks it at run-time Page Data View A graphical window into the variables and functions inside the EGL JSF Handler for this .JSP page
Run hello1.jsp – Test Your Work (From Project Explorer) Right-click over, and select run hello1.jsp on the server • If you are using Tomcat make sure that: Update context root… is checked – and… Click: Finish (at Select Tasks) Note that you will do this every time you run a page using Tomcat
(OPTIONAL) Lab3 Create an EGL Batch Program (From Project Explorer) Right-click over EGLSource, and select: New > Program • From the New EGL Program part wizard, specify: • Package: • kbprograms • EGL source file name: • kbprogram • Click Finish
Lab3 – continued – Code the Batch EGL Program The tooling will create a skeleton EGL batch program. Edit the program, and add the following statements: • Four variable declarations • Assignment statements • Invoke a function • Add a function that adds that calculates simple interest // Comments are optional (FYI) The slide ***Notes contain finished code for the above.
Lab3 – continued – Save and Debug the Batch Program 1. Save your edits by clicking the Save icon on the toolbar 2. Add a breakpoint to your EGL program, by double-clicking in the Editor’s gray left-hand border 3.(from Project Explorer) Right-click over kbprogram.egl Select: Debug EGL Program Click Yes – at Confirm Perspective Switch *** See Notes, if you’re using the Vista O.S.
Lab3 – continued – Modify the Values and Step (F5) Through the Code • Double-click the values in the Variables View to over-ride your assignment statements (note – click right on top of the variable Values) • Press F5 to step through your EGL statements – one line at a time. Note that as the values change the Variables view updates. • When you are finished, from the top right cornerClose the Debug Perspective *** See Slide Notes
Extend This Batch Program Workshop (More Optional Lab Work) Time permitting: Return to the Web Perspective: 1. Add the new EGL functions shown in this screen capture 2. From inside the main() function invoke the new functions 3. Save your edits – and clean up any EGL syntax errors - which will appear as a red 4. Debug (step through) your new code. Between function invocations, consider zeroing out (resetting) the result variable values for each computation: - principal - interest - nbrYears 5. Close the Debug Perspective, and return to the Web Perspective *** See Slide Notes for the finished code
Optional Lab4 – Working With EGL Code Formatter – 1 of 2 You have already seen that Ctrl+Shift+F will format your code, when you are editing inside a file. But there are several other things you should know about this tooling feature: • You can format code for: • Files • All of the EGL files in a Package • Right-click over the file or package, and selecting Format • This allows you to apply the source code formatting rules to more than one file, in one operation • Feel free to try this on • kbprogram.egl • All of the files in the jsfhandlers folder
Optional Lab4 – Working With EGL Code Formatter – 2 of 2 To see or change the Formatter Rules From: Preferences EGL Editor Formatter Click: Show… To view the current rules New… To define custom EGL code formatting rules Note that you could (when finished with new rules) Export them to your fellow project team members
Optional Lab5 - Create an Online Calculator If time permits, create the following new, EGL web page • Using this EGL JSFHandler logic And these controls – dragged from Page Data: • Challenge Lab - Create the rest of the basic functions (and web page buttons) for your calculator: Subtract/Multiply/Divide
Optional Lab6 – Create a Typical Login Page • Create the following new web page • Name: hello3.jsp • Layout • EGL Code • Notes: • Don’t worry about comments //I am an EGL comment • Don’t worry about blank lines • If you get syntax errors • (Red X’s appear) • Mouse-over them to read what’s wrong
Unit Summary • Now that you have completed this unit, you should have: • Navigated the eclipse IDE, • Opened project folders and files • Set project properties • Defined and used the following eclipse views and perspectives: • Views • Content Area • Project Explorer • Page Data • Palette • Console • Servers • Capabilities • Perspectives • Web • Debug