Download
1 / 12
120 likes | 293 Views
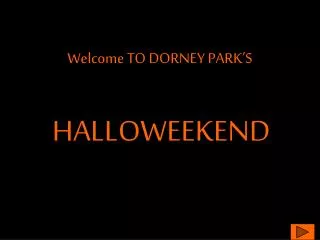
Welcome TO DORNEY PARK’S. HALLOWEEKEND. A Feast for The Senses For young And old Alike!. Where the rides are terri-fying…. And so is our staff!. So….. Beware!. Because you never know who --. OR What --. You’ll run into next!. Thanks for Visiting Dorney park!. The Explanation.

E N D
Welcome TO DORNEY PARK’S HALLOWEEKEND
So….. Beware!
The Explanation PowerPoint is a lot of fun! I began my preparation for this project by completing the online tutorial: http://einstein.cs.uri.edu/tutorials/csc101/powerpoint/ppt.html. Since the tutorial was designed for PowerPoint 97 I had to scout around a couple of times to figure out how an effect worked in PowerPoint 2000. It was a very basic tutorial, so after that I figured out how to do things by trial and error and judicious use of the Help menu. I had created images in Adobe Photoshop LE from Dorney Park’s (a nearby amusement park) Halloween celebration. The event was called “Halloweekend” and I had pictures of the rides, displays, my son and daughter and their two best friends, plus assorted ghosts and monsters. I decided that some spooky music would be nice, so I went to Microsoft’s Clip Gallery Online and downloaded some evil sounds and spooky tunes. Then I had everything I needed to begin my presentation. PowerPoint has many similarities to Publisher in inserting pictures, textboxes, and in being able to drag frames anywhere I wanted them on the screen. The formatting of text was also similar. So I could concentrate on trying to figure out how to create slides and how to do animations within each slide. Since it was for Halloween I decided that black and orange would be an appropriate color scheme. I went into the View Menu and created a Master slide with these basic colors. Then every time I inserted a new slide I already had the color scheme I wanted. I wanted an unusual font and selected Bazooka as just scary enough.
The Explanation - Part 2 I created the title slide from one of the auto formats. I then applied my first effect to the word “Halloweekend.” I applied the effect “Fly from Right.” and added sound to the text: the wav file “evilaff.gif. After this I used all blank slides. I inserted a picture on the right side and a text box on the left side. I then played with the effects. I added a different animation to each picture and each text box. I would then click on the Slide Show button and when the effect didn’t work the way I wanted I would go back into Custom Animation and go through all the tabs till I found out what wasn’t working. I wanted the effects to be for the most part automatic, with a mouse click advancing the slide. This is done in the Slide Show menu, clicking on Custom Animation and the Timing & Effects tab. You can decide what in a slide will have animation and in what order. You can also set the number of seconds between each animation. In this way you can have more than one picture appear in one slide. I discovered that to insert sound files I needed to go to the Insert menu and click on “Movie and Sounds.” From the Custom Animation window I could adjust when the music would play and for how many slides I wanted it to continue. It was here that I needed to indicate that I wanted the slide show to continue while the music was playing.
The Explanation - Part 3 After I finished the slides I added navigation arrows and recolored them by right-clicking and selecting “Format Autoshapes.” I had the arrows appear last on the screen so that the viewer wouldn’t click till everything on the slide had appeared. I think the biggest danger in PowerPoint is going overboard. I could have had text and pictures dancing all over the screen. I could have used every color under the rainbow. I had a little more leeway because my presentation was supposed to be entertaining and not exceptionally informational. I could see how a business audience could be distracted by an overly busy presentation. By the way, I learned one more Adobe Photoshop effect at the last minute. I wanted a link from the final slide of my presentation to this explanation. What better than a gravestone! I painted over the RIP on the original gravestone and figured out how to insert text into the image. I then learned how to make the picture a hyperlink so it could lead to this explanation. I tried to save this PowerPoint presentation as a webpage but it was not very successful. I suspect the presentation was too elaborate. The graphics did not move smoothly, the music was always two steps behind, and it would stop after one slide. I do not know if this presentation will work as well in PowerPoint 97 since I only have PowerPoint 2000. I hope so! But if you’re using ’97 and the presentation runs in fits and starts, see if you can track down a 2000 version to view it on. Hope you enjoyed it! Mo