Next-Gen Serial Connectivity Roadmap
690 likes | 763 Views
Explore the Virtex-6 GTX transceiver architecture, features, and clock resources for high-speed data transmission. Learn about advanced equalization, low latency, and power-efficient designs for PCIe and more.

Next-Gen Serial Connectivity Roadmap
E N D
Presentation Transcript
V6 GTX Gu Yongguo
Agenda • Transceiver Overview • Transceiver Roadmap • Virtex-6 GTX Table • Virtex-6 GTX Overview • Die Allocation • PLL • Clock resources • Virtex-6 GTX Architecture • Transmitter • Receiver • DRP • Virtex-6 GTX PCB
Transceiver OverviewNext-Generation Serial Connectivity Roadmap GTH Features: Highest Serial BW Advanced RX EQ I/O Speed 11.2 Gbps 10 Gbps 9.95 Gbps 6.5 Gbps GTX Advanced Rx EQ Low latency Low Power PCI Express IP GTXAdvanced Rx EQ Low latency Low Power PCI-Express PHY PCI Express IP Easy to Use 5 Gbps 3.125 Gbps GTPLow Power PCI-Express PHY PCI Express IP Easy to Use GTP Lowest Cost Low Power PCI-Express PHY PCI-Express IP Easy to Use 2.488 Gbps 614 Mbps 150 Mbps
Virtex-6 LXT & SXT 16 of 18 device-package combinations have transceivers
Agenda • Transceiver Overview • Transceiver Roadmap • Virtex-6 GTX Table • Virtex-6 GTX Overview • Die Allocation • Reference Clock • PLL • Virtex-6 GTX Architecture • Transmitter • Receiver • DRP • Virtex-6 GTX PCB
Transceiver OverviewVirtex-6 Transceivers - GTX • Available in Virtex-6 LXT, SXT and HXT • Range: 480 Mbps – 6.5 Gbps • Compliant to major protocol standards • Gigabit Ethernet, PCI Express Gen1 & Gen2, OC-48, XAUI, HD-SDI, OBSAI, CPRI, SRIO, FC-1/2/4, Interlaken, CEI-6 • OOB signaling for PCI Express • Built-in Linear EQ, DFE and Tx Pre-emphasis • Highly flexible clocking • Independent PLLs for TX and RX • Power dissipation: < 150 mW typ
Reference Clock • Easier than it looks • Intelligent Pin Selection • Connect IBUFDS_E1 to MGTREFCLKTX/RX[0] • Wizard will sort this out for you! • The wizard selections will make the correct connections • Includes north and south bound routes • Advanced Users: • Can use MUX connections to specify specific clock routes • Complex view available to assist in Clock Switching applications 2 Refclks cascade from North Quad 2 Refclks (RefClk0 and 1) from pins (Like Virtex-5) PERFCLK and GREFCLK From Fabric 2 Refclks cascade from South Quad
Clock Generation Comparison: • Virtex 5 GTP/GTX Clocking: • Virtex 6 Clocking:
Reference clock connectionSingle Clock Sharing • Note • Each external RefClk can feed up to 3 Quads (12 transceivers) • MGTRefclk directly from an external pin via IBUFDS Quad (n+1) Quad (n) MGTRefClk comes from local pins Quad (n-1)
PLL Selection: Typical Case • Upstream and downstream are same rate • XAUI • PCIe • Aurora • Most other protocols… • Power down TX PLL = Power Savings
PLL Selection: Fancy Case • Upstream and downstream are different rates! • HD-SDI • Transponder w/ FEC and w/o FEC rates • Additional Flexibility
GTX • Recall • MGTRefClk is local, so we select MGTREFCLKRX[0] • For Aurora, we use the same RefClk for TX and RX directions • TX PLL is powered down to save power Remember… This output used by both TX and RX MGTRefClk from local pins
Agenda • Transceiver Overview • Transceiver Roadmap • Virtex-6 GTX Table • Virtex-6 GTX Overview • Die Allocation • Reference Clock • PLL • Virtex-6 GTX Architecture • Transmitter • Receiver • DRP • Virtex-6 GTX PCB
TXUSRCLK INTERNAL GENERATION • TXUSRCLK tied to GND • TXUSRCLK is derived from TXUSRCLK2 • TXUSRCLK is not faster than TXUSRCLK2 • Internal divider only
Clock scheme Example2-Byte interface • TXUSRCLK is generated internally • 1 BUFG is saved • Internal and internal data widths are equal
Clock scheme Example4-Byte interface • WINT = WEXT • FTXUSRCLK2 = FTXUSRCLK / 2 • TXUSRCLK is generated externally by MMCM
Clock scheme Example1-Byte interface • FTXUSRCLK2 = FTXUSRCLK * 2 • TXUSRCLK is generated internally • 1 BUFG is saved
Clock scheme ExampleMulti-lanes with 2-Byte interface • Clock is same to single 2-byte application • But share among other lanes • Similar case to other interfaces
TXBUFFER • Remove phase difference between TXUSRCLK and XCLK • Can be bypassed for low latency application • Advanced and some complex
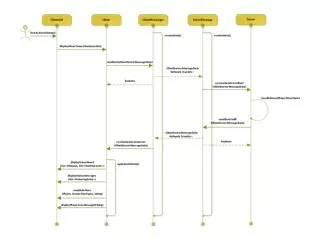
Buffer Bypass Steps • Set the following attributes with their values as follows: • Set TXOUTCLK_CTRL to use either TXPLLREFCLK_DIV2 or TXPLLREFCLK_DIV1 • Set TX_XCLK_SEL to TXUSR • Set TX_BUFFER_USE to FALSE • Set TX_PMADATA_OPT to TRUE • After power-on, make sure TXPMASETPHASE and TXENPMAPHASEALIGN are driven Low. • Make sure that the input port TXDLYALIGNDISABLE is driven High. • Apply GTXTXRESET and wait for TXRESETDONE to go High. • Wait for all clocks to stabilize, then assert TXDLYALIGNRESET for at least 16 TXUSRCLK2 clock cycles. • Drive TXENPMAPHASEALIGN High. • Keep TXENPMAPHASEALIGN High unless the phase-alignment procedure must be repeated. • Driving TXENPMAPHASEALIGN Low causes phase alignment to be lost. • Wait 32 TXUSRCLK2 clock cycles and then drive TXPMASETPHASE High. • Wait the number of required TXUSRCLK2 clock cycles as specified in Table 3-20, and then drive TXPMASETPHASE Low. The phase of the PMACLK is now aligned with TXUSRCLK. • Drive TXDLYALIGNDISABLE Low. • Optional: Keep TXDLYALIGNDISABLE High to disable the TX delay aligner.
Phase Re-alignment conditions • GTXTXRESET is asserted • TXPLLPOWERDOWN is deasserted • The clocking source changed • The line rate of the GTX TX transceiver changed
TXPOSTEMPHASIS • Control the Post-Cursor Preemphasis
TXPREEMPHASIS • Control the Pre-Cursor Preemphasis
RXEQMIX Setting • Determine the operating data rate. • Determine the channel loss (board) in dB at data rate/2. • This is the differential insertion loss from measured or extracted S-parameter data commonly referred to as Sdd21. • Pick the appropriate RXEQMIX setting from the relative gain plot. • Always make sure that the transmit amplitude is sufficient when picking modes with a higher gain because there is DC attenuation of the signal. Reference the absolute gain plot. • Based on these results, the appropriate setting of RXEQMIX can be picked.
RX CDR • Edge Sampler • Detect the Eye edge • Data Sampler • Real Data Sampling Point • Scan Sampler • For Margin
CDR Lock Detection • Finding known data in the incoming data stream (for example, commas or A1/A2 framing characters). • Several consecutive known data patterns must be received without error to indicate a CDR lock. • Using the LOS state machine • Incoming data is 8B/10B encoded • If CDR is locked, the LOS state machine moves to the SYNC_ACQUIRED state and stays there.