Scanning Answer Sheets
If you've administered your assessments, you're ready to scan your answer sheets for test scoring and result access. This presentation guides you through the essential scanning steps. Follow the instructions and use the Edusoft Grader to ensure your sheets are correctly processed. If you encounter issues, consult your Microsystems Technician or reach out to our Help Desk at 866-433-8763 for support. Let’s get started!

Scanning Answer Sheets
E N D
Presentation Transcript
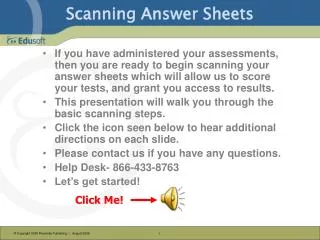
Scanning Answer Sheets • If you have administered your assessments, then you are ready to begin scanning your answer sheets which will allow us to score your tests, and grant you access to results. • This presentation will walk you through the basic scanning steps. • Click the icon seen below to hear additional directions on each slide. • Please contact us if you have any questions. • Help Desk- 866-433-8763 • Let’s get started! Click Me!
Step #1: Find the Grader Software Find the shortcut for the Edusoft Grader, usually placed on the desktop. If there is no shortcut, verify that the grader software has been loaded. Click the document for directions and consult with your Microsystems Technician, MST. Call our Help Desk for support: 866-433-8763 option 2
Step #2: Log into the Grader Type your Edusoft username and password to log into the grader. It is the same one you use to log into the website. If you need assistance, please contact our Help Desk at 866-433-8763 option 2. Click Me!
Step #3: Load the Answer Sheets Note: Make sure the answer sheets are facing up! Click the scan button on the screen- not the actual scanner. Click Me!
Step#6: Continue scanning next batch OR click View Results if you are finished scanning
Step#7: View the Grading Session Pages Scanned Tests Graded And Assigned To Students Tests Graded
Step #8: Resolve errors, if necessary Click Here
Step#9: Follow instructions on the screen to solve any errors- see samples on next few slides… Why the answer sheet failed to grade
What Happened? Paulo forgot To bubble His name
Resolving the Answer Sheet How to Resolve this Error
Select the Correct Student Select Paolo from the list
Page Has Been Regraded To Return To List And Fix Other Answer Sheets
Return to Grading Status Page Paulo’s Answer Sheet Graded
Final Notes: • You may add students to the roster if they are new to your site. Contact your school site administrator for assistance with this feature. Only school site admins have the permission to use the “Add A Student” function. • Once you have data for every child who took the test, you are finished with scanning and resolving.
Customer Assistance For immediate assistance: • Click the Contact Us Button from www.edusoft.com • Edusoft Help Desk: 866-433-8762 x 2 • E-Mail: help@edusoft.com