Troubleshooting
Troubleshooting. What is Troubleshooting?. A logical, systematic process to determine: “ What " happened? “ W hy " it happened? A method to develop effective repairs based on this knowledge. Why Troubleshoot?. To prevent repeated incidents of equipment failure.

Troubleshooting
E N D
Presentation Transcript
What is Troubleshooting? • A logical, systematic process to determine: • “What" happened? • “Why" it happened? • A method to develop effective repairs based on this knowledge
Why Troubleshoot? • To prevent repeated incidents of equipment failure
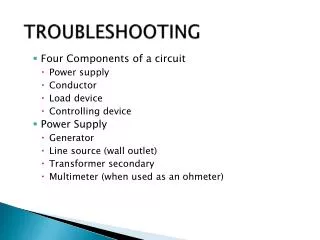
Most Common Types of Failure • Installation/Training (25%) • Devices that were never installed, user error, user training or working but not in service • Plumbing (19%) • Valves, tubes, leaks, sponges, filters, flow adjustments and inflating bulbs and bladders, descaling • Electrical (18%) • Patient ESU plates, contacts, light bulbs, switches, cables, temperature meters, relays, simple wiring, wall outlets • Mechanical (18%) • Screws or adjustments, mechanical lamp adjustments, lubrication, rusted parts, cases, boxes and enclosures • Power Supply (14%) • Circuit breakers, fuses, wall plugs, transformers, batteries, battery chargers, battery backup, power resistors, power regulators
Five Steps of Troubleshooting • Preparation • Step 1: Observation • Step 2: Define Problem Area • Step 3: Identify Possible Causes • Step 4: Determine Most Probable Cause • Step 5: Test and Repair • Follow-up
Preparation: • Familiarize yourself with safety rules & procedures for equipment • Personal Protective Equipment (PPE) • Gloves, lab coats, eye protection, etc. • Check PPE for defects or tears • Replace torn or defective PPE with new PPE • DO NOT reuse disposable equipment • Dispose of contaminated or used PPE properly • Blood and Bodily Fluid Safety • Blood & bodily fluids should never touch skin, eyes, or mouth • Use disposable gloves • Store soiled items in a plastic bag • Wash hands after removing PPE • Electrical Safety • Turn off power • Ground yourself • Use gloves when appropriate • Note: Medical devices come in contact with all types of contaminated material; always wear PPE when troubleshooting
Preparation • Gather information about the equipment and the problem • Understand the design and proper operation of the equipment • If available, obtain service and operation manuals • Draw out or locate schematic of device • Obtain and review history records to check for any recurring problems
Step 1: Observation • “What Happened?” • Observe state of all components, for example: • Relays energized or not • Which lamps are lit • Auxiliary equipment running or not • Look for obvious visual clues to the cause • Evidence of mechanical damage: • Impact • Chafed wires • Loose components • Parts lying in bottom of cabinet • Overheating • Wiring • Relay coils • Printed circuit boards • Often times, observation and logic can pinpoint damaged component with little testing
Step 1: Observation • Do not forget your other senses • Smell • Burned insulation/wiring • Sound • To find the problem area • Can indicate mechanical failures • Touch (Carefully!) • Hot areas indicate over heating • Test the operation of all of the equipment’s features • Note any non-functional feature in detail
Step 1: Observation • Pay attention to problem areas from past report history • Caution! Do not let these mislead you. They are not necessarily the problem you are looking for now • Also, do not take reported problems as fact. Always check for yourself if possible. The person reporting the problem may not have described it properly or may have made their own incorrect assumptions
Step 2: Define Problem Area • Apply logic and reasoning to define the problem area • Use observations of which parts work and which do not • Continue to rule out parts until you are left with only faulty parts that could cause the symptoms you observe
Step 2: Define Problem Area - Circuit Testing • Obtain schematic diagram of the circuit • For each observation ask, “What does this tell me about the circuit operation?" • Start with whole circuit board as problem area and work down to smaller areas • If observation indicates a section of circuit is operating properly, eliminate it as a problem • Make sure to mark eliminations on schematic for record keeping • For example: • If circuit board has nothing to do with the problem (i.e. a cracked rotor), it can be ruled out • If the observed problem is that a power light will not turn on, you can rule out all sections of the circuit board that have no effect on that specific LED
Step 3: Identify Possible Causes • Identify all possible causes of the malfunction • Typically, every component in the problem area • Use your initial observations • Write down every possibility, no matter how remote • In step four, these will be ranked by probability of occurrence
Step 4: Determine Most Probable Cause • Rank list possible causes in order of probability • Components that burn out or wear out • Mechanical switches • Relay contacts • Light bulbs • Fuses • Remember: Fuses burn out for a reason; find out why before replacing them • Components that generate heat over time • Coils • Motors • Transformers • Others devices with windings • Connections • Screws • Bolts • Connections exposed to vibrations • Note: Loosening causes high resistance which leads to overheating • Defective wiring • Wire insulation • Incorrect wiring • Note: especially on a new piece of equipment.
Step 4: Determine Most Probable Cause • It is not very likely for two components to fail at the same time • Start by looking for one faulty component as the culprit • Keep in mind, while improbable, it is still possible to have multiple problems
Step 5: Test and Repair • In ranked order from step four, test function of each component • For example: • Rotor speed • Electrical resistance • Electrical connection • First use careful inspection and analysis • Next use test instruments: • General (e.g. multimeters) • Specialty • Tachometers • Flow meters • Oxygen monitors
Step 5: Test and Repair • Taking meter readings • Always predict what the value should be before measuring • Use circuit schematic to determine normal meter reading • Any variation in reading indicates that part of the circuit is being affected by the fault • The problem area can include a large area of the circuit • Use a “divide and eliminate” testing approach to eliminate larger sections of the circuit
Step 5: Test and Repair • Once the cause(s) is determined, replace the defective component • After replacing the component: • Test all features of the circuit/device • Make sure proper component was replaced • Ensure no other faults in the circuit/device • It can be very embarrassing to tell the customer that you have repaired the problem only to have her immediately find another problem with the equipment
Follow-Up • Although not an official step, follow-up should be done once the equipment has been repaired and put back in service • Try to determine the reason for the malfunction • Did the component fail due to age? • Did the environment the equipment operates in cause excessive corrosion? • Are there wear points that caused the wiring to short out? • Did it fail due to improper use? • Is there a design flaw that causes the same component to fail repeatedly? • Many organizations have their own follow-up documentation and processes to minimize further failures
Follow-Up • If human performance (or user error) was the problem, steps must be taken to train users • Interview users to find out where confusion occurs
Example: • A centrifuge begins to smoke and eventually catches fire
Preparation • Put out fire • Gather tools and manuals for centrifuge • Put on gloves and other protective equipment (eyewear, etc) • Unplug centrifuge
Step 1: Observe • You open the case of the centrifuge and see the ball bearing in the motor is melted • You smell melted plastic
Step 2: Define Problem Areas • It looks like the melted components are all in the motor and there appears to be no burning or scorching in the electronics • Therefore, the problem area is most likely the motor
Step 3: Identify Possible Causes • Lubrication problems • Loading problems • Misalignment problems • Clearance problems • Friction problems
Step 4: Determine Most Probable Cause • If, through observation, you see that there is no lubricant on the motor, you might conclude that insufficient lubricant is the most probable cause • If, through observation, you see that the rotation of the centrifuge is not even (it wobbles), you might conclude that misalignment is the most probable cause
Step 5: Test and Repair • Test (examine) the motor for sufficient lubrication. If this is the problem, lubricate motor, reassemble, and test the centrifuge • Test (examine) rotor’s rotational alignment. If this is the problem, realign the rotor, replace the bearing, reassemble, and test the centrifuge
Follow Up • If, through review of the documentation, you notice that centrifuges regularly fail because of inadequate lubrication, you might create a program to lubricate them on a more regular basis to mitigate the recurring issue
Your Turn! • A centrifuge begins to smoke and eventually catches fire. • In step 1, you observe that the circuit board appears burned while the motor appears undamaged • Continue through steps 2-5 of the troubleshooting process to brainstorm how you would solve the problem
Process • Step 2: Define Problem Areas • Area of circuit board that is burned and all connecting areas • Step 3: Identify Possible Causes • Resistors, capacitors, grounding, bridge rectifiers • Step 4: Determine Most Probable Cause • Bridge rectifiers, capacitors/resistors, grounding • Step 5: Test and Repair • Test that bridge rectifier and capacitors are not continuous • Test that resistors are continuous (unless very high resistance) • Test that all parts are grounded) • Step 6: Follow Up • Schedule more routine preventive maintenance to detect these problems earlier
What if you can’t determine or don’t know any possibilities? • Use pre-developed and/or existing checklists that contain the most common problem symptoms and causes • These checklists are often found in the user’s and service manuals
Additional References • How to Troubleshoot like an Expert- A Systematic Approach • Warren Rhude • Equipment Troubleshooting • Andrew Marquardt