Download
1 / 82
820 likes | 937 Views
Access Chapter 3. Maintaining a Database. Objectives. Add, change, and delete records Search for records Filter records Update a table design Format a datasheet Use action queries to update records. Objectives. Specify validation rules, default values, and formats

E N D
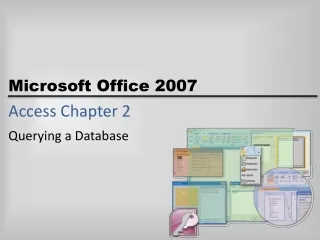
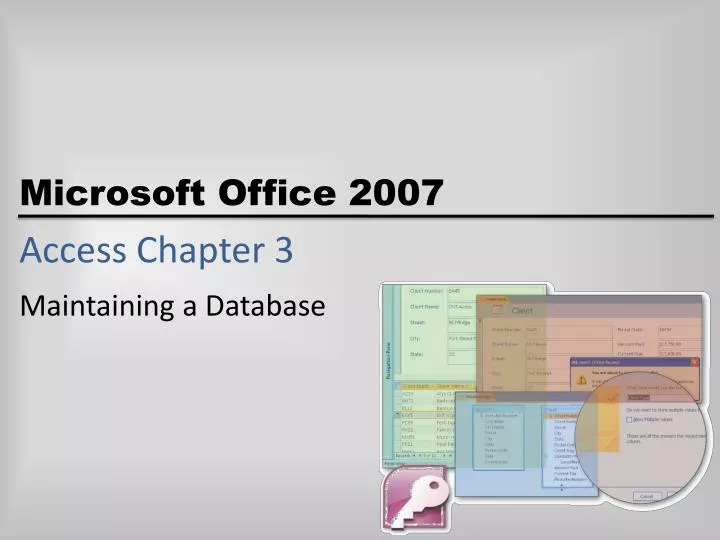
Access Chapter 3 Maintaining a Database
Objectives • Add, change, and delete records • Search for records • Filter records • Update a table design • Format a datasheet • Use action queries to update records Microsoft Office 2007: Introductory Concepts and Techniques
Objectives • Specify validation rules, default values, and formats • Create and use single-valued and multivalued Lookup fields • Specify referential integrity • Use a subdatasheet • Sort records Microsoft Office 2007: Introductory Concepts and Techniques
Plan Ahead • Determine when it is necessary to add, change, or delete records in a database • Determine whether you should filter records • Determine whether additional fields are necessary or whether existing fields should be deleted • Determine whether validation rules, default values, and formats are necessary • Determine whether changes to the format of a datasheet are desirable • Identify related tables in order to implement relationships between the tables Microsoft Office 2007: Introductory Concepts and Techniques
Starting Access • Click the Start button on the Windows taskbar to display the Start menu • Point to All Programs on the Start menu to display the All Programs submenu and then point to Microsoft Office on the All Programs submenu to display the Microsoft Office submenu • Click Microsoft Office Access 2007 on the Microsoft Office submenu to start Access and display the Getting Started with Microsoft Office Access window • If the Access window is not maximized, click the Maximize button on its title bar to maximize the window Microsoft Office 2007: Introductory Concepts and Techniques
Opening a Database • With your USB flash drive connected to one of the computer’s USB ports, click the More button to display the Open dialog box • If necessary, click the Look in box arrow and then click UDISK 2.0 (E:) to select the USB flash drive, in the Look in list as the new open location. (Your drive letter might be different.) • Click JSP Recruiters to select the file name Microsoft Office 2007: Introductory Concepts and Techniques
Opening a Database • Click the Open button to open the database • If a Security Warning appears, click the Options button to display the Microsoft Office Security Options dialog box • Click the Enable this content option button • Click the OK button to enable the content Microsoft Office 2007: Introductory Concepts and Techniques
Creating a Simple Form • Show the Navigation pane if it is currently hidden • If necessary, click the Client table in the Navigation pane to select it • Click Create on the Ribbon to display the Create tab • Click the Form button on the Create tab to create a simple form • Click the Form View button to display the form in Form view Microsoft Office 2007: Introductory Concepts and Techniques
Creating a Simple Form Microsoft Office 2007: Introductory Concepts and Techniques
Using a Form to Add Records • Click the New (blank) record button on the Navigation bar to enter a new record, and then type the data for the new record as shown on the following slide. Press the TAB key after typing the data in each field, except after typing the data for the final field (Recruiter Number) • Press the TAB key to complete the entry of the record • Click the Close ‘Client’ button to close the Client form • Click the No button when asked if you want to save your changes Microsoft Office 2007: Introductory Concepts and Techniques
Using a Form to Add Records Microsoft Office 2007: Introductory Concepts and Techniques
Searching for a Record • Right-click Client Form in the Navigation pane and click Open on the shortcut menu to open the form in Form view • Hide the Navigation pane • Click the Find button on the Home tab to display the Find and Replace dialog box • Type MH56 in the Find What text box • Click the Find Next button in the Find and Replace dialog box to find client MH56 • Click the Cancel button in the Find and Replace dialog box to remove the dialog box from the screen Microsoft Office 2007: Introductory Concepts and Techniques
Searching for a Record Microsoft Office 2007: Introductory Concepts and Techniques
Updating the Contents of a Record • Click in the Client Name field in the datasheet for client MH56 after the letter M to select the field • Press the DELETE key twice to delete the letters au • Type the letters un after the letter M • Press the TAB key to complete the change and move to the next field Microsoft Office 2007: Introductory Concepts and Techniques
Updating the Contents of a Record Microsoft Office 2007: Introductory Concepts and Techniques
Deleting a Record • With the Client Form open, click the record selector in the datasheet (the small box that appears to the left of the first field) of the record on which the client number is EA45 • Press the DELETE key to delete the record • Click the Yes button to complete the deletion • Close the Client Form by clicking the Close ‘Client Form’ button Microsoft Office 2007: Introductory Concepts and Techniques
Deleting a Record Microsoft Office 2007: Introductory Concepts and Techniques
Using Filter By Selection • Open the Client form and hide the Navigation pane • Click the City field on the first record in the datasheet portion of the form to select Berridge as the city • Click the Selection button on the Home tab to display the Selection menu • Click Equals “Berridge” to select only those clients whose city is Berridge Microsoft Office 2007: Introductory Concepts and Techniques
Using Filter By Selection Microsoft Office 2007: Introductory Concepts and Techniques
Toggling a Filter • Click the Toggle Filter button on the Home tab to toggle the filter and redisplay all records Microsoft Office 2007: Introductory Concepts and Techniques
Using a Common Filter • Be sure the Home tab is selected • Click the City arrow to display the common filter menu • Point to the Text Filters command to display the custom text filters • Click Begins With to display the Custom Filter dialog box Microsoft Office 2007: Introductory Concepts and Techniques
Using a Common Filter • Type Ber as the City begins with value • Click the OK button to filter the records • Click the Toggle Filter button on the Home tab to toggle the filter and redisplay all records Microsoft Office 2007: Introductory Concepts and Techniques
Using a Common Filter Microsoft Office 2007: Introductory Concepts and Techniques
Using Filter By Form • Click the Advanced button on the Home tab to display the Advanced menu • Click Clear All Filters on the Advanced menu to clear the existing filter • Click the Advanced button on the Home tab to display the Advanced menu a second time • Click Filter By Form on the Advanced menu Microsoft Office 2007: Introductory Concepts and Techniques
Using Filter By Form • Click the Postal Code field, click the arrow that appears, and then click 80330 • Click the Amount Paid field, click the arrow that appears, and then click 0 • Click the Toggle Filter button on the Home tab to apply the filter Microsoft Office 2007: Introductory Concepts and Techniques
Using Filter By Form Microsoft Office 2007: Introductory Concepts and Techniques
Using Advanced Filter/Sort • Click the Advanced button on the Home tab to display the Advanced menu, and then click Clear All Filters on the Advanced menu to clear the existing filter • Click the Advanced button on the Home tab to display the Advanced menu a second time • Click Advanced Filter/Sort on the Advanced menu • Expand the size of the field list so all the fields in the Client Table appear • Include the Client Number field and select Ascending as the sort order Microsoft Office 2007: Introductory Concepts and Techniques
Using Advanced Filter/Sort • Include the Postal Code field and enter 80330 as the criterion • Include the Amount Paid field and enter 0 as the criterion in the Criteria row and >20000 as the criterion in the Or row • Click the Toggle Filter button on the Home tab to toggle the filter and view the results. Click the Client Form tab to view the Client table • Click Clear All Filters on the Advanced menu • Close the Client Form Microsoft Office 2007: Introductory Concepts and Techniques
Using Advanced Filter/Sort Microsoft Office 2007: Introductory Concepts and Techniques
Adding a New Field • Show the Navigation pane, and then right-click the Client table to display a shortcut menu • Click Design View on the shortcut menu to open the Client table in Design view • Click the row selector for the Amount Paid field, and then press the INSERT key to insert a blank row above the Amount Paid row • Click the Field Name column for the new field. If necessary, erase any text that appears • Type Client Type as the field name and then press the TAB key Microsoft Office 2007: Introductory Concepts and Techniques
Adding a New Field Microsoft Office 2007: Introductory Concepts and Techniques
Creating a Lookup Field • If necessary, click the Data Type column for the Client Type field, and then click the arrow to display the menu of available data types • Click Lookup Wizard, and then click the ‘I will type in the values that I want.’ option button to indicate that you will type in the values • Click the Next button to display the next Lookup Wizard screen • Click the first row of the table (below Col1), and then type MED as the value in the first row • Press the DOWN ARROW key, and then type DNT as the value in the second row Microsoft Office 2007: Introductory Concepts and Techniques
Creating a Lookup Field • Press the DOWN ARROW key, and then type LAB as the value in the third row • Click the Next button to display the next Lookup Wizard screen • Ensure Client Type is entered as the label for the lookup column and that the Allow Multiple Values check box is NOT checked • Click the Finish button to complete the definition of the Lookup Wizard field Microsoft Office 2007: Introductory Concepts and Techniques
Creating a Lookup Field Microsoft Office 2007: Introductory Concepts and Techniques
Adding a Multivalued Field • Click the row selector for the Amount Paid field, and then press the INSERT key to insert a blank row • Click the Field Name column for the new field, type Specialties Needed as the field name, and then press the DOWN ARROW key • Click the Data Type column for the Specialties Needed field, and then click Lookup Wizard in the menu of available data types to start the Lookup Wizard • Click the ‘I will type in the values that I want.’ option button to indicate that you will type in the values • Click the Next button to display the next Lookup Wizard screen • Click the first row of the table (below Col1), and then type CLS as the value in the first row Microsoft Office 2007: Introductory Concepts and Techniques
Adding a Multivalued Field • Enter the remaining values from the first column in Table 3–1 on page AC 160. Before typing each value, press the TAB key to move to a new row • Click the Next button to display the next Lookup Wizard screen • Ensure Specialties Needed is entered as the label for the lookup column • Click the Allow Multiple Values check box to allow multiple values • Click the Finish button to complete the definition of the Lookup Wizard field Microsoft Office 2007: Introductory Concepts and Techniques
Saving the Changes and Closing the Table • Click the Save button on the Quick Access Toolbar to save the changes • Click the Close ‘Client’ button Microsoft Office 2007: Introductory Concepts and Techniques
Using an Updated Query • Create a new query for the Client table • Click the Update button on the Design tab, double-click the Client Type field to select the field, click the Update To row in the first column of the design grid, and then type MED as the new value • Click the Run button on the Design tab to run the query and update the records • Click the Yes button to make the changes Microsoft Office 2007: Introductory Concepts and Techniques
Using an Updated Query Microsoft Office 2007: Introductory Concepts and Techniques
Using a Delete Query • Clear the grid • Click the Delete button on the Design tab to make the query a Delete query • Double-click the Postal Code field to select the field • Click the Criteria row for the Postal Code field and type 80412 as the criterion Microsoft Office 2007: Introductory Concepts and Techniques
Using a Delete Query • Run the query by clicking the Run button • Click the Yes button to complete the deletion • Close the Query window. Do not save the query Microsoft Office 2007: Introductory Concepts and Techniques
Specifying a Required Field • Show the Navigation pane, and then open the Client table in Design view • Select the Client Name field by clicking its row selector • Click the Required property box in the Field Properties pane, and then click the down arrow that appears • Click Yes in the list Microsoft Office 2007: Introductory Concepts and Techniques
Specifying a Required Field Microsoft Office 2007: Introductory Concepts and Techniques
Specifying a Range • Select the Amount Paid field by clicking its row selector, click the Validation Rule property box to produce an insertion point, and then type >=0 and <=100000 as the rule • Click the Validation Text property box to produce an insertion point, and then type Must be at least $0.00 and at most $100,000 as the text Microsoft Office 2007: Introductory Concepts and Techniques
Specifying a Range Microsoft Office 2007: Introductory Concepts and Techniques
Specifying a Default Value • Select the Client Type field. Click the Default Value property box to produce an insertion point, and then type =MED as the value Microsoft Office 2007: Introductory Concepts and Techniques
Specifying a Collection of Allowable Values • Make sure the Client Type field is selected • Click the Validation Rule property box to produce an insertion point and then type =MED or =DNT or =LAB as the validation rule • Click the Validation Text property box and then type Must be MED, DNT, or LAB as the validation text Microsoft Office 2007: Introductory Concepts and Techniques
Specifying a Collection of Allowable Values Microsoft Office 2007: Introductory Concepts and Techniques
Specifying a Format • Select the Client Number field • Click the Format property box and then type > Microsoft Office 2007: Introductory Concepts and Techniques
Saving the Validation Rules, Default Values, and Formats • Click the Save button on the Quick Access Toolbar to save the changes • Click the No button to save the changes without testing current data • Close the Client table Microsoft Office 2007: Introductory Concepts and Techniques