Download
1 / 18
180 likes | 374 Views
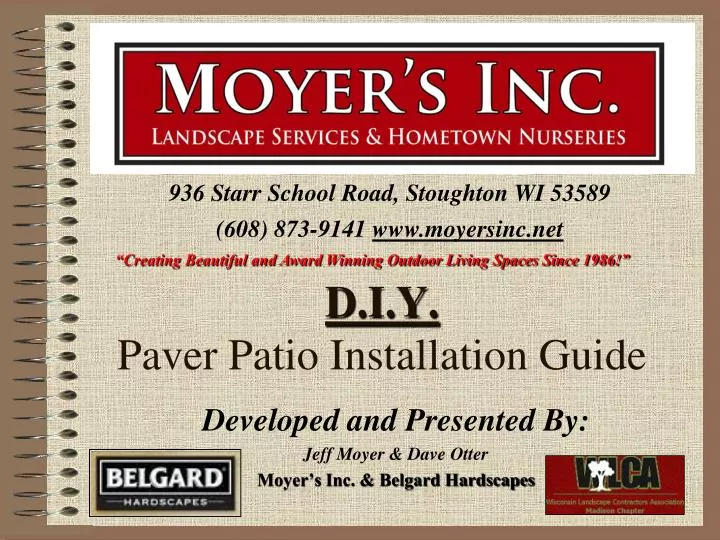
D.I.Y. Paver Patio Installation Guide. 936 Starr School Road, Stoughton WI 53589. (608) 873-9141 www.moyersinc.net. “Creating Beautiful and Award Winning Outdoor Living Spaces Since 1986!”. Developed and Presented By: Jeff Moyer & Dave Otter Moyer’s Inc. & Belgard Hardscapes.

E N D
D.I.Y. Paver Patio Installation Guide 936 Starr School Road, Stoughton WI 53589 (608) 873-9141 www.moyersinc.net “Creating Beautiful and Award Winning Outdoor Living Spaces Since 1986!” Developed and Presented By: Jeff Moyer & Dave Otter Moyer’s Inc. & Belgard Hardscapes
Meet The Presenters: • Jeff Moyer • Moyer’s Inc. CEO & V.P. • Second Generation Family Business Owner • UW-Platteville Alumnus (B.S. Ornamental Horticulture & Business) • Member WLCA, WGIF & MNLA • (Current State Board Member) • National Cert. Level 1 ICPI Installer • National Cert. Level 1 NCMA Installer • National Horticulture Honor Society Member • World Class Award Finalist and Winner (2010 & 2011) • WMA Nominee and Winner (2011 & 2012) • Dave Otter • Northfield Block Belgard Territory Sales Manager • 10 Years Professional Lead Design Experience • Associates Degree – Milwaukee Area Technical College (Landscape Design & Construction) • Member WLCA, WGIF & MNLA • National Cert. Level 1 ICPI Installer • National Cert. Level 1 NCMA Installer • Current Hardscape Industry Professional Educator and In-Field Trainer. • Involved in several Industry Related Quality Assurance Panels and Awards Judging Ceremonies.
Let’s Get Started… • You’re going to need some important tools in order to accomplish your patio with less headaches and potentially costly mistakes.
Location and Size of Desired Patio • After you have acquired the necessary tools and equipment needed to accomplish the construction of your patio its time to get its potential size and dimensions. • It helps to mark out your desired patio with yard paint, garden hose or rope to foresee the future size and shape of your patio professionally designed by Moyer’s Inc. • Get the length, width, and depth of entire base. • These dimensions will help you figure the quantity of materials that will be needed to install your patio. Moyer’s Landscape Services & Hometown Nurseries, Inc.
Materials Needed • Besides the important tools and equipment that you’ll need to get started; there are some other very important materials you’ll need to construct your paver patio. • These materials include (but are not always limited to): Landscape Fabric Underlayment Compaction Stone Base Aggregate Torpedo Screed Sand Belgard Pavers of Choice Polymeric Joint Stabilizing Sand Paver Edge Restraint w/ Stakes or Nails Cleaning and Sealant Material(if desired) Moyer’s Landscape Services & Hometown Nurseries, Inc.
L x W x H • Now that you have your dimensions you can apply them to calculate the amount of material you’ll need. • Keep in mind that most of our dimensional measurements are made in linear feet. However, most base material is ordered by the cubic yard or ton. You will need to make some mathematical conversions to come up with our “landscape friendly” orders. NOTE: The professional landscape supply staff at Moyer’s Inc. are happy to help you calculate and deliver your accurate material quantities! • Here is an easy conversion to keep in mind: For converting cubic feet into cubic yards take your length x width x height (in feet) and divide it by 27 (to give you the actual volume in cubic yards). Example (Calculation Compaction Stone Base): 16 ft. x 12 ft. x .5 ft = 96 Cubic Feet 96 Cu. Ft. / 27 = 3.56 Cubic Yards (or just over 3.5 Cu. Yds. Of Compaction Stone Base Material) Moyer’s Landscape Services & Hometown Nurseries, Inc.
Order Your Material • Contact Moyer’s Hometown Nurseries and Landscape Services, Inc. for all of your hardscaping supply needs. • We supply all of your base materials and offer a wide variety of paver types and styles to chose from. Just give us a ring, stop by or check us out on the web! MOYER’S INC. 936 Starr School Rd. Stoughton, WI 53589 Phone: 608-873-9141 Fax: 608-873-9414 www.moyersinc.net
Excavation • The excavation of your base should exceed at least six (6) inches beyond the predetermined size of your patio on all sides. This “over excavation” allows for strength and stability of pavers, drainage, and room for slight adjustment of actual finished size of your patio. • Depth of patio base excavation is determined by sub soil conditions, patio usage (driveway, patio, retention, etc.), and building / structural obstacles. A standard to go by is assuming that your pavers will be between 2” – 3” thick, your total excavation depth should be 9-10”. This takes into account a 6’’ compaction stone base, an approximately ½’’ screed sand base, and a 2” – 3” thick paver. • A string line and / or painted markings help insure your excavation remains accordingly to how you want your patio to finish. • After the base is excavated to the proper depth, it is very important to compact the sub soil with the use of a jumping jack or vibratory plate compactor to insure there are no voids in the existing soil. NOTE: Compact sub-base to 95% Proctor Density! Moyer’s Landscape Services & Hometown Nurseries, Inc.
Base Materials Installation • Install your fabric underlayment. This fabric does not act as a weed barrier! It is a semi-permeable barrier separating the compacted sub soil from the compaction base material. It also acts as soil stabilizer; strengthening the base and increasing the longevity of your patio. • After the fabric underlayment is installed, begin adding your compaction stone material (3/4’’ crushed aggregate w/ fines) in lifts of 2 inches, leveling and compacting properly between each lift. Do this step until you have a minimum 6 inch compacted base. You will need to dampen the compaction to gain a proper moisture level for proper compaction rates. to 985 Proctor Den NOTE: Compact the base aggregate to 98% Proctor Density. Moyer’s Landscape Services & Hometown Nurseries, Inc.
Setting Your Level and Pitch • Compacting your stone base is not the only task that is crucial while setting the base for your patio. While setting your lifts of compaction stone you should also be leveling the stone according to your predetermined pitch (different patio applications may require different pitch ratings). Pitch is what determines water runoff and flow which is very important for outdoor structures. By setting your level and pitch as you build the base upward you’re decreasing the possibility of errors that can occur while setting the screed levels. Moyer’s Landscape Services & Hometown Nurseries, Inc.
Master of the SCREED… • Now that you’ve set the stone base properly, with sufficient compaction and, of course, setting the correct slope and pitch, the easy part is done! • You now need to spread a layer of screed sand evenly over the compacted stone base not exceeding 1 inch. This sand will be leveled, and compacted as the final base prior to laying your pavers… this is very crucial to the outcome of your patio! Screed the sand with a manufactured screed board or a very plum and straight 2 x 4’’ board. While screeding, perform your strokes in a “cross pattern” action or perpendicular to one another to insure that all areas have been smoothed level. • NOTE: It helps to use ½” conduit as a screed guide over top of your base aggregate for your board to run across. This tool keeps your screed layer consistent and limits human error! Moyer’s Landscape Services & Hometown Nurseries, Inc.
It’s Paver Laying Time! • Okay, now the hard part is over… The base has been excavated, compacted, stone set, pitched and leveled and the sand has been screeded. • The key to successfully completing the laying process is bribery and Advil! It helps to have several people involved to carry pavers to a person who can lay out the desired pattern. This makes the laying process efficient and saves a bit on the back and knees if you’re caught having to haul and lay pattern yourself. • It is best to start a “square point,” when laying out the pavers. Usually a house corner or door entrance is a great starting point. • NOTE: Feel free to consult your Moyer’s Inc. Professional staff member and your Belgard Product Resource Guide for patterns and layout instructions! Moyer’s Landscape Services & Hometown Nurseries, Inc.
Paver Edge Restraint • After laying the main body of your patio and cutting pavers to meet the shape and style you desire, it’s time to install the edging restraint. This helps to “hold your patio in place.” It is a strength and stability application the allows interlocking pavers to interlock and do their jobs. • It is recommended to use a sturdy, rigid PVC edge restraint secure with heavy nails or stakes. NOTE: Contact Moyer’s Inc. for prices on the best hardscaping products in the market! Moyer’s Landscape Services & Hometown Nurseries, Inc.
Polymeric Joint Sand • Now that the pavers have been secured with a sturdy PVC edge restraint you can sweep in the interlocking bonding agent. Polymeric sand is a bonding sand that “grouts” the pavers and adds to the patio’s strength and stability, but also makes the pavers “pop” with a beautiful outlined appearance all while eliminating potential weeds, insects and moss / mold! • NOTE: Properly installing and curing polymeric sand takes care and patience. Remember to read all product labels and follow directions diligently! Moyer’s Landscape Services & Hometown Nurseries, Inc.
Finish The Project! • Generally, most patio applications will require backfilling of topsoil to meet the new grade of the patio. There are many clean up and finish duties involved that can be very time consuming, however, they are important to the longevity and appearance of the patio and will allow you to enjoy your patio retreat for years to come! NOTE: Contact Moyer’s Inc. for delivery of your finishing materials such as pulverized topsoil, seed / sod, straw matting, and beautiful trees and shrubs to compliment your new outdoor living space! • Below is a ‘Design Construction Detail’ of a proper paver base and finished application for your reference: Moyer’s Landscape Services & Hometown Nurseries, Inc.
Enjoy Your Patio! www.moyersinc.net
Proper Paver Patio Installation Guide References / Contact Info: • Jeff Moyer (CEO & V.P.) Moyer’s Landscape Services & Hometown Nurseries, Inc.: Jeff.Moyer@moyersinc.net • Dave Otter (Sales Representative) Belgard Hardscapes: David.Otter@oldcastle.com • Moyer’s Landscape Services & Hometown Nurseries, Inc.: www.moyersinc.net • Belgard Hardscapes: www.belgard.biz • Interlocking Concrete Pavement Institute (ICPI): www.icpi.org • National Concrete Masonry Association (NCMA): www.ncma.org • Wisconsin Masonry Alliance: www.wma-online.org • Wisconsin Landscape Contractors Association – Madison Chapter: www.landscapemadison.com Moyer’s Landscape Services & Hometown Nurseries, Inc.