Download
1 / 8
80 likes | 273 Views
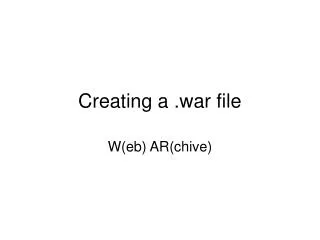
Creating a FNMA 1003 V.3.2 .txt file that can be uploaded and submitted to emasshousing.com. PART 1. Exporting a 1003 file from FannieMae’s DU or DO system to your computer.

E N D
Creating a FNMA 1003 V.3.2 .txt file that can be uploaded and submitted to emasshousing.com PART 1. Exporting a 1003 file from FannieMae’s DU or DO system to your computer. • In order to upload a 1003 file to emasshousing.com you need to save the 1003 file on your computer (in this example it will be saved to your desktop) as a text document. • The 1003 must be a Version 3.2 file format. • If the 1003 file is created on your loan origination system (LOS), you will need to check with your LOS vendor to ensure the 1003 file format is the correct version. • If your 1003 file was created in FNMA’s Desktop Underwriter (DU) or Desktop Originator (DO) when you export the file, you need to be sure to select v3.2 as your format. • Slides 2 through 8 explain how to export a loan file from DU/DO. • To continue learning about 1003 uploads please read: • Part 2: Upload the exported text file to emasshousing.com • Part 3: Complete the first submission of a 1003 file to emasshousing.com • Part 4: Complete the resubmission of a 1003 file to emasshousing.com
Part 1: Exporting a 1003 file from FannieMae’s DU or DO system to your computer. Your first step is to log into DU or DO and navigate to your Loan List screen. Step 1. Click the Borrower name for the loan you want to export. In this example we are exporting the “Test” loan.
Part 1: Exporting a 1003 file from FannieMae’s DU or DO system to your computer. • Step 2. The Loan Information screen appears. • Click Export Loan in the navigation bar.
Part 1: Exporting a 1003 file from FannieMae’s DU or DO system to your computer. • Step 3. The Export Loan screen appears. • Make sure file version 3.2 is selected. • Click Export.
Part 1: Exporting a 1003 file from FannieMae’s DU or DO system to your computer. • Step 4. The Download File link appears on the screen. • RIGHT CLICK the Download File link (that is, click on the Download File link with your right mouse button). • Click Save Target As in the shortcut menu that appears.
Part 1: Exporting a 1003 file from FannieMae’s DU or DO system to your computer. • Step 5. The Save As window will appear. • Make sure the Save In dropdown has DESKTOP selected. If Desktop is not selected, you can click the down arrow, find and select Desktop. • Make sure the Save as Type has Text Document Selected. If Text Document is not selected, you can click the down arrow, find and select Text Document.
Part 1: Exporting a 1003 file from FannieMae’s DU or DO system to your computer. • Step 6. Change the file name to one that is more meaningful. • The file name will be a Case ID assigned by the DU/DO system. It is advised that you change the name of the file to something that will better identify the loan. How you name your file is up to you. • In the Save As window, change the file name. In this example, I changed the file name from 555220765.1003 to Test Loan.1003 (Test is the Borrower’s last name). • Click SAVE.
Part 1: Exporting a 1003 file from FannieMae’s DU or DO system to your computer. • Step 7. The Export Loan screen appears again. • Click the Return to Loan Information link to return to the Loan Information screen. • To continue learning about 1003 uploads please read: • Part 2: Upload the exported text file to emasshousing.com • Part 3: Complete the first submission of a 1003 file to emasshousing.com • Part 4: Complete the resubmission of a 1003 file to emasshousing.com