1 / 9

cricut.com/setup

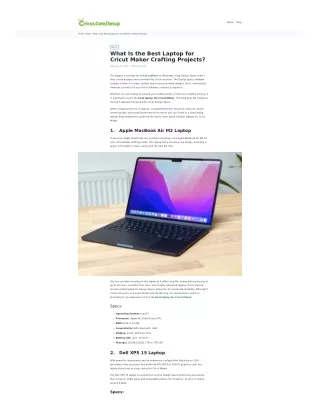
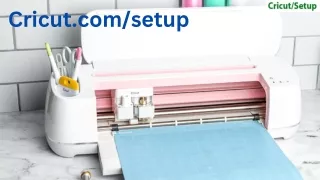
If you have just bought a Cricut machine, then you will need to set it up before using it. The setup process is very easy and doesnu2019t take much time. You only need to download the Cricut Design Space app on your operating system (desktop/smartphone) and connect your crafting machine. Navigate to the cricut.com/setup website, follow the simple steps, and start making your favorite craft projects like greeting cards, decals, labels, or decorations in no time.<br>Visit: https://cricutmakermachines.com<br><br>

Yael5
Download Presentation

cricut.com/setup

An Image/Link below is provided (as is) to download presentation Download Policy: Content on the Website is provided to you AS IS for your information and personal use and may not be sold / licensed / shared on other websites without getting consent from its author. Content is provided to you AS IS for your information and personal use only. Download presentation by click this link. While downloading, if for some reason you are not able to download a presentation, the publisher may have deleted the file from their server. During download, if you can't get a presentation, the file might be deleted by the publisher.

E N D

Presentation Transcript


  1. CRICUT.COM/SETUP How to Calibrate Cricut Explore Air 2? (Tutorial Steps) www.cricutmakermachines.com

  2. Last week, you felt frustrated with your Cricut Explore Air 2, as the cuts were off, the edges were misaligned, and the pieces didn’t fit. You wondered, “What’s going wrong with the machine?” It is common for Cricut machines to cut outside the lines or for designs not to come out clean. Many crafters encounter this issue, and if that’s happening with you, it’s probably time to Calibrate your Cricut Explore Air 2.

  3. HOW TO PREPARE FOR CALIBRATION ON CRICUT EXPLORE AIR 2? Use White Paper Your calibration sheet must have crisp, clearly printed lines and cuts. Always use clean, white 8.5 x 11-inch printer paper to achieve the best outcomes. Don’t use colored or textured papers because they might interfere with the machine’s sensors and affect the calibration accuracy. Ensure Good Lighting If the lighting around the workspace is good, the Cricut sensors will precisely detect calibration marks. Work in a well-lit area where few or no shadows fall on the cutting machine or mat during calibration.

  4. Check Printer Connection The calibration process involves printing a test page. Therefore, before getting started, check that your printer is connected and functioning properly. Also, do check if the printer has sufficient ink and is set as the default printer in the computer settings. Clean Blade and Mat For accurate cuts, it is essential to have a clean blade and a cutting mat. A clean mat gives a secure grip on the calibration sheet. If you see any debris or paper bits on the blade housing or mat, clear them off before starting the calibration process. Using a dirty blade or mat may result in uneven cuts in the end. Update Design Space Regular updates can enhance the Cricut’s performance and resolve issues. Before starting the calibration, check that Design Space is running on the latest version on your device (desktop or smartphone). The updated Cricut Design Space version can avoid compatibility problems during calibration.

  5. STEPS TO CALIBRATE CRICUT EXPLORE AIR 2 Step 1: Take a Cricut mat and plain copy paper. Step 2: Launch the Cricut Design Space Application. Step 3: In the canvas, go to the top left and click on the three horizontal lines. After that, click on the ‘Calibration’ option. Step 4: Next, click on Print Then Cut. Step 5: Choose the name of your printer from the given list and click ‘Print.’ Step 6: After that, click Continue. Step 7: Now, load the mat and paper into the Cricut Explore Air 2 machine. Step 8: Once loaded, press the Go (C) button on the machine to complete the calibration cut.

  6. COMMON CALIBRATION PROBLEMS AND FIXES Issue 1: Incomplete Calibration If the machine fails to complete the calibration or skips parts, check if the firmware and software are up to date. Restart your machine and the software, or check if the sheet is loaded correctly and is not misaligned. Issue 2: Machine Not Reading Marks If that happens, clean the sensor or optical reader of the machine. For the calibration sheet, use only white, non-reflective paper. Stay clear of direct light or glare, as that may interfere with the mark detection. Issue 3: Blade Dragging or Tearing Paper This happens when the blade cuts too deeply or snags the material. So, check its depth and pressure setting. Perform a test cut before you start. Use the correct blade for your material type and inspect it for any damage or dullness.

  7. TO SUM UP That wraps up the steps on ‘How to Calibrate the Cricut Explore Air 2‘. Just follow as we have discussed carefully, and don’t skip anything. Calibrate regularly, especially after ‘software updates‘ or when your cuts and prints start to look misaligned. In doing so, you can receive accurate cuts from your machine every time. No more wastage of paper; only cleaner and more professional results.

  8. CONTACT US CRICUT.COM/SETUP WWW.CRICUT.COM/SETUP LOGIN INSTALL CRICUT DESIGN SPACE APP CRICUT.COM SETUP MAC

More Related