Download
1 / 14
140 likes | 164 Views
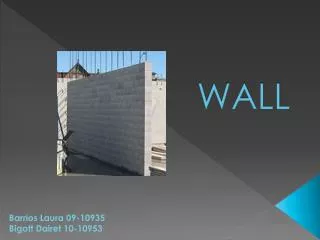
For those who donu2019t have any clue about stud walls, let us tell you what this stud wall is? Use this guide to learn how to build an interior wall in detail. To know more visit https://bit.ly/3bUitIM

E N D
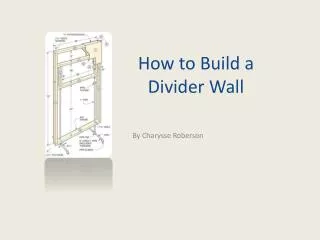
How to Build a Wall – An Ultimate Guide To Building An Interior Wall! Want to add an interior wall or partition in your house? Adding a wall in your place can make a significant change. So how to build an interior wall? You can easily make your ample and unusable space more functional. This can be easily done by a professional, but that will cost you a fortune, and it is quite difficult to find one even in this quarantine period. So, why not you build a wall yourself! Yes, trust us. With simple tools and materials, you can do it in no time! To help you, today, we have brought a step-by-step guide on how to build a wall inside a house. So are you excited about this DIY project? So to frame a wall first, you have to select the location where you want to build the wall. Whether you want to create a partition in your living area for a new home office space or just want some privacy, this method works in all conditions. But you should check the rules about the current building regulations relating to fire resistance, light, and ventilation to match with the basic building codes. Also, if you’re living in a rented apartment, take permission from the landlord. Use this guide to learn how to frame a wall in a detailed step by step procedure and install it with accuracy and attention. For those who don’t have any clue about stud walls, let us tell you what this stud wall is?
What is a Stud Wall? Source: walsalltraining.com A stud wall is made of stud, which is nothing but regular timber or pieces of wood. These walls have wooden frames that support the wall’s structure. These studs are secured to the floor, ceiling, and walls, which are later covered and attached with drywall and plasterboard. When you paint and decorate this wall, it will look like an integral part of your house. It is a basic part of a lot of houses, and you may have seen it in many residences.
So let’s start with the procedure, Time Required: Over 1 day Difficulty: Intermediate Tools & Materials Source: sndimg.com ● Circular saw ● Hand saw ● Stepladder ● Combination square ● Earmuffs ● Gloves ● Framing nailer
● Nail gun ● Pencil ● Safety Glasses ● Spirit Level ● Tape Measure ● Drill ● hammer ● Chalk Line ● Masonry bit ● 2×4 boards ● Masonry Nails How to Build a Wall? Source: sndimg.com
Below is the complete step by step procedure of building an interior wall. Don’t skip any step and read each step carefully to clear all your doubts. Note: All these are the steps for framing an 8- by a 10-foot wall. 1. Plan the Layout Source: ytimg.com The first step in the wall assembling is always started with solid planning. Just plan the whole layout, where you want to build a stud wall. So here are some steps which you can follow to plan your wall accurately. ● First, take a chalk piece, mark the area where you want to place a new wall. ● To locate the joists, use a stud finder. ● If some joists are parallel to the new wall, then adjust the wall in such a way that all of them come under a joist, whereas if the joists run perpendicular to the wall, you don’t need to make the adjustments.
TIP: If your walls have 3- or 4-inch diameter pipes, then make the new wall from 2- x 6-inch boards Or 2- x 4-inch boards. 2. Measure Ceiling Source: constructionreviewonline.com If you want a sturdy wall, then you should do the framing carefully. Measure the plates correctly. Plates are the base pieces of wood that serve as anchors for the rest of the wall frame. With the help of a tape, carefully take measurements of the top and sill plates and mark their locations. ● Start measuring from one corner of the room and continue marking the areas where the new wall meets the existing old wall. ● Now do the same thing from the opposite corner and layout the other end of the new wall. ● Also, make a chalk line between the marks for the proper measurements, and it will indicate one edge of the top plate.
● When you see your measurements for the new wall, which are diagonally between the opposite corners and they’re the same, then your new wall will be square. ● If the measurements are not equal, don’t worry, just slightly adjust them a bit to make the layout equal. 3. Lay Out the Bottom Plate Source: amazonaws.com Laying out the floor or sole plates isn’t an easy task, but if you follow the below steps, it will be easy for you: ● First, drive a nail in the ceiling above one of the ends of the chalk line. ● After this, hang a plumb bob from this nail and mark on the floor at this point.
● Repeat the same process at the other end and also draw a chalk line between the marks to layout one edge of the floor plate. ● Where the plates will be positioned, mark an “X ” to the side of the line where the plate will be positioned. TIP: If you have concrete ceilings, use specifically a construction adhesive and concrete nails. 4. Determine the Stud Locations Source: hearstapps.com Now the next step is to determine the placement of the walls. These studs will support the frame of the new wood wall. ● First, place the top and floor plates side by side on the floor.
● Then start measuring and marking from the one end of the plates every 16 inches. ● Extend these lines all across the plates and draw an “X” mark at each plate’s end. 5. Calculate the Stud Length Source: buildmagazine.org.nz The fifth step is to measure and calculate the wall studs length. So let’s start: ● Always measure the stud length from a distance between the ceiling and the floor at various places. ● First, take the shortest distance and then subtract 3 3/4 inches. This is for the total thickness of the top and sole plates. So when you tilt the wall into place, this will give you some space.
6. Cut the Studs for the New Wall Source: vermonttimberworks.com Done with all the measurements? If yes, now it’s time to cut and create the wall frame from the wood stud pieces. ● With the help of a circular saw or hand saw, cut all the studs in the right length. ● After this, lay the bottom plate and place the first stud on edge. ● Nail it tightly on the plate with 16d nails. ● Sometimes the studs will warp, but make sure that the crown part of the nail should always remain face-up. Because this will allow you to nail the ends without the stud rocking.
TIP: Don’t forget to wear safety goggles whenever using a circular saw or other power tools to protect your eyes. 7. Assemble the Wall Source: ndsudesignbuild.files.wordpress.com Now complete the whole frame by nailing all the wood studs on to the sole plate. ● Nail all the studs on the bottom plate one by one, just like the first stud. ● After nailing the studs on the bottom plate, put the top plate on the frame, and start fixing all the studs on the top plate marks that you have made before. ● Place two-by-fours support between the studs. This will act as firestops and prevents the fire from spreading if the wall accidentally catches fire.
● Cut them precisely for a perfect fit, then position them and nail them in place. 8. Place the New Wall Source: amazonaws.com Yes, it’s the right time when you just have to put your new wall into place. But if it is a big wall, call someone to help you lift the frame because it may be heavy. ● When all the studs are nailed in place, carefully align the bottom plate on the chalk line that you had drawn before. ● Now start carefully tilting the wall in to place and try to align the top plate with the ceiling chalk line. ● Now shim between the top plate and ceiling, and also check the leveling by a leveler. ● Carefully shim and plumb each section of the wall. Fix the top plate into the framing by driving the 16d nails. ● Do the same thing to the bottom plate and also nail the end studs to framing in the existing wall.
● Once you are done with the wall framing, you can now move onto the further process of installing insulation and drywall. The Finishing Touches Source: googleusercontent.com Now finally, your wall is up, but don’t think all the work is done because it is just the wooden frame wall; you have to cover it with drywall or plasterboards. After all, who likes bare walls, nobody right! For the final decorative touches, just give a coat of plaster on the walls. Then paint or put a wallpaper to complete your new space. For more guidance, you can read our blog on how to texture a wall.
This new wall surely will make better use of your existing space or give you an entirely new view of the room. The best thing about this DIY project is that you can easily find all the tools and supplies in the nearest Home Depot Center. You can also order everything online. If you want to learn about external wall insulation, click on the link to read our blog. I hope you like this blog and keep coming to Homedesignnow for more interesting tips and ideas on home improvement and decoration. Contact Us : Website : https://homedesignnow.com Email Id :homedesignnowofficial@gmail.com To Connect With Us Visit