Download
1 / 27
270 likes | 289 Views
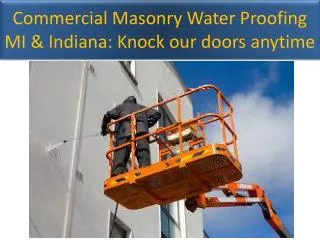
100% Solution of Roof Waterproofing in Islamabad, Heatproofing, leakage seepage.10 years working experienced. Get best price deals on waterproofing in Islamabad.

E N D
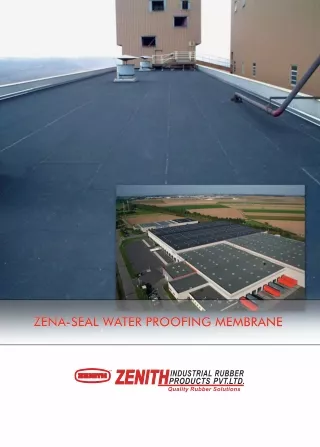
Water-proofing • Building water-proofing is a process which isdesigned • to prevent water from penetrating abuilding. • Usually extensive waterproofing measures are added toa building at the time of construction, to provide moisture control from thestart • Waterproofing may also be done after a building is built, to address problems as they emerge or as part of a buildingretrofit. • Water proofing is done in various parts of thebuilding • whichinclude- • WC • Bathrooms 3.Terrace • Roofs andChejjas • Basement, swimming pools, undergroundducts. • Under ground and overhead watertanks. • Water-proofing maintains the appearance of thebuilding and increases the life of thestructure. • WATERPROOFING • INTRODUCTION
Why water proofstructures? • Constructionwaterproofing • In building construction, a structure needs waterproofing since concrete itself will not be watertight on its own (but note concrete is easily waterproofed withadditives). • The conventional system of waterproofing involves 'membranes'. This relies on the application of one or more layers of membrane (available in various materials: e.g., bitumen, silicate, PVC, EPDM etc.) that act as a barrier between the water and the building structure, preventing the passage ofwater. • A saferfoundation • Exposure to weather conditions like heavy rain and sunlight could cause structural problems. If wooded decks etc is not properly waterproofed, we can notice discoloration, water stain, rotting and fungigrowth. • Walls not properly waterproofed will give in hydrostatic pressure creating cracks and leaks on walls andfloors. • Healthierenvironment • Humidity and moisture is what moulds and mildew want. Mould and mildew could cause respiratory problems like asthma and also trigger allergic reactions. There is no way to remove these fungi’s spores inside the house, the only thing that could remove such growth would be to controlmoisture. • Moulds do not only grow on walls or areas where there are moisture issues. It could grow on anything like wood, carpet and even food. By reducing humidity, preventing condensation and water seepage, mould and mildew growth could be decreased. Eliminate insectgrowth • There are various kinds of insects, water bugs, cockroaches, beetles, and crittersthat find heaven in dampareas. • Wet basements are ideal for wood boring insects like termites toreproduce. • These insects could cause damage not only to the foundation but also toimportant things stored in theroom. WATER PROOFING PROOFING REASON FORWATER
Materials used for WaterProofing Cement: Ordinary Portland cement is used for allwater- proofingworks…type?//pproperties Sand : Clean river sand should be used forwater- proofing work. If muddy, the sand shouldbe washed beforeuse. Metal : Hard angular metal of sizes varying from 12mmto 20mm is used for water-proofingworks. • Brick bat: Brick bats should be well burnt pieces ofbricks having proper thickness. Underburnt or overburnt brick bats should not be used for water-proofingwork. • Water-proofing chemical/powder: • A number chemicals and water-proofing compounds in powder form are available inthe • market. Some chemicalsinclude • -tar/bitumen basedcompounds • -inorganic compounds with little percentage of chlorides andsulphates. • -acrylic basedcompounds. • -epoxyresins. WATERPR-sOiliOcoFnIeNs. G WATERPROOFING MATERIALS-polysulphides andpolyurethanes.
Water ProofingChemicals • Bitumen - Mixed with a filler component such as limestone orsand. • Polymers are added to the bitumen such as APP (atactic polypropylene)a plastic additive that gives rigidity and tear resistance, or SBS (styrene butadiene styrene) a rubber additive that gives more elasticbenefits. • Base Products - Polyester, fiber glass, rag fiber (hessian), and paper.These products are bought in roll format and are pulled through the bitumen mixes on huge rollers. The base product becomes saturated in huge tanks by the tar like bitumen substance, creating rolls of waterproofmaterial. WATER PROOFING CHEMICALS WATERPROOFING
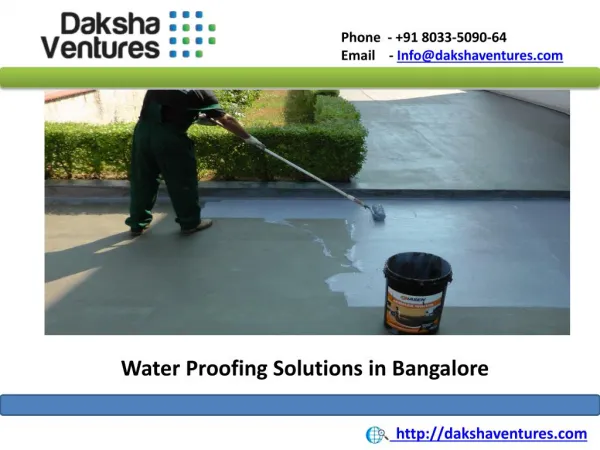
Techniques of Waterproofing RoofWaterproofing Sheet MembraneWaterproofing Cavity WallWaterproofing Blind SideWaterproofing Surface AppliedCoating Hot RubberWaterproofing WATERPROOFING TECHNIQUES WATERPROOFING
Deck Coating/TrafficTopping ConcreteRepair Epoxeal GS &Carbon Fibre Fillmore Expansion JointSystems Epoxy healersealer WATERPROOFING TECHNIQUES WATERPROOFING
Water proofingMembranes • Waterproofing membrane systems include both negative and positive sidewaterproofing. • Positive side waterproofing systems are applied to the face of the element that isdirectly • exposed to moisture, the exteriorface. • Negative side waterproofing systems are applied to the surface of the elementopposite the surface exposed tomoisture. • Positive systems are available in numerous materials and forms. Negative systemsare • limitedto • cementitioussystems. WATERPROOFING TECHNIQUES WATERPROOFING
Water Proofing membranes can be classified into fourtypes Cementitious waterproofing Systems—These systems contain Portland cement with and sand combined with an active waterproofing agent. These systems include metallic, crystalline, chemical additive and acrylic modified systems. These systems can be applied as negative or positive sidewaterproofing. Sheet-MembraneSystems—Sheet membranes used in below grade applications aresimilar to the materials used in roofing applications and include thermoplastics, vulcanized rubbers and rubberized asphalts. The thickness of these systems varies from 20 to 120mils. Fluid Applied Systems—These systemsinclude urethanes, rubbers, plastics and modified asphalts. Fluid membranes are applied as a liquid and cure to form one monolithic seamless sheet. Fluid systems can be applied to vertical and horizontal applications. For foundation wall applications typical fluid applied systems are 60 mils in thickness. Bentonite Clays—Natural clay systems, knownas bentonite act as waterproofingby swelling whenexposed to moisture thus becoming impervious to water. This swelling can be 10 to 15 percent of the thickness of the base material. Clay panels and sheets are popular for use in blind-side waterproofing applications such as on retaining earth systems and elevator and sumppits
WCWater-proofing • Preparation of WCwater-proofing • The pre-work should be completed before starting the water-proofing: • Completion of internal plaster of walls leaving a margin of 18” from the finalfloor • level of WCunit. • Completion of grooving or chasing for concealed G.I. piping or electric conduit piping inWC. • Removing of all debries from WC and chiselling the extra mortar to expose the rare slab completely. • Completion of making holes in external walls for connecting nahini trap, p-trap, floor trap, etc to the external drainageline. • Thorough cleaning of WC with sufficient quantity ofwater. • Level marking in red color on wall with respect to floor level to setup traplevel. Socketing of WCwater-proofing • Fill up the WC slab with 7cm of water(after plugging traphole) • Keep the slab filled with water over-night for atleast 12hours. • Check for leakages in base slab orunderneath. • If a major leakage is observed, locate the spot with porous concrete and provide a socket for grouting. In addition provide 4 sockets at each corner of theslab. • Grout the socket with cement slurry with consumption rate of 1 bag of cement to 75 to 100lts of water. To spreadtheslurryintheporousportionoftheconcrete,itisrequiredtoflowtheslurrywithvelocity. • Itisfurtherunderstoodthattheprocessofsocketingandgroutingistobecontinueduntiltheleakagein base slab is totallystopped. • After completion of cement grouting and testing for leakages, remove thesockets. • WATER PROOFING WCWATER PROOFING
Coating for WCwater-proofing • Provide 25-40mm thick cement mortar base coat in proportion 1:4 with a slope of 1:100 from the entrance door towards the water escape pipe (drainpipe). • Carry out this base coat on all walls upto a height of 45cm above toilet finished floorlevel Keep this base coat full with water upto the slab drop top,for Brick coat for WCwater-proofing minimum 4 days for curing and testingpurposes. • Select well burnt brick bats. Before laying brick bats, sock thoroughly in water for atleast half anhour. • Lay the brick bat on the edge and not on theflat • surface. • Any gaps between the bats should be filled with mortar. Complete the brick bat coat with joints filled with cement mortar in 1:6. Also use water-proofing compound as per the specified dose per bag of cement while filling thejoint. • Give a slope of 1:100 in brick bat coat fromthe • entrance door to the water escapepipe. • Cure the coat by ponding water for four days and check for anyleakages. WATERPROOFING WCWATER PROOFING
Topping coat for WC water-proofing • After curing of the brick bat coat, complete the topping coat with 1:4 cement mortar mixed with waterproofingcompound. Finish this coat properly with neat cement slurry by metalfloat. • Roughen the surface with a wire brush, for bonding of the horizontal filler coat.Continue this coat on the side walls, upto 45cms above WC floor level. This coat should not project out beyond the plastering coat of the WC walls, so as to avoid unnecessary thickness of the glazed tiledado. • Cure this final coat for a minimum of 7days, • with water upto minimum 7.5cmsdepth. WATERPROOFING PROOFING WCWATER
WC pan fixing and finishing ofwater-proofing • Fix WC pan at the required level, considering 15mm sunk from the floorlevel. • Block the p-trap outlet hole with gunny bags and fill the WC pan with sand to prevent any damage by the water-proofingworkmen. • Check the WC pan for itscentre. • Fill the extra gap around WC pan over the topping coat with brick bat and mortar in layer upto a minimum of 7.5cm below the top ofWC. • Allow curing for a minimum of 3days. • The final topping coat should be done upto 50mm below top of WC with a slight slopetowards • the WCpan. • Roughen the top coat surface with a wire brush to receive the mortar with the requiredbonding. • Continuous curing should be done for a minimum of 7 days with wet gunnybags. WATERPROOFING PROOFING WCWATER
BathroomWater-proofing • Preparation of Bathroomwater-proofing • After completion of the internal plastering of walls, keep a margin of 450mm from the final floor level of the bathroom. Roughening of the plaster should be done with a wire brush for fixing the glazed tiles claddingdado. • Complete grooving, chiseling for concealed G.I and electrical conduit piping inbathroom. • Remove all debris from the bathroom after chiseling the extra mortar, if any, to expose theslab • completely. • Make the holes in the external walls for connecting nahini trap to external drainage line andwater leakage drainpipe. • Clean the bathroom thoroughly with water. Mark the level in red on the walls, with respect to the floor level, to set up the traplevel. WATERPROOFING PROOFING WCWATER
Base Coat for bathwater-proofing • After stopping any leakages in the base slab, provide 15-25mm thick cement mortar base coat in proportion 1:4 with a slope of 25mm in 3m from entrance door towards nahinitrap. • This base coat should cover all the walls around upto the outer face wall line at the entrance door and the bottom portion of the nahini trap connection hole made in thewall. • Flood this base coat with water, upto the slab drop, for a minimum of 4 days, for curing andtesting. • Fix the nahini trap and drain pipe over this basecoat. • The brick bat coat is done similar to WC water- proofing. Topping coat for Bathroomwater-proofing • After curing the brick bat coats, complete the topping coat using 1:4 cement mortar mixed with water-proofing compound, with a proper slope from the entrance door to the nahini trap. Finish this coat with cement slurry using a metal float. Roughen the top coat using a wire brush to receive tile mortarbonding. • Ensure that this coat on walls does not project beyond the bathroom wall plasteringcoat. • Cure this final coat for a minimum of 7 days with standing water (depth7.5cm) WATERPROOFING PROOFING BATH ROOMWATER
Basement/Swimming pool and underground duct waterproofing • For basements, swimming pools and underground ducts such as lift pits, thewater- • proofing has to withstand the water pressure in addition to its basicstress. • Work procedure • Carry out the work of PCC bed and provide a cement mix 1:4 base coat withwater- proofing compound and above this fix rough shahabadtiles. • Maintain the break joint pattern while fixing the tile forbase. • After fixing the tiles, grout the joints with cement slurrycompletely. • Apply a jointless layer of cement mortar 1:3 25mm thick and cure it for 7days. • For basement, provision of gutter and sump is made in PCC itself and shahabad base is also prepared in the same fashion. Gutter is given proper slope towardsthe sump. This is done as a preventive measure against occasional entry of rain water intobasement. • After curing, provide the final jointless water-proof plaster coat in cement mortar 1:4 over the rough shahabadtiles. WATERPROOFING PROOFING BASEMENT, DUCT AND SWIMMING POOLWATER
Brick Bat Coba ForTerrace • Fix in a slope of 1:150, starting from the lowest point of rainwater down take and by keeping a minimum thickness of 65mm below the rainwater outlet. • Fix brick bats in cement mortar layer of 1:6 proportion in a slope of1:150 • with the water proofingcompound. WATERPROOFING TERRACE BRICK BAT COBAFOR
Fill the cement mortar 1:4 with the brick batjoints. • Fix small pieces of brick bats along with 20mm metal for covingof watta(rounding) at the bottom of the parapetwall • Special care should be taken for achieving the round shape near therain • waterpipe. • Block the rain water outlet with gunny bags, to avoid cement slurryfrom enteringit. • Cure the brick bat coba coat for at least sevendays. WATERPROOFING TERRACE BRICK BAT COBAFOR
Final coat for terracewater-proofing • Spread cement mortar in 1:4 along with water-proofing compound overthe • brick batcoba. • Press the cement mortar with a ruler of length of2m. • Level the surface with a wooden float, keeping 25mmthickness. • Apply thick cement slurry over the levelled surface, along with thewater- proofing compound for a smooth finish. • Polish the surface with metalfloat • Make vertical and horizontal lines at an intervel of 300mmX300mm, using a cotton line dori of minimum 3mm thick; so as to avoid cracking of thetop layer. • Clean and cure the final coat for 21days with atleast 150mm waterstanding • on the waterproofing. WATERPROOFING TERRACE BRICK BAT COBAFOR
Sloping Terrace WaterProofing • Clean the surface of the slopingterrace. • Apply a thick cement slurry over the surface of theslab. • Apply 1:1.5:3 screencoat. • Cure this coat for 7 days by putting wet gunny bags onit. • Over this coat, apply a finishing coat with cement sand mortar 1:4and water-proofing compound as perdesign. • Make an edge between the parapet and the sloping roof on the secondday. • Cure this water-proofing for 15 days with gunny bags spread overit. • Constant watering is required on a slopingslab. WATERPROOFING SLOPING TERRACEWATER PROOFING
Over head tank waterproofing • Chisel the extra concrete in the tank, particularly in the corners aroundthe chambers. • Clean the entire tank, along with the bottom slab and side walls and throwaway thedebris. • Allow the cement slurry to penetrate all holes, cracks of bottomslab. • Check the hacking of vertical walls from inside for better bonding withwater- proofing. WATERPROOFING PROOFING OVER HEAD TANKWATER
Check the inlet, outlet and washout pipes for their rigidity. If the pipes are notrigid, grout them to achieve the desired fixity. Before grouting, check the levels ofthese pipes and if necessary correct them by shifting the pipesaccordingly. Apply water-proofing plaster in C.M 1:4, by adding water-proofing compound. Apply 15-20mm thick over this plaster, particularly on the corners and base for avoiding shrinkage and to achieve betterstrength. The bottom of the top slab does not requirewater-proofing. The top of the overhead water tank is to be finished with brick bat, asmentioned for terracewater-proofing. Allow the water-proofing to set foe atleast 12hours Cure this water-proofing for a minimum of 15days. WATERPROOFING PROOFING OVER HEAD TANKWATER
Expansion JointWater-proofing • Surface Preparation For Expansion Joint WaterProofing • Clean the joint surface of dust, cement mortaretc. • Remove oil and grease(if any) from thesurface. • Protect the edges of the joint with maskingtape. • Keep the tools like suspended scaffolding, ladder,spatula, • putty knife, hand held gun equipment etc.ready. • Work procedure for vertical expansion joint waterproofing in Islamabad. • Primer is applied in the joint in accordance with the type of joint. For surfaces like concrete, masonryetc. • After the primer dries completely, sealant is prepared by mixing base and accelerator. Mixing should continue till a uniform color isobtained. • The base and accelerator are mixed in equal proportions byweight. • This mixed compound is then applied with a spatula or hand held gun equipment wherever required. Extra material is cut off with putty knife and a smooth vertical joint iscreated. • The masking tape is then removed and the surface is cleaned with suitable solvents. WATERPROOFING PROOFING EXPANSION JOINTWATER
Dampproofing Dampness is the seepage of water through the members of thebuilding. There is very little difference between leakage anddampness. If the water comes out of slab of the bathroom/toilet, it is termed as leakageand if it is observed on external walls of the building directly exposed to rains and floors, then this percolation is termed asdampness. WATERPROOFING PROOFING DAMP
Damp proof course inplinth • Foundation masonry is always in contact with thesub soil,which sometimes may containwater. • The subsoil water tries to enter the building throughthe walls/floore. • Due to capillary action, the subsoil water sometimes rises into the walls of the building against gravity and indicates dampness. • Generally , foundation masonry is done with UCRmasonry and at the plinth level,DPC is provided to prevent capillary water of the sub soilwater. • The rich cement concrete, generally of M20 grade with water proofing compound added to it can be used as DPCin buildings. • Tar isalso applied below DPC to prevent the entrythrough • capillaryaction. • Above the DPC, regular masonry for super structure is done. WATERPROOFING DPCIN PLINTH
Causes and Precautions for walldampness • If the foundation masonry is directly exposed to subsoil, water may enter the building through thewalls. • For this it is ensured that pointing or plastering the exposed walls is done to restrict the direct contact of sub soil water withmasonry. • No hollow spaces should remain in the masonry as these are the routes for water toenter. • For the junctions of RCC and masonry, chicken mesh should be used forplastering. • Dampness is also observed on the ceiling in the form of patches. This is due to stagnant water on the terrace or some organic matter dumped on theterrace. • During execution of the terrace, a proper slope should be given so that water doesnt accumulate in anyplace. • The terrace must be kept clean during rainy seasons to prevent continuous dampness. • The terrace slab must be cast carefully so that it attains densityand • impermeability. WATER PROOFING DAMPNESS WALL