Download
1 / 10
100 likes | 117 Views
Best practices to treat and care for your Sprained Ankle at Home.

E N D
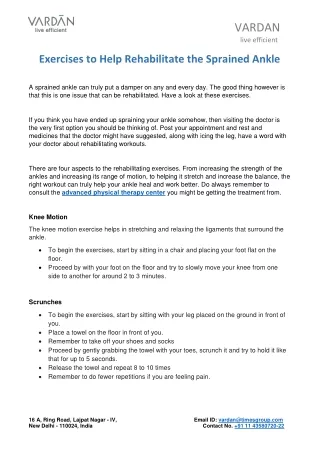
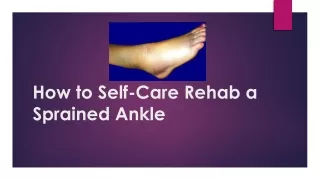
How to Self-Care Rehab a Sprained Ankle
95% of Ankle Sprains are Inversion Sprains Damage to the lateral ankle stabilizing ligaments (Peak incidence age 15-19) u Anterior Talofibular Ligament u Calcaneofibular Ligament u Posterior Talofibular Ligament
How are Ankle Sprains Graded? Ankle sprains are graded according to severity of damage to ligaments, amount of swelling, degree of instability, and amount of functional loss Grade 2 Grade 1 Sprain mechanism is limited in amount of inversion. • Ligaments are stretched causing microscopic tearing • Little if any swelling present • No ankle instability • No loss of ankle functionality Grade 3 Significant inversion sprain mechanism • Most or all ligaments are ruptured • Severe swelling occurs immediately after injury • Moderate to severe joint instability • Loss of functionality, severe pain if try to bear weight • Ecchymosis Sprain inversion mechanism is greater than grade 1, but not severe Ligaments are stretched with partial tearing Moderate to severe swelling is present Mild to moderate joint instability Functionality impaired making it difficult to bear weight Ecchymosis • • • • • • • •
Steps in the Rehabilitation of a Sprained Ankle – Immediately post sprain (RICE) Compression. After completion of icing apply a compression wrap (Ace bandage) to the ankle to help control swelling and to provide support. u The wrap should be applied with sufficient tension to provide compression, but not so tight as to adversely restrict circulation. Elevation. Whenever possible, sit in a way so that you can elevate your foot to allow gravity to help control swelling at the ankle. Rest: Avoid activities that reaggravated the injury and cause pain and swelling. ICE: Apply ice in the form of a bucket of ice slurry. Gently move their ankle through some range of motion in the sagittal plane – plantar flexion and dorsiflexion. • Ice for approximately 20 minutes. Repeat 2-3 times a day for the first 24-48 hours post injury
Steps in the Rehabilitation of a Sprained Ankle – Daily Regimen w/ Progression As with any injury where pain, swelling, and restricted movement are present, certain anatomical and physiological changes occur that if not properly addressed in a progressive rehabilitation program, can dramatically slow the healing process, and may yield some long- lasting deficits. u Loss of Range of Motion (dorsiflexion) u Loss of Proprioceptive Sensitivity (muscle spindles) u ↓ joint protection & performance u Loss of Muscular Strength
Timing & Progression of Rehabilitation Some General Guidelines Grade 1: Because there is little ligament damage, joint instability, or swelling, rehabilitation can begin immediately after pain is controlled, and the individual can usually return to activity in less than a week. Grade 2: Because of partial tearing of ligaments, some joint instability, and moderate to severe swelling, the joint should be somewhat immobilized for several days, delaying the initiation of some rehabilitation protocols. Grade 3: Because the ligaments are ruptured with gross instability to the ankle joint, and pain and swelling persists for an extended period of time, the initiation of rehab protocols is delayed as weight bearing may not be possible for two or more weeks. • • • Note: Let pain be your guide principle
Initial Rehab – Non-Weight Bearing Passive Range of Motion (PROM) → to Active Range of Motion (AROM): Perform ROM exercises in the sagittal plane of motion, working to maintain or restore normal dorsiflexion and plantar flexion range of motion. Stationary Bike: Aids in dorsiflexion and plantar flexion ROM while providing a cardiorespiratory workout to help maintain conditioning during absence from sport or activity. Wobble Board: In a seated or only partial weight bearing position, perform ROM exercises in both sagittal and frontal planes of motion. Isometric Contractions: Perform isometric muscle contractions of the evertor muscles (Fibularis Longus, Fibularis Brevis) to build strength in these muscles.
Initial Rehab – Non-Weight Bearing Walking: Focus on achieving a normal gait pattern Stretching of Calf Muscles: Beginning with towel stretches and progressing to standing/weight bearing stretching of calf muscles. Progressive Resistance Exercises: Perform resistance (manual, resistance bands, weights, body weight heel raises, etc.) exercises of ankle plantar flexors and dorsiflexors, then invertors and evertors to progressively build strength Proprioceptive Training: Incorporation of balance training. Progression→: u *Double leg stance → single leg stance u *Firm surface → foam pad → BOSU u *Eyes open → eyes closed u *Incorporating various perturbations Back to Sport Activities: jogging → sprinting → jumping → figure 8’s, etc. progressing in speed, angle, force
When is Your Rehab Complete Your ankle rehabilitation program is not complete until your: Ligaments have healed • Full range of motion has been achieved • Muscles have returned to full strength Proprioceptive sensitivity has returned to normal. • •
Two products designed to stretch & strengthen the calf muscles The Bob Increasable Calf Master Click HERE for more information The FootRamp Click HERE for more information