Download
1 / 14
140 likes | 170 Views
1. Garage Door Overhead Repair.<br>2. Garage Door Remote Clicker-Maintenance and Repair Tips.<br>3. Garage Door Torsion Spring-Repair Tips You Need to Know.<br>4. Garage Door Opener Repair.<br>5. Garage Door Cable Repair.<br>6. Garage Door Track Repair.<br>7. Handy Garage Door Installation Tips.

E N D
Synopsis 1. Garage Door Overhead Repair 2. Garage Door Remote Clicker- Maintenance and Repair Tips 3. Garage Door Torsion Spring-Repair Tips You Need to Know 4. Garage Door Opener Repair 5. Garage Door Cable Repair 6. Garage Door Track Repair 7. Handy Garage Door Installation Tips
Garage Door Overhead Repair • The first thing you’ll need to do is inspect the metal racks that are located in the garage. Take a look at the mounting brackets (these ensure that the tracks stay attached to the walls). If the brackets are lose, tighten the screws or bolts that are holding the brackets to the walls. Close the garage door and look at the tracks to see if there are any flat spots or dents that need to be repaired. If you see any damage, you can use a rubber mallet to level the tracks. You can also accomplish with this with a scrap wood block that is sturdy enough to pound out dents. If you try to get rid of the damage and don’t see huge improvement, , it’s time to get new garage door tracks. You should also use a level so that you can check the tracks for alignment. If the tracks are installed horizontally, they should slant downward and face the rear of your garage. If your garage has a roll-up door, make sure that the vertical parts of the door tracks should be plumb. Both of the tracks also have to be equal height on the walls of the garage. If the tracks aren’t properly aligned, you should loosen the tracks to even them, but don’t remove them from the wall completely. Don’t take the bolts or screws from the tracks, because these hold the mounting brackets, so loosen them so you can work with the tracks. Instead, just tap the tracks back into the right position. Check the tracks again and tighten the bolts to improve the way your garage door operates. •
Garage Door Overhead Repair • Next, you’ll have to make sure the tracks are clean. Use a household cleaner that has strong cleaning power to get rid of dirt and grease. This allows the tracks to work at their full capacity use water and cleanser for cleaning, then wipe the rollers and tracks with a paper towel or washcloth until they are completely dry. Finally, after cleaning, check on and around the garage door to make sure there are no loose pieces. If you see that a track or bracket isn’t tight enough, secure it before you start using the garage regularly again. If your garage door rolls up, inspect the hinges that hold the door together, and replace hinges that are damaged. If you see that the screw hole is too large, get a new screw that is longer but has the same diameter. To hold the screw in place, dip the screw in carpenter’s glue and place it in the hole that you’ve already drilled in order to keep the screw in place. If you see that the wood around the hinge is cracked, take the hinge from the wall an fill in the cracks with a wood filler. Allow the filler to dry before replacing the hinge or move the hinge onto solid wood if you can. •
Garage Door Remote Clicker- Maintenance and Repair Tips • Finding a remote is a fairly easy process, but keeping a few things in mind while you’re shopping can make it even easier. For instance, a remote with two buttons is best if you’re using the device to open multiple garage doors. You may also want to get remote clickers that come in a set of two or three, so that all the drivers in your home will be able to operate the garage safely when leaving an returning to your home. If you have an extra remote, you can also leave it for house guests or contractors who need to get into your home while you’re away. A remote with smart capabilities is also ideal if you want to connect the remote to your smartphone for added home security. Wireless installation is also a great idea so that you can connect the garage door opener to your alarm or the cameras in your home so that people who aren’t supposed to have access to your home won’t be able to get in. The remote should be battery-operated so you can use it immediately, and of course, you should find out all you can about the warranty before you buy. Even though remote clickers don’t usually cost that much, it can be a hassle to have it repaired or replaced once you get a new door and have to reprogram the door to work with the remotes, or if there is a malfunction with the remote. You should also be aware of the several types of garage door openers that you have to choose from based on the type of garage you have. If you have a garage door with a standard deign, you need a chain drive garage door opener. When you press the remote, it activates a chain that moves the garage door up and down. These garages can be a bit noisy, so it’s best to choose this variety if there are mostly adults in the house and opening the garage won’t wake a sleeping baby or disturb your pets. You can also choose a belt drive garage and a remote to go along with it. A belt is used in place of a chain to operate the door; attached garages function well with a belt drive door. If you have a garage door that operates on a threaded rod made of steel, you have a screw drive garage, and there are specific remotes for this as well. • •
Garage Door Torsion Spring- Repair Tips You Need to Know • In most cases, you’ll be able to repair torsion springs that are mounted to both sides of your garage door anchor bracket. The bracket is located above the center of the garage door. The springs usually come with a list of instructions, and it’s a good idea for you to look for instructions and links to other parts of the garage door so you can ensure you’re repairing the door correctly. To repair the door, look at the diagram and instructions for the type of garage door you have. For instance, if you see cable drums and cables on your door that look like the picture you see in the directions. The cable drum is made of cast aluminum in most cases. You’ll also need to find the end bearing plate and make sure that you see how the cable unwraps off the rear of the drum and sits between the garage wall or jamb and the drum. The cable should also run alongside the door in order to keep it working well. Whether you’re fixing the torsion spring yourself or have decided to call a professional, you should know how much the entire process will cost so that you can budget accordingly. You should expect to spend between $200 and $300 for a repair technician to come replace two sprigs. If you’ve searched online for a garage repair service, it’s likely that you’ve seen prices around $700, with DIY blogs suggesting that you’ll save up to $500 if you do the job yourself, but this is not entirely accurate. Sometimes the price quotes are extremely high to encourage you to purchase DIY materials to get the job done. Look for a garage repair business in your area by searching sites like the Better Business Bureau (BBB) or Yelp. If you find a company that may be able to do the job through a Google search, check to make sure that the BBB logo is on the company website. If not, it’s probably best to go with a different company. If you find a few companies in your area that can do the job and you aren’t sure which one to select, ask for recommendations from your family members and colleagues. You can also look online to see what other customers have to say about the company. •
Garage Door Opener Repair • One of the first things you should do is pull the emergency release cord with the garage door closed. See if the door will open and close smoothly. If you’re having a hard time getting the door to go up or down, this indicates that you’re having an issue with your rollers, springs and tracks, and the problem isn’t with your garage door opener. When you’re figuring out what’s wrong with your garage door and you’ve checked to ensure that the opener is not malfunctioning, make sure the door is down so that you can clearly see the brackets and springs before you do the necessary work. If you find that a door spring is loose, pull the emergency release cord after you raise the door so that the garage door won’t come down too fast. It’s also best that you unplug the garage door opener. If someone visits your home and hits the remote button while you’re working on the garage door, the door could close on you and you could also get electrocuted. • •
Garage Door Opener Repair • There are cases in which the garage door remote works but there may be something wrong with the wall switch. This means you’ll need to get new wall switches and wires, but you’ll need to know which ones aren’t working well. Unscrew the switch and touch two of the wires; this is safe since the wires are low voltage and won’t electrocute you. If the garage door opener still works when you put the wires together, this means you have a faulty switch. If you’ve got a garage door opener that is a little older, you can use a cheap doorbell button to repair the program. If you have a newer garage door opener with a light and locking option, purchase the replacement that is compatible with your model. A new one usually costs about $15. If the garage door opener doesn’t run when you connect the wires to the opener, use a smaller wire and jump the tire wires you connected to the opener at the opener terminal. If the opener works, this means that the wire that connects the opener and switch needs to be replaced. Or, the staples that are holding the wire to the wall will pinch the wire so that electricity doesn’t travel through them properly. To avoid this, install a 18 to 22 gauge wire. If the wall switch works but the remote isn’t working, you can fix this by replacing batteries or buying a new receiver or remote. Check the batteries and if the batteries are fully charged but the remote isn’t working, it’s time to get a new remote. You can find one at your nearest home repair store, or search for the remote you need online. • •
Garage Door Cable Repair • Before you do any work on the cables of your garage door, you should prepare for the job. Make sure the garage door is fully closed. If you have a slack cable, you may be able to fix it just by cutting a cable end and making the cable shorter by eliminating all the slack. If you need to replace the garage door cable, close the door so that you can take the old cable out and install a new one. This is pretty easy, but you have to make sure there’s enough tension in the cable once you’ve put the new cable on. After you’ve repaired and replaced the cable, it’s important that you check your work. Make sure there’s a good distance between you and the garage door before you open it; about 15 feet is usually a safe distance. When you’re not standing too close to the door, you’ll be able to keep yourself protected if a spring breaks and pops off of the cable. • •
Garage Door Cable Repair • Even though the process can be pretty straightforward, it’s also easy to make a few mistakes when you’re repairing the garage door cable. For instance, you shouldn’t let too much slack in when you’re installing the cable, since this can keep the door from opening and closing the right way. The cables also have to be properly tightened and there are some cables you can purchase that will snap so they should be checked about twice a year for wear and tear. Since the track is what’s necessary to keep the door in the right place and functioning properly, garage door track installation is one of the most essential parts of the installation. The track is runners made of metal that are placed on the walls or ceiling of the garage; the door slides on these cables when it is lowered or raised. When the tracks are installed properly, you can avoid problems with your garage door in the future Be sure to measure the tracks and the space where they will be positioned carefully. There has to be equal distance between the top of the runner and the top of the garage door, as well as equal distance on both sides of the track and the garage door. Usually, there should only be about half an inch of space between the track and the garage door. To make sure that both the door and the track are straight, use a tape measure. Remember to also be careful with the screws when you’re installing or repairing a garage door cable. The screws should be tight but not firm so that the drums holding the cables won’t crack. Screws that are firm but only overly secure will keep your garage door functioning at its best. • • •
Garage Door Track Repair • First, you’ll need to check the metal tracks located in the garage. Be sure to inspect the mounting brackets that attach the track to the walls of the garage. If the tracks are loose, tighten the screws and bolts at the brackets. It’s best to work inside the garage with the door closed, and check the tracks for crimps, spots that are flat, and dents. If you see any damage, use a mallet or hammer to pound them out. If you use a hammer, use some scrap wood to help shape the track and prevent any further damage. If the tracks are severely distorted, it’s time to replace them. Next, you’ll need to check the tracks with a level to ensure that they are aligned properly. If the tracks are horizontal, they should slant downward toward the back of your garage. If you have a roll-up door, the vertical parts of the track need to be exactly plumb. Make sure that both of the tracks are the same height in terms of how they are positioned on the walls of the garage. If the tracks aren’t aligned well, loosen the tracks but don’t take the bolts or screws from the mounting brackets completely. Tap the tracks into the correct position and check the tracks again with a level so you can be sure they’re in the right position before tightening the screws or bolts to hold the tracks into their new position. After this, you’ll need to clean the tracks. You can use a concentrated household cleanser to get the dirt and tough-to-remove grease off the tracks. Your rollers should also be cleaned well, and be sure to that you wipe the tracks and rollers dry so that they will function at their best and won’t be affected by water damage in the future. If you’re fixing nicks or dings in the tracks, there’s a chance that this happened while the track and garage door were being installed. While you may not think this detail is important, remember that if the metal loses its shape, it will affect the way the garage door works. To keep this from happening, give the track a thorough inspection after installation to make sure everything is correctly positioned. If you see dents, pound them out with a rubber mallet without using too much pressure. • • •
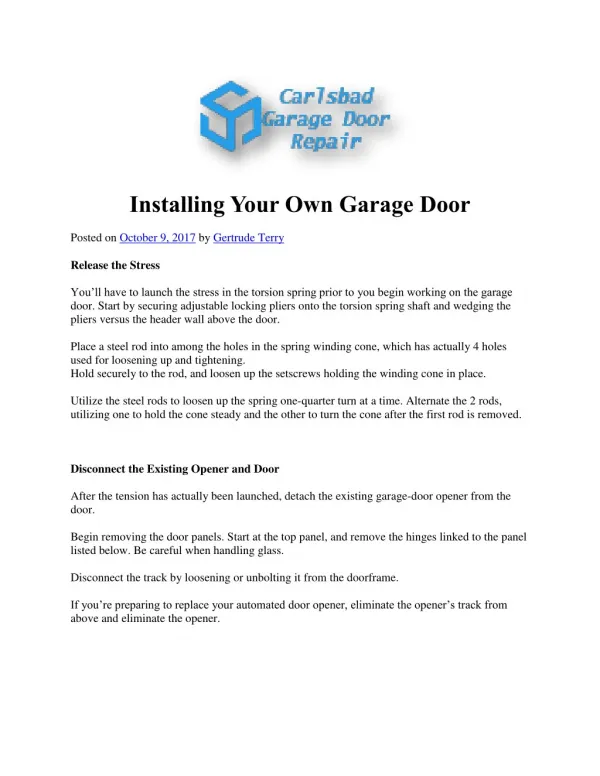
Handy Garage Door Installation Tips • Garage doors are heavy and can be a little challenging, so you’ll probably want to take advantage of the installation services that the garage door company offers. Of course, installing the door yourself could save you a considerable amount of money, but you’ll need to be familiar with the type of garage door you have. For instance, if you have a sectional garage door, it will travel up and down on rollers that go along tracks on either side of the garage doorway. If your garage door has a torsion spring system, it will be safer for you to adjust than a door with a standard torsion-spring model. Don’t try to adjust to take off a garage door that has a standard torsion spring because the springs are under lots of tension and this makes them dangerous. In these cases, it’s best to call a professional who is experienced in installing and removing garage doors. •
Handy Garage Door Installation Tips • It’s important that you attach weather-stripping to the bottom of the first panel in the garage door. Set the panel to make sure it’s in the doorway space and secure it in place by hammering nails halfway into the jambs at an angle so that the door can be wedged in place. You can attach the hinges at the top edges of the door if they’re not there already. Next, you’ll need to make sure you have all the necessary pieces for curved, vertical, and horizontal tracks according to the instructions the manufacturer has provided. Install the brackets and rollers on the garage door and any brackets that should be mounted on the wall of jamb. Go to one side of the doorway and slip the vertical track at the first door section, then go to the other side of the doorway to do the same thing. In the second section, you’ll need to install the rollers. Have someone help you lift this section and put it in place, then slip the roller on the tracks that are on both sides of the doorway. Connect the hinges of the first section to the second section. Most garage doors will require that you have a power drill and screwdriver tip or nut driver you’ll be able to complete this step much quicker. Using the same method described above, install the third section of the garage door. Inspect the door to make sure it’s level and check plumb in the vertical track before fastening the top plates from both vertical tracks to the wall. The lag screws should be especially secure and penetrate the framing members since the garage door will exert considerable force when it moves up and down. • •
The End For more details, please visit: https://garagedoorsrepairservice.com/garage-door-repair/