Download
1 / 2
20 likes | 25 Views
In this Document, we have discussed easy steps to use general finishes milk paint. while keeping your belongings safe. Click here to know more.

E N D
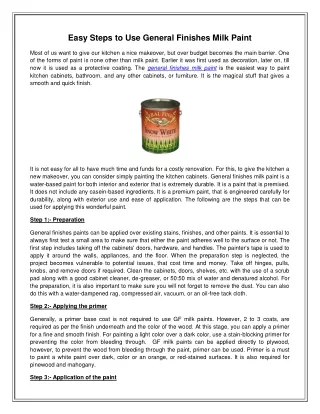
Easy Steps to Use General Finishes Milk Paint Most of us want to give our kitchen a nice makeover, but over budget becomes the main barrier. One of the forms of paint is none other than milk paint. Earlier it was first used as decoration, later on, till now it is used as a protective coating. The general finishes milk paint is the easiest way to paint kitchen cabinets, bathroom, and any other cabinets, or furniture. It is the magical stuff that gives a smooth and quick finish. It is not easy for all to have much time and funds for a costly renovation. For this, to give the kitchen a new makeover, you can consider simply painting the kitchen cabinets. General finishes milk paint is a water-based paint for both interior and exterior that is extremely durable. It is a paint that is premixed. It does not include any casein-based ingredients. It is a premium paint, that is engineered carefully for durability, along with exterior use and ease of application. The following are the steps that can be used for applying this wonderful paint. Step 1:- Preparation General finishes paints can be applied over existing stains, finishes, and other paints. It is essential to always first test a small area to make sure that either the paint adheres well to the surface or not. The first step includes taking off the cabinets' doors, hardware, and handles. The painter's tape is used to apply it around the walls, appliances, and the floor. When the preparation step is neglected, the project becomes vulnerable to potential issues, that cost time and money. Take off hinges, pulls, knobs, and remove doors if required. Clean the cabinets, doors, shelves, etc. with the use of a scrub pad along with a good cabinet cleaner, de-greaser, or 50:50 mix of water and denatured alcohol. For the preparation, it is also important to make sure you will not forget to remove the dust. You can also do this with a water-dampened rag, compressed air, vacuum, or an oil-free tack cloth. Step 2:- Applying the primer Generally, a primer base coat is not required to use GF milk paints. However, 2 to 3 coats, are required as per the finish underneath and the color of the wood. At this stage, you can apply a primer for a fine and smooth finish. For painting a light color over a dark color, use a stain-blocking primer for preventing the color from bleeding through. GF milk paints can be applied directly to plywood, however, to prevent the wood from bleeding through the paint, primer can be used. Primer is a must to paint a white paint over dark, color or an orange, or red-stained surfaces. It is also required for pinewood and mahogany. Step 3:- Application of the paint
After the application of the primer, the step moves towards the paint application. application of the paint is the step that everyone wants to do right away. After the primers, it becomes easy to apply the paint more perfectly. At this stage, the paint glides on effortlessly and lays down quickly. Stir paint thoroughly before applying it and in case it is thicker, then you can add some water to thin it out a bit. You can use a paint pad, foam brush, microfiber roller synthetic bristle brush, or a paint sprayer for applying the paint. Step 4:- Coating and final finish At this last step of the process, GF milk paints generally need 2-3 coats of paint. It also depends on the color of the wood along with the look that you want. Before applying the coat the paint needs to be fully dry. However, the general finishes milk paint don’t need to apply top coat for the finish. A high- performance topcoat can be used just like the paint to change the sheen of the paint. At the ned, you can put the cabinets and everything rest in its place.