
CAD/CAM – An Introduction to 2D Design Creating our Design with Miss Hudspith.
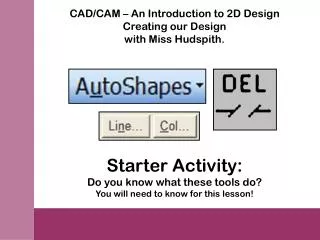
CAD/CAM – An Introduction to 2D Design Creating our Design with Miss Hudspith. Starter Activity: Do you know what these tools do? You will need to know for this lesson!. THE BIGGER PICTURE - WHAT ARE WE GOING TO DO?

CAD/CAM – An Introduction to 2D Design Creating our Design with Miss Hudspith.
E N D
Presentation Transcript
CAD/CAM – An Introduction to 2D Design Creating our Design with Miss Hudspith. Starter Activity: Do you know what these tools do? You will need to know for this lesson!
THE BIGGER PICTURE - WHAT ARE WE GOING TO DO? You have been approached by a chain of birthday gift stores to create a prototype design for a wooden photo frame to sell. The frame should feature a decorative design and may be personalised with a name if you choose to do so. The chain would like you to create the frame design on computer so that it can be accurately recreated in bulk if they choose to sell your design.
LESSON OBJECTIVES: Today we will be working on the computer with Techsoft 2D Design. All pupilsMUST: create two designs using the template, geometric shapes and the clipping tool. Some pupilsSHOULD: create two designs using autoshapes from Microsoft Powerpoint. Some pupilsCOULD: create two designs from clip art and two from bitmap images. Red = Cut, Blue = Engrave. Line thickness = 3mm No fill necessary draw the engraving first and cuts second. Use the template: MY COMPUTER > PUBLIC > TECHNOLOGY > MISS_HUDSPITH > YEAR 9 > frame_template.dtd. Do not cut inside the orange border – you may engrave within this area if necessary.
We have a board that is 300mm x 500mm and our photoframes are 150mm x 100mm. How many photoframes can we fit onto the board? How many boards will we need to allow for everyone in the class to have one 150 x 100mm piece for the front of the design and one the same size for the back? Adding our designs to the board: First person, open pattern.dtd and copy and paste the design into the space provided. Save it onto the removable disk and pass it on to the next person.