Download
1 / 64
650 likes | 677 Views
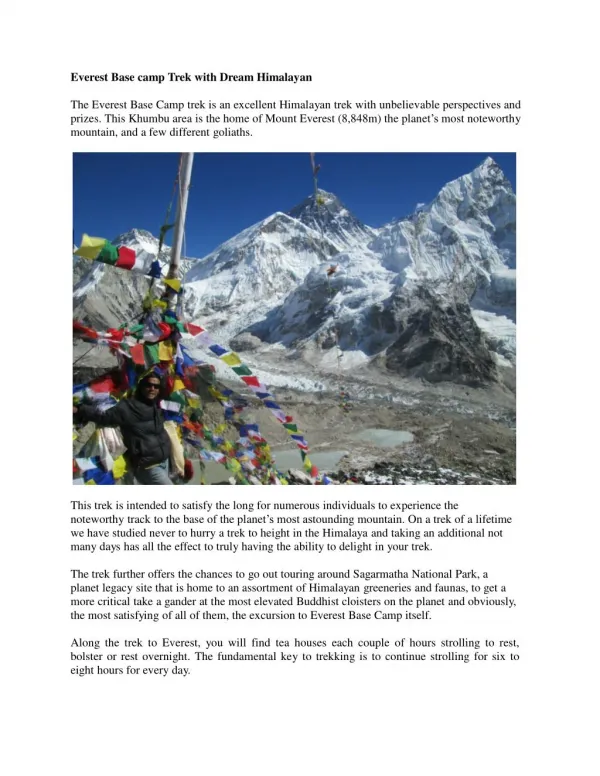
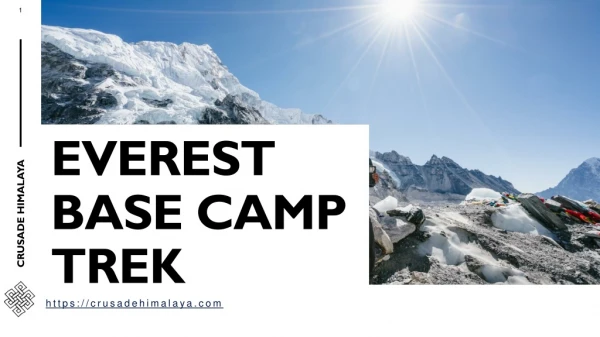
Everest Base Camp Trek is an ambition for many trekkers. The Everest Base Camp Trek, which includes Kalapatthar Climbing, is one of Nepal's most unique and popular treks (5545 m). The trek offers breathtaking views of four of the world's six highest peaks in the Everest region, including Holy Lake Gokyo

E N D
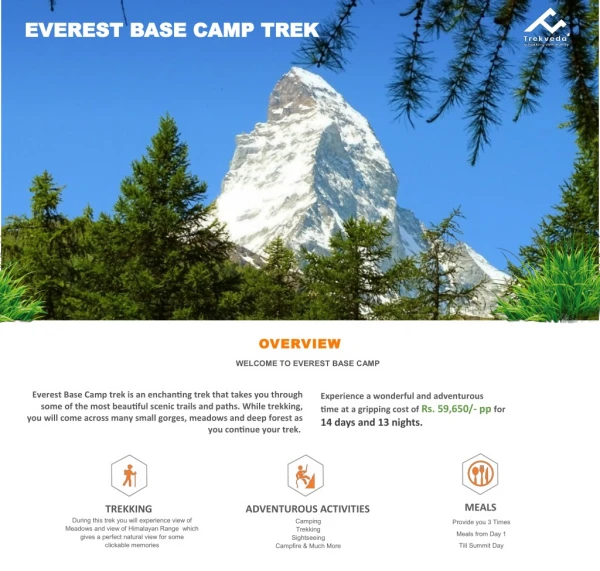
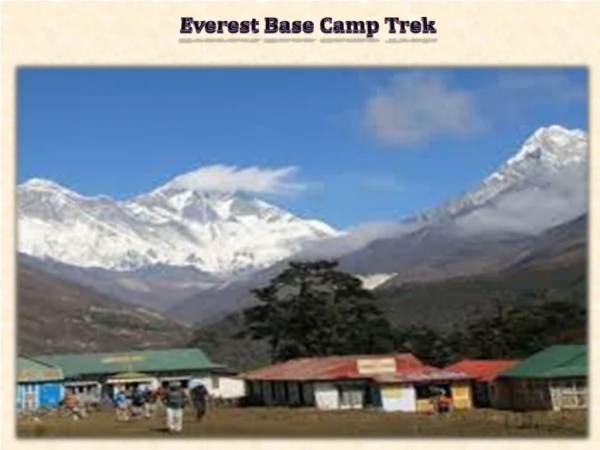
EVEREST BASE CAMP TREK Trip Introduction Everest Base Camp Trek is one of the special and the most visited treks in Nepal including Kalapatthar climbing (5545 m). The Trek provides a stunning view of four world’s six tallest tops in the Everest region including Holy lake Gokyo. The fascinating view on Mt. Everest, Lhotse, Cho Oyu, and Makalu and enjoy the stunning Panoramic view of more than 100 snowy capped mountains. The trekking trails from Shivalaya are above 4000 meters. So, acute altitude sickness will be a serious problem. Thus, It is necessary to slow rise and take the suggested rest day (acclimatization rest) to prevent acute altitude sickness. The Everest region is a beautiful place to visit and Everest Base Camp Trek is an ambition for many trekkers. Trekking to the base of the world’s highest mountain is a fantastic achievement and it is well worth the effort. Realistically, most of us are not going to be able to achieve this! But if you are of good fitness and strong determination, you can make it to Everest Base Camp! And between you and me, the views of Everest from Kalapatthar are the most spectacular you can get without having to spend weeks trudging up to the summit! Naturally, to preserve the beauty that surrounds Mt. Everest and the other mountains in the Himalayan range, the Government of Nepal imposes permit entrance fees. Sir Edmund Hillary and Tenzing Norgay may have been the people to put the Khumbu on the map but since then countless mountaineers and trekkers have enjoyed the beauty of the likes of Mt. Everest, Ama Dablam, Goyko Lakes, and much more. Let’s ensure this area stays as it is for future trekkers and Nepali people. The Allure of Mount Everest, and the Everest Base Camp Trek brings us back time and time again. We boast a 95% success rate to date on our Everest base camp trek, this is achieved by having 3 nights in Namche Bazaar at 3,440m/ 11,300 feet on the way up to the trail in the critical acclimatization period giving you the best chance of making a safe and enjoyable journey to Everest base camp. We include continuous training support and advice along with our booklet on the trek. Our goal is to help you come physically prepared and get you to face to face with Mount Everest. The quickest route into the region is by air, leaving from Kathmandu on a thirty-five-minute flight into the village of Lukla. We use Summit Air and Sita Air for our flights in and out of Everest. There is an option to fly via helicopter into Lukla airport. Lukla sits at 2,853m/ 9,360 feet. The Everest Region, also known as the Solukhumbu Region is rich in culture in addition to mountaineering history. The Everest Base Camp Trek has some of the greatest mountain views on the planet. This trip to Everest is one of the highlights of any avid trekker’s career and is achievable for most fit walkers. The Everest base camp trek is rated one of the best treks in the world and a journey never to be forgotten.
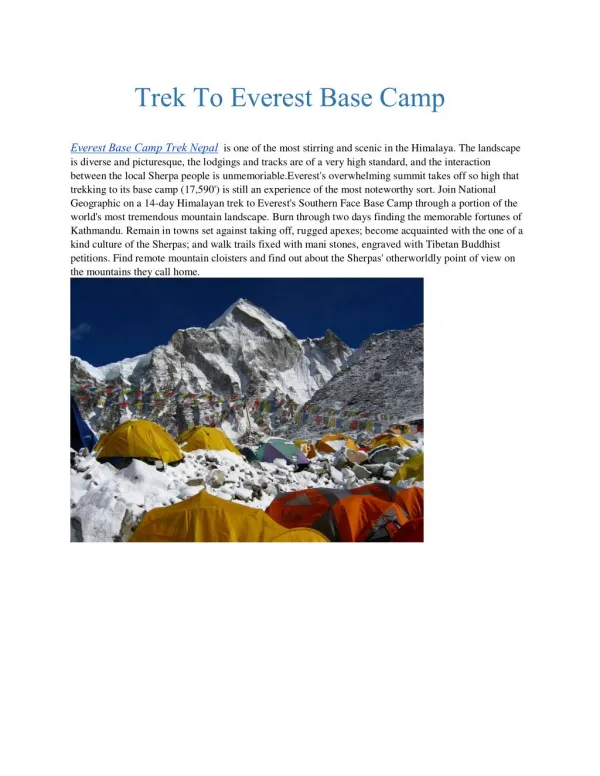
Everest Base Camp Trek begins from Kathmandu to Lukla flight and via Namche Bazaar and goes into Khumbu region of 30,000 to 10,000per month during peak season. From Namche, the trek heads upward through colourful Sherpa villages along the Dudh Kosi River. Terraced rice fields and rhododendron forests eventually turn into hardened landscapes of rock and ice with well renowned skilled mountain guides. On the approach to Everest Base Camp is the final outpost of Gorak Shep that provides brilliant experienced lifestyles and cultures of Sherpa and Bates. The scramble to nearby Kala Patthar (5,545 m; 18,192 ft) offers a panorama of Everest, Lhotse, and Nuptse that bests the views from the base camp itself. The main Everest Base Camp trail is an up-and-back route, meaning that you hike down the same trail you hiked. Di?culty level As it is the most difficult to get to the top Himalayan mountain, Mount Everest is also the biggest dream of many climbers who want to finish their career with such a climbing experience that requires overcoming the obstacles that their bodies build. Climbing Everest is an enterprise that has to be prepared in detail but before climbers head for the Himalayas they have to devote a long time to build stamina and train to get used to harsh conditions such as low temperatures and low-oxygen environments at higher altitudes. The body starts to rebel against the lack of oxygen. Even the strongest climbers may experience impaired judgement, strokes, heart attacks or difficulty overcoming altitude sickness. To achieve the set goal climbers have to acclimate to the lower rate of oxygen in the air before they attempt to get to the peak. It can be done by going on an Everest Base Camp Trek each time higher. Doing this they allow their body to produce more hemoglobin that carries oxygen from the lungs to the rest of the body preventing it from dying. That is why every mount Everest expedition has to be properly prepared, and this can only be done right by such an experienced company as Asian Trekking whose employees are Sherpa guides coming from the community known to have spent almost their whole lives trekking in the Himalayas. ACCOMMODATION ON A TRIP Accommodation at Lukla You’ll start your EBC trekking journey through a short flight from Kathmandu to Lukla. Most people prefer to take a trail straight away and head for the first stop Phakding or Namche. But Lukla is still a beautiful village with plenty of good hotels. Although they are more expensive than the lodges. Overall, you’ll get much better facilities than tea houses on the trail. Accommodation at Phakding
After Lukla, your next stop will be at Phakding. It is a beautiful small village that lies in the Dudh Koshi river valley just north of Lukla and south of Monjo. Phakding has enough hotels on both riversides. The tea houses at Phakding offers you an affordable and accessible accommodation service. If you’re travelling with a bit more budget, then for a bit more comfort there are many options for luxury accommodations too. Accommodation at Namche Bazaar Namche Bazaar is the main point to the Everest Base Camp trek. It is also a great place for acclimatization. Many trekkers spend two or three days getting adjusted to the altitude. This place is worth exploring as you’ll get the first view of Mt. Everest. Besides the natural beauty, this place has some of the best tea houses with great accommodation facilities. This is the last place where you can get moderate accommodation facilities on the trail of EBC. You’ll find a wide variety of tea houses from luxury to basic with a wide price range. Accommodation at Tengboche Tengboche is another popular trekking route during the Everest Base Camp. Tengboche Monastery is the largest monastery situated at 3,867 m. above the sea level in the Khumbu region. There are only 4-5 hotels in Tengboche on the trail. There will be more basic tea houses with basic facilities. Even though few tea houses provide a room with attached bathrooms and hot showers. Many people want to spend a night at Tengboche to attend the morning prayers at the monastery. So, it might get crowded during the peak seasons. Accommodation at Dingboche Dingboche is a Sherpa village and it is much larger than Tengboche. This place has dozens of lodges, a handful of shops, a bakery, and even an internet cafe. Most of the trekkers spend two nights at Dingboche for acclimatization purposes. Yes of course, here all the trekkers are welcomed for every season. Accommodation at Lobuche Lobuche is the last overnight route to the Everest base camp. Basically, there are significant hotels in this village. But the accommodation here is quite basic. During peak trekking season, sometimes it can get hard to find lodges. So, in this type of situation, you might have to share the rooms with other trekkers of the same gender. Accommodation at Gorak Shep
Since it is the best launching pad for an ascent of Kala Patthar, almost it is always a crowded place. In terms of accommodation, Gorakshep is pretty average. Trekking lodges are basic and even in the peak trekking season, you might have to sleep in a dining room or share a room with trekkers. Luckily, the dining room would be warmer for a little while, until the fire dies down. SEASONS: SPRING (March-May) The months of spring are considered the best months for Everest Base Camp Trek. In spring, the weather is pretty favourably stable and perfect for high altitude climbing. During this period the entire Everest Region is blossom with seasonal flowers including Nepal’s national flower “ Rhododendron or laliguras”.And crossing the UNESCO World Heritage “ Sagarmatha National Park” in this season offers a view of endangered animals, birds, vegetation and more. The whole forest lights up with red rhododendron which is only possible in the spring season. Spring season offers panoramic views of high peaks like Mt. Everest (8848 m), Mt. Cho Oyu (8201 m), Mt Makalu (8481 m), Mt. Ama Dablam (6812 m) and more. AUTUMN(August – Early November)
Along with the spring season, the Autumn season is also considered the best for EBC Trek. As for the climate, it is neither warmer at day nor too freezing cold night as winter season. It gets a little chillier in the fall than during the springtime. But that’s a fair trade for the mesmerizing views of the surrounding peaks that you get to see during this season. Also, you may get to experience light rainfall in the early days of autumn. But the views after those unannounced rainfalls are definitely threats to keep an eye on. You can find a lot of trekkers from around the world. WINTER (December- February) The above mentioned season is not necessarily a bad season but due to cold climatic conditions the temperature falls under -17⁰C (1.4⁰F). It is off-season and the sky seems to be very clear during winter. Also, winter is just the right time if you want to avoid hustling for space with other travellers. MONSOON(June -August) Generally, trekking during the monsoon season is a challenging task. In the rainy season, the trails get muddy and even slippery at times. The biggest challenge is going to be getting in or out of the mountains. There may not be flights in or out of Lukla for days on
end. You could experience torrential rains lower on the trail, making it difficult and challenging to trek in. If possible, we suggest avoiding this season of the year. There is more risk of land-slide and an overall more challenging time to be in the Everest region. Food : Nuts Trail mix (nuts/seeds/dried fruit) Oatcakes and nut butter. Whole grain, sandwiches. Rice/pasta/quinoa salads (more substantial for lunch perhaps) Homemade banana bread. Noodles/Chocolates Energy bars Energy gels Electrolyte replacement drink mix Snacks Nepal is a multi-religious country where people follow different traditions, cultures, religions, and lifestyles. They have their language, culture and custom, food, dress, and even festivals. You can try typical Nepali foods which are much more delicious as well. Dhal Bhat and Tarkari : Dal Bhat is Nepal’s staple dish. It is also known as Dal Bhat Tarkari, or just Tarkari (curry) in many local restaurants. Yet no matter the restaurant, cafe or hotel you order it in the chances are it will never be the same. But usually always very good and very filling. The
food is very rich in carbohydrates, protein and all sorts of essentials for the body. So, it may sound boring, but as the items get changed every time, they are varied and tasty. Dhido and Gundhruk : Although the Dal and Bhat is the main food of Nepal, dhindo and gundruk is the national food of Nepal. It is prepared from buckwheat or millet flour, but wheat and corn flour are the commonly used ones. While gundruk is a fermented leafy green vegetable and it serves as curry in the dhindo and gundruk cuisine. Eating dhindo and gundruk may not be as easy as eating dal and bhat. It is very sticky in hand and in the mouth too.It is eaten by making a small ball with fingers, dipping in the curry of gundruk and swallowing. Yes, you heard it right, it is swallowed not chewed. If you chew it, it will stick between your teeth. Newari Khaja set : The Newar community of Nepal is very rich in culture and tradition. And, their foods are also as rich as their customs. Newari Khaja is probably one of the popular and favourite cuisines of Nepal. The Newar community of Nepal is very rich in culture and tradition. And,
their foods are also as rich as their customs. Newari Khaja is probably one of the popular and favourite cuisines of Nepal. MOMO : Momo is a type of steamed dumpling with some form of filling. Momo has become a traditional delicacy in Nepal. Momo is like Mount Everest – one of the symbols of Nepal. Now its popularity has spread beyond national boundaries and, thanks largely to Nepalese communities living abroad, it is growing popular in other parts of the world, too. It is found in every corner of the country and every restaurant and hotel, big or small. So how is momo prepared and what are the ingredients? Momo is made from wheat flour, vegetable oil, chopped onion, garlic, sesame, green chillies, tomatoes, meat (preferably beef), mustard powder, ginger juice and a blend of Nepalese herbal spices. During First Aid : As mentioned above, a first aid kit should include: Diamox Re-hydration Sachets (Electrobion) Antiseptic cream Water purification tablets Insect repellent Antibiotics as per doctors’ advice Medicine for allergy Medicine for infections (Eye, urinary & Abdomen) Medicine for headaches Medicine to control diarrhea Multi-vitamin tablets Throat Lozenges Plasters (Adhesive & Blister) ● ● ● ● ● ● ● ● ● ● ● ● ●
Splint Pain relief spray, ointment & tablet. Dressing kit Thermometer Oximeter Betadine Cold and flu tablets Hand sanitiser ● ● ● ● ● ● ● ● Gear Equipment 1. MICROSPIKES If you already own Microspikes, Yaktrax, or another traction system for icy conditions please bring them with you, but note that these are typically most useful in the spring trekking season. Alpine Ascents will provide a pair of traction devices at no additional charge if you do not already own these. 2. TREKKING POLES Collapsible skiing/trekking poles. Three-section, adjustable-height models are preferred.
3. HIKING BOOTS Waterproof hiking boots designed for hiking in cool to cold conditions. Modern, lightly insulated boots with room in the toe box and good support should be stressed. Models like the Scarpa Terra GTX are ideal. 4. WOOL OR SYNTHETIC SOCKS Three pairs of medium to heavy hiking socks. These must fit over your liner socks if you plan to wear liner socks. TECHNICAL CLOTHING 1. SHORT UNDERWEAR
Two to three pairs including the pair you are wearing on Day 1. Synthetic or wool fabrics only – no cotton! Bring comfortable athletic styles based on your needs and preferences (e.g., boxers, briefs, sports bras). 2. BASELAYER BOTTOM Non-cotton baselayer bottoms that should fit snugly without constriction. We recommend lighter weight baselayers rather than heavier fleece-type layers. Wool, wool blend, polyester, or other synthetic fabrics all work well. Be sure your baselayer pants are not constructed from cotton. 3. SYNTHETIC T-SHIRT One or two short-sleeved outdoor t-shirts for hiking on warm days. “Tech tees” work well for this, as they are synthetic and quick-drying. 4. LONG SLEEVE SUN SHIRT
One long-sleeved base layer top. This item must be constructed of a non-cotton material such as merino wool or polyester. Note that light-coloured, hooded sun shirts are strongly recommended for sun protection, and are worn by guides throughout most climbs. 5. SOFTSHELL PANTS Stretchy, comfortable, non-insulated softshell pants that should fit comfortably with or without your base layer bottoms. Please note that “zip-off”-style trekking pants are too light to be considered softshell pants. 6. HIKING PANTS
One pair of lightweight synthetic hiking pants. Some prefer to bring zip-off styles, though that is not required. 7. HARDSHELL PANTS Non-insulated, fully waterproof shell pants that must fit comfortably over your baselayer bottoms and softshell pants. Full-length separating size zippers are generally required; occasionally, 7/8th zippers (extending from the cuff of the pant to the upper hip) can suffice but are strongly advised against. 8. SOFTSHELL JACKET
This breathable but wind-and-weather resistant jacket is a key part of a mountaineering layering system. We recommend a hooded model. This layer must fit well over your mid-layer top and baselayer top. Check out our write-up to learn more. 9.MID LAYER TOP A midweight, form-fitting, lightweight fleece layer for use over baselayers. Hoods are optional but recommended. Grid fleeces generally provide the best warmth-to-weight ratio. Note that very light puffy jackets can also suffice as a mid-layer. 10. HARDSHELL JACKET
A non hood. Must fit comfortably over your base layer, mid-layer, and softshell. -insulated, fully waterproof shell jacket with a 11. SYNTHETIC PUFFY JACKET (OPTIONAL) Light to midweight puffy jacket. Synthetic insulation is preferred for dealing with wet weather, but down fill can work with careful management. Models with a hood are useful but not required. Down sweaters or synthetic equivalents work well. 12. INSULATED DOWN PARKA This jacket or parka should be heavily insulated with high-quality down fill. We recommend an overall parka weight between 1.5 and 2.5 pounds. For warmth, a hood is required. Down sweaters or light puffy jackets will not be sufficient.
13. INSULATED SYNTHETIC PANTS A synthetic insulated pant with full-length separating side zips. Ski pants are typically not appropriate for this layer HANDWEAR SOFTSHELL GLOVES Midweight, lightly insulated gloves for use when mittens are too warm and liner gloves are not warm enough. Leather-palm construction is always ideal for the sake of durability. One pair of warm shell gloves with insulated removable liners. Excellent for use when conditions are too cold for softshell gloves, but too warm for expedition mittens. We recommend models with durable leather palms. HEADWEAR 1. WOOL/SYNTHETIC SKI HAT
Non-cotton wool or synthetic hat that covers the head and ears comfortably. 2. SUNGLASSES High-quality, UV-blocking sunglasses with good all-around protection are recommended. A good fit is critical for comfort- try on glasses to check for a comfy fit and good light blockage. Keep in mind that high-quality lenses are an absolute must due to the mountain sun. 3. HEADLAMP A modern outdoor LED headlamp offering 200-300 lumens of output. Freshly installed batteries plus spare batteries. Rental headlamps do not include spare batteries. Weather-resistant models are strongly preferred.
PERSONAL EQUIPMENT 1.(OPTIONAL) TOWEL & SOAP A small packable towel and a small bottle of soap/shampoo can be nice to have, as showers may be purchased at times during the trip. 2.0° FAHRENHEIT SLEEPING BAG Whether filled with down or synthetic insulation, your sleeping bag should be rated to approximately 0° Fahrenheit and feature a collared hood for warmth. Be sure to include a compression stuff sack. Weather conditions and your body temperature needs may affect what rating of sleeping bag you require. Please call with questions. 3. WATER BOTTLES
Bring two one-litre capacity water bottles. Wide-mouth, hard-sided, plastic bottles are ideal. Nalgene brand bottles are recommended. Do not bring metal bottles, and do not bring soft-sided water bottles. 4. PEE BOTTLE Collapsible or hard-sided 1 litre Nalgene models can work well. If opting for a collapsible model, please pick a 1.5-2 litre model as it allows for more space while using in your sleeping bag. For longer expeditions and colder mountains (Everest, Vinson, Denali, etc..) we strongly recommend a hard-sided 1 litre Nalgene as the collapsible models tend to crack in extreme temperatures. 5. PEE FUNNEL (FOR WOMEN) Optional. Practice is critical for the use of this item. 6. TRASH COMPACTOR/CONTRACTOR BAGS
Three heavy plastic garbage bags for use as waterproof packs/stuff sack liners. Trash compactor or contractor bags are made from heavier plastic and stand up well to prolonged mountain use. Alternatively, a reusable waterproof pack liner can be used provided it completely fills the inside of your pack. 7. CAMERA Optional. Small point-and-shoot cameras (including compact SLRs) are ideal & work well at altitude. Alternatively, many opt to use a smartphone camera. Due to weight & care in the mountain environment, large DSLR cameras are discouraged. 8. TOILETRY BAG Include toilet paper (stored in a plastic bag), hand sanitiser, toothbrush, toothpaste, floss, and wet wipes. Choose a quantity appropriate for the length of your trip. Female climbers should
bring an appropriate amount of feminine hygiene products for the duration of the trip (for international trips, these can be difficult to find last minute in-country). 10. WATER TREATMENT TOOLS You need to be able to treat four to six litres of water for personal consumption each day. Steri-Pen purification tools have become very popular – they quickly and easily treat water without the addition of chemical tastes. However, some find them temperamental from a battery perspective, even when extra batteries are available. Please bring one set of Aquamira chemical treatment drops as well, in case your Steri-Pen fails. 11. SUNSCREEN Two to four ounces of SPF 30+ sunscreen. Varieties with zinc-oxide are more protective! Two to four ounces per week is typically sufficient, but several small tubes can offer insurance against loss or exploded tubes. Sunscreen loses SPF rating over time; we strongly recommend brand-new sunscreen. 12. LIPSTICK
Several tubes of SPF 30+ lipstick. As with sunscreen, be sure your lipstick is new. 13. RUNNING SHOES Lightweight, comfortable running or walking shoes are recommended for off-mountain use and pre-and-post trip travel. In some situations, these may also serve as approach shoes. 14. SMALL PERSONAL FIRST-AID KIT Basic medical supplies in a compact package. We recommend basic painkillers, Moleskin, first-aid tape, Band-Aids, and anti-septic wipes or gel.
15. HAND SANITIZER Many alcohol-based hand cleaners will work well. Bring a small amount appropriate to the trip duration. 16. FACE MASK While on the mountain, all climbers are required to have a face mask easily accessible in a waterproof bag (Ziploc, etc.). When social distancing measures are not feasible, such as at a belay, you will be requested to wear your mask. Cloth or surgical masks are both acceptable. 17. HAND AND TOE WARMERS Bring three sets of each. Please note that toe warmers are different from hand warmers. They are formulated to work in a lower oxygen environment, like the inside of a boot, they also burn out more quickly.
INTERNATIONAL TREK FOOD All the food for this trip is provided, but bring any snacks or other food and drink items you wouldn’t want to trek without! We recommend bringing a personal selection of energy bars and Gu for the trek. Please let us know in advance if you have any food allergies we should be aware of. COVID-19 VACCINATION CARD & NEGATIVE PCR TEST RESULTS All climbers must bring a copy of their COVID-19 vaccination card and a negative PCR test to participate in the program. An electronic copy OR an original paper copy are both acceptable. For more details, please reference the COVID Protocols listed above in the Logistics tab. TRAVELING EXTRAS Please pack several quart-sized Ziploc bags, extra batteries for any electronic device (such as a headlamp or Steri-Pen!), and consider packing outlet adapters depending on your itinerary. An assortment of items to make your travel comfortable and secure will ensure a smooth trip. TRAVEL LOCK We recommend two (2) TSA-approved travel locks for your luggage. When travelling or when storing items in hotels or lodges these are useful, offering extra peace of mind. TRAVEL CLOTHES
Clean ‘town’ clothing is recommended for use travelling as well as pre-and-post trips. We recommend bringing a comfortable variety of clothing for peace of mind, including some t-shirts. SMALL DUFFEL This item can double as carry-on luggage for your flight and is used to store any items you do not plan to take into the mountains. Think light and simple, with 40-50 litres of total capacity. Bring a travel lock for peace TRAVEL LUGGAGE
For travelling to your start location, we recommend standard luggage with a travel lock. Medium-sized soft-sided duffels will be provided for transporting your belongings during your journey, so this travel luggage may be left behind at your hotel. Fitness Level The proverb” Health is wealth” truly holds for any Trekking/Hiking/Backpacking trip, especially in the Himalayan Region. Unlike mountaineering or rock climbing, mountaineering is considered a recreational activity. Why do we need to be physically fit before trekking to Everest Base Camp? The fittest you are, the chances are better than you extract the most from trekking. As we gain a higher altitude during the trek, the air becomes thinner. To cope with the decreasing level of Oxygen Aerobic fitness is most. Defying gravity and walking for a long duration on a steep slope with a rucksack/day-pack require a moderate level of Strength and Endurance training. How do we achieve the desired fitness level needed for Everest Base Camp Trek? This is purely quantitative and depends on the present physical condition of difficulty level and on the age to an extent. More time we spend on physical training results in better. However, this is a basic guideline to improve spending at least 8 weeks. The below training plan is a basic trekking fitness programme for beginners. Aerobic Fitness: First Phase: 1) Walking: In the early days, it is a good starter. Walking 4/5 Km every day, if possible on slopes. Maintain speed with a Complete 5 Km walk within an hour. Should continue for 5 days a week or for 3 weeks. 2) Stretching: After walking regular stretching exercises like free hands including shoulder, neck, arms, waist and legs should be done. Always do the stretching after your body is warmed up. Cold stretching is ineffective and may develop injuries.10 to 15 minutes.is mandatory. Once you complete the initial 3 weeks you can start building upon it. You can start either of the following: 2nd Phase:
Jogging can be done. Avoid jogging on the concrete or tarred surfaces and use a properly cushioned running shoe. Initially try to cover 3 km in 20 minutes and later 5 Km in 30 minutes. Follow stretching exercises as mentioned after the Jog/Run. Continue for 4/5 days a week for 5 weeks span. Cycling is another effective way to increase your aerobic capabilities and to shed extra pounds quickly. If you can do outdoor cycling, nothing compares to it. Using a static cycle in-home/gym initially covers a distance of 5 Km in 20 min with easy to moderate resistance available with the equipment. Later using moderate to high resistance cover a distance of at least 8 Km in 30 minutes. Follow stretching exercises as mentioned after the cycling session. Continue for 4/5 days a week for 5 weeks span. Strength and Endurance training: You can start this from the 2nd Phase of your Aerobic training. Always do the Strength training after the Aerobic Training and Stretching. It aims at building strength in your back, shoulders, arms, and abdominal muscles. Your leg muscles will get stronger through aerobic training. At home, you can do push-ups and sit-ups. Do three sets each with a repetition of 10-15. Pull-up or Chin-ups is difficult to start with. If you are able to do then do 3 sets with 5-10 repetitions. Otherwise, take someone’s help and do assist pull-ups of 3 sets with 8 to 12 repetitions. Free squats of 3 sets with 10-15 repetitions. Avoid this if you have/had knee injuries. In a gym or home, you can do a few basic weight training like biceps-curl, triceps press and shoulder press. Consult a physical trainer before this workout. Do 3 sets of each with weights ( as suggested by the trainer ) for 8-10 repetitions. Permit needed for Everest Base Camp Trek You need to have trekking permits to go on Everest Base Camp Trek. An entry permit for Sagarmatha National Park and the Khumbu region is needed for EBC Trek. An additional entrance permit of the Gaurishankar Conservation Area and a standard trek from Lukla is
also needed. In this travel guide, you will get all details on trekking permits for Everest Base Camp Trek. It includes the trekking permits from Luka and Jiri/Salleri. Sagarmatha National Park Entry Permit Includes: Sagarmatha National Park Entry Permit Khumbu Rural Municipality Entrance Permit. Gaurishankar Conservation Area Entrance Permit Everest Base Camp Trek Permits cost The amount payable for trekking permits remains the same regardless of the starting point of your trek; Lukla or Jiri/Salleri. Sagarmatha National Park Entry Permit costs NRP 3,000 per person for foreigners and citizens of SAARC nations cost NRP 1,500 per person. Nepalese are charged NRP 100 per person. Khumbu Rural Municipality Entrance Permit costs NRP 2,000 per trekker. It is the same for every trekker regardless of their nationality. You need to pay NRP 2,000 to obtain the Gaurishankar Conservation Area permit. The cost of this permit is the same for everyone. Let’s find out which are the trekking permits that you will require among the above-mentioned permits & costs when trekking from Luka or Jiri/Salleri. Documents Required to Get Everest Base Camp Trekking Permits. A passport with a validity of 6 months or its copy is required to fill out a form. You need details from your passport to fill in the form and obtain Sagarmatha National Park Entry Permit and Khumbu Rural Municipality Entrance Permit. You will need two photographs and fill up a form to get the Gaurishankar Conservation Area Entrance Permit. The permit is required only when trekking from Jiri or Salleri. Where to get Everest Base Camp Trek Permits? You will be acquiring trekking permits from different places when starting your trek from Lukla and Jiri or Salleri. Where to get an EBC trek permit when starting your EBC Trek from Lukla? You can get the Sagarmatha National Park Entry Permit at Monjo, the entrance of the national park while trekking. You can get a permit from Nepal Tourism Board in Kathmandu before the trek. Khumbu Pasang Lhamu Rural Municipality Entrance Permit is available at the rural municipality counter which lies at the edge of the village in Lukla. You cannot get this permit from Kathmandu. The local government of Khumbu directly collects the fee. The benefit from permit fees will go to the region. Where to get an EBC trek permit when beginning your EBC Trek from Jiri/Salleri?
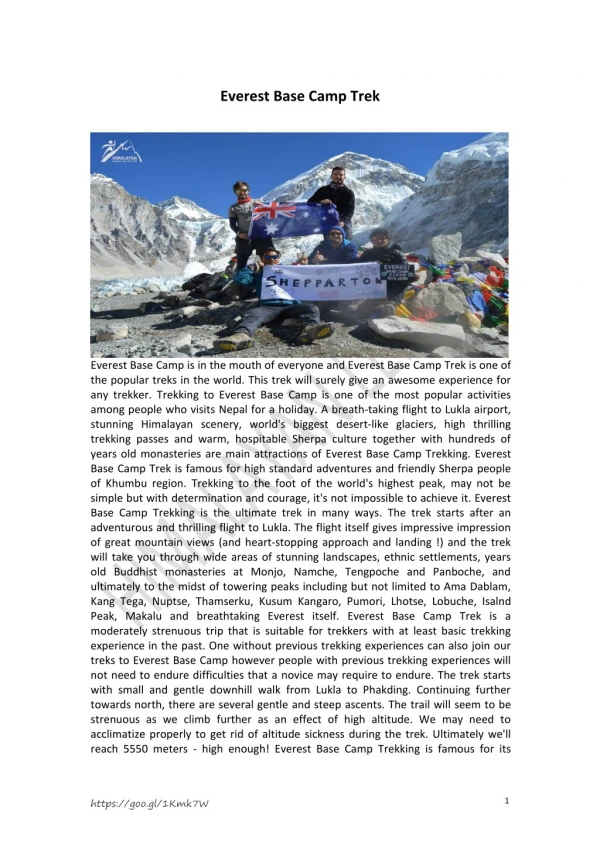
You can get Sagarmatha National Park Entry Permit either at Monjo during the trek or from Nepal Tourism Board’s office in Kathmandu. When trekking from Jiri or Salleri, Khumbu Pasang Lhamu Rural Municipality Entrance Permit will be available at Monjo. The local government of Khumbu directly takes the permit fees so you cannot get this permit in advance from Kathmandu. The Gaurishankar Conservation Area permit can be acquired from the Nepal Tourism Board’s office in Kathmandu prior to your trek. Do you need a trekking permit for a helicopter tour of Everest? Well, you do not need to obtain a trekking permit for a helicopter tour of Everest. But if you will stop at Everest view hotel for breakfast then you have to pay RS 3000 for Sagarmatha National Park Entry Permit. Do you need a TIMS Card for Everest Base Camp Trek? As of October 2018, a new rule is in effect and trekkers do not need a TIMS card for Everest Base Camp Trek. Before 2018, trekkers needed 3 trekking permits- Sagarmatha National Park, TIMS (Trekker’s Information Management System), and Khumbu Pasang Lhamu Rural Municipality. A TIMS card used to cost USD 10 for trekkers in a group and USD 20 for independent trekkers. Moreover, the price of the TIMS card was NRP 300 for trekkers in groups and NRP 600 for independent trekkers from SAARC countries. Important Tips for EBC Trek Permits Trekkers are expected to respect the local custom and traditions of the region and should not do any activity against the tradition and values of the community. You need to carry cash to pay for your Everest Base Camp Trek Permits that are payable in Nepalese Currency. The trekking permit fees could be quoted in the US dollar but are payable in Nepalese Currency. You are highly recommended to get travel insurance which covers high altitude treks up to 5,550 meters and emergency rescue via helicopter. It will be thoughtful to get the insurance that covers you in the event of lost or stolen baggage and cancellation of both domestic and international flights. Travel with A Trusted Trekking Company Trekking agency generally handle the process of obtaining Everest Base Camp Trek permits. Choose a travel company with a professional and experienced guide. An experienced guide from a trusted company will add value to your trek and make your trek wonderful. Everest Base Camp will shower you with memories to cherish for a lifetime! The success rate for Everest base camp trip In comparison to climbing Everest, The Everest Base Camp Trek is not a difficult trek to understand. Statistics show that about 90% of people make it to Everest base camp 5,364m/ 17,598 feet. It is even less up to Kala phattar 5,545m/ 18,192 feet which really is one of the main reasons for going to the Khumbu (Everest) region trek.
The majority of death reported on Everest each year are of climbers and sherpas who have to deal with much greater altitude, more adverse weather conditions and a greater risk of fatal falls than those of EBC trekkers. The Everest Base Camp Trek poses a variety of risks because of its location and altitude. The trek would be much harder if you tried to complete it in under 14 days. Activities involved in the Trip Everest Base Camp Trek is not only about walking. If you think so you have to think beyond your perception. You can do much more activities and experience much more than just walking. The activities that you can do in the Everest base camp trek offer you an experience that certainly exceeds your expectation. Being the home to the highest mountain in the world, the Everest region has its charm that attracts adventure travellers from around the world. Everest base camp trek is a dream adventure for many trekkers. If you want to take this adventure beyond just a walking activity. We are listing a few awesome activities that you can do in the Everest base camp trek. Walk to the base camp of the World’s highest peak. Tengboche Monastery Everest View Hotel Sherpa people, their culture, and lifestyle The sunrise views and views of mountains from Kalapatthar Stunning views of mountains such as Mt. Everest, Mt. Lhotse, Mt. Makalu, Mt. Cho-Oyu, Mt. Ama Dablam, Mt. Nuptse, Mt. Thamserku, Mt. Tawache and many more. Everest Helicopter Tour Yoga and Meditation Meeting and Conference GUIDE AND PORTERS Trekking in Nepal can be done either by taking a guide or independently. If you’re not sure of the difference between porters, guides and those in between, trying to work out who you need on your team for a trek can be tricky. If you plan to trek without a guide, then it is usually best to stick to the more popular trekking trails, with plenty of teahouses and information signages. Guides are experienced trekkers and usually have good knowledge about trek trails. Porter is a personal decision that is also affected by the difficulty of the trek and the available budget. Guide Guide show you the way, to point out the famous mountains, landmarks and of course, dangers. They’re there to keep you safe, to fascinate you with tales of local lore and wild
adventurers. They’re there to make sure you get good food and a clean bed in every village and to make sure you have the best possible experience on your trek. A good guide can sometimes be hard to find but when you find one they’ll usually be happy to help you find porters (most of whom speak little or no English or other languages, so unless you know some Nepali, this can be very difficult), sort out park passes and permits, get you into the mountains and work as a general manager for your porters and other staff each day, where you may otherwise struggle. Some of these additional services may come with a small fee to cover your guide’s time and travel costs to the various booking offices and government departments. Your guide is essentially your mountain concierge and having one is likely to make your trip more pleasurable in every way. It’s important also to treat your guide with respect and acknowledge the experience and wisdom they possess. The best guide-trekker relationships are always those that begin with mutual respect and blossom into friendship, trust and laughter. That is in fact the very foundation from which this company came into being. For safety, fun, local knowledge and to support the country that inspires such awe for all of us, we’d always recommend trekking with a guide. Porters Porters are literally the backbone of the trekking world. Everything you see in the mountains that nature didn’t put there – a porter did. For trekkers, the trail can be hard, the air thin, and the gear really heavy. Porters, especially Sherpas and other mountain peoples, are accustomed to the altitude and thin air and spend their lives carrying loads in the mountains. For you, a heavy pack of gear might make a tough day unbearable. A good porter won’t have too much difficulty. If you ask them, porters will carry immense loads, much more than could be considered reasonable. It’s up to you to exercise discretion and care. We suggest not asking any single porter to carry more than 18kg. A safe weight they can manage with comfort. A porter will typically carry the gear of two people. Porters aren’t there to guide you, most don’t even speak English, they’re just there to make sure everything you need is where you need it. They’re also not there to look out for your safety, in fact, porters are often so keen to get the job done that you need to look out for their safety and well-being. Especially on a DIY trek, as their employer, you have genuine responsibility for their health and safety. Meanwhile, you can check out our most popular trekking routes: Everest Base Camp Treks Annapurna Base Camp Treks Langtang Region Treks
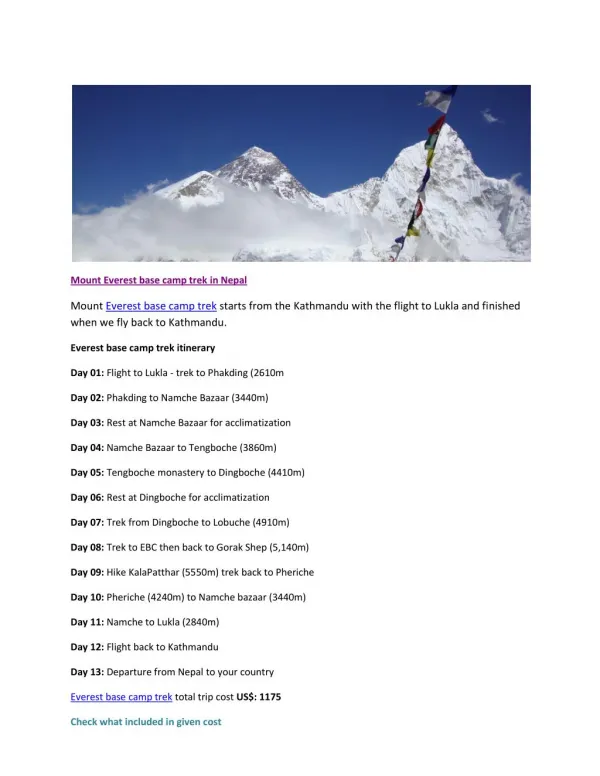
If you might be interested to visit for more similar types of treks you can go through a short Everest base camp trek Why trek to Mount Everest with us? We are a fully locally owned company with the quality of service at a reasonable price. We have highly skilled staff with flexible and customized trip itineraries. We provide 100%customer satisfaction. Outline Itinenary Day 01 :Arrival in Katmandu. Day 02 :Fly to Lukla from Kathmandu (2,820m) and trek to Phakding 2,640 M (30 minutes flight and 3 hours walk). Day 03 :Day 03: Phakding to Namche Bazaar (3446m) 6 hour. Day 04 :Rest Day at Namche Bazaar. Day 05 :Namche Bazaar to Tengboche (3867m) 5 hour. Day 06 :Tengboche to Dingboche (4300m) 5 hour. Day 07 :Rest day at Dingboche for acclimatization and outing. Day 08 :From Dingboche Trek to Lobuche 4,930 m - 5 hrs. Day 09 :From Lobuche Trek to Everest Base Camp 5,364 meter and come back to GorakShep 5,180 miter - 06 hours. Day 10 :From GorakShep Hike up to Kalapathar 5,545 meter and trek to Pheriche 4,240 meter - 5 hours. Day 11 :From Pheriche Trek to Namche Bazzar- 6 hours walk. Day 12 :From Namche Bazzar Trek to Lukla - 4 hrs. Day 13 :From Lukla Fly back to Kathmandu and transfer to your Lodging. Day 14 : Final Departure/Farewell. ● ● ● ● ● ● ● ● ● ● ● ● ● ● rip Introduction Everest Base Camp Trek is one of the special and the most visited treks in Nepal including Kalapatthar climbing (5545 m). The Trek provides the stunning view of four world’s six tallest tops in the Everest region including Holy lake Gokyo. The fascinating view on Mt. Everest, Lhotse, Cho Oyu, Makalu and enjoy the stunning Panoramic view of more than 100 snowy capped mountains. The trekking trails from Shivalaya are above 4000 meters. So, acute altitude sickness will be a serious problem. Thus, It is necessary to slow rise and take the suggested rest day (acclimatization rest) to prevent acute altitude sickness. The Everest region is a beautiful place to visit and Everest Base Camp Trek is an ambition for many trekkers. Trekking to the base of the world’s highest mountain is a fantastic achievement and it is well worth the effort. Realistically, most of us are not going to be able to achieve this! But if you are of good fitness and strong determination, you can make it to Everest Base Camp! And between you and me, the views of Everest from Kalapatthar are the most spectacular you can get without having to spend weeks trudging up to the summit!
Naturally, to preserve the beauty that surrounds Mt. Everest and the other mountains in the Himalayan range, the Government of Nepal imposes permit entrance fees. Sir Edmund Hillary and Tenzing Norgay may have been the people to put the Khumbu on the map but since then countless mountaineers and trekkers have enjoyed the beauty of the likes of Mt. Everest, Ama Dablam, Goyko Lakes, and much more. Let’s ensure this area stays as it is for future trekkers and Nepali people. The Allure of Mount Everest, and the Everest Base Camp Trek brings us back time and time again. We boast a 95% success rate to date on our Everest base camp trek, this is achieved by having 3 nights in Namche Bazaar at 3,440m/ 11,300 feet on the way up to the trail in the critical acclimatization period giving you the best chance of making a safe and enjoyable journey to Everest base camp. We include continuous training support and advice along with our booklet on the trek. Our goal is to help you come physically prepared and get you to face to face with Mount Everest. The quickest route into the region is by air, leaving from Kathmandu on a thirty-five-minute flight into the village of Lukla. We use Summit Air and Sita Air for our flights in and out of Everest. There is an option to fly via helicopter into Lukla airport. Lukla sits at 2,853m/ 9,360 feet. The Everest Region, also known as the Solukhumbu Region is rich in culture in addition to mountaineering history. The Everest Base Camp Trek has some of the greatest mountain views on the planet. This trip to Everest is one of the highlights of any avid trekker’s career and is achievable for most fit walkers. The Everest base camp trek is rated one of the best treks in the world and a journey never to be forgotten. Everest Base Camp Trek begins from Kathmandu to Lukla flight and via Namche Bazaar and goes into Khumbu region of 30,000 to 10,000per month during peak season. From Namche, the trek heads upward through colourful Sherpa villages along the Dudh Kosi River. Terraced rice fields and rhododendron forests eventually turn into hardened landscapes of rock and ice with well renowned skilled mountain guides. On the approach to Everest Base Camp is the final outpost of Gorak Shep that provides brilliant experienced lifestyles and cultures of Sherpa and Bates. The scramble to nearby Kala Patthar (5,545 m; 18,192 ft) offers a panorama of Everest, Lhotse, and Nuptse that bests the views from the base camp itself. The main Everest Base Camp trail is an up-and-back route, meaning that you hike down the same trail you hiked. Di?culty level As it is the most difficult to get to the top Himalayan mountain, Mount Everest is also the biggest dream of many climbers who want to finish their career with such a climbing experience that requires overcoming the obstacles that their bodies build. Climbing Everest is an enterprise that has to be prepared in detail but before climbers head for the Himalayas they have to devote a long time to build stamina and train to get used to harsh conditions
such as low temperatures and low-oxygen environments at higher altitudes. The body starts to rebel against the lack of oxygen. Even the strongest climbers may experience impaired judgement, strokes, heart attacks or difficulty overcoming altitude sickness. To achieve the set goal climbers have to acclimate to the lower rate of oxygen in the air before they attempt to get to the peak. It can be done by going on an Everest Base Camp Trek each time higher. Doing this they allow their body to produce more hemoglobin that carries oxygen from the lungs to the rest of the body preventing it from dying. That is why every mount Everest expedition has to be properly prepared, and this can only be done right by such an experienced company as Asian Trekking whose employees are Sherpa guides coming from the community known to have spent almost their whole lives trekking in the Himalayas. ACCOMMODATION ON A TRIP Accommodation at Lukla You’ll start your EBC trekking journey through a short flight from Kathmandu to Lukla. Most people prefer to take a trail straight away and head for the first stop Phakding or Namche. But Lukla is still a beautiful village with plenty of good hotels. Although they are more expensive than the lodges. Overall, you’ll get much better facilities than tea houses on the trail. Accommodation at Phakding After Lukla, your next stop will be at Phakding. It is a beautiful small village that lies in the Dudh Koshi river valley just north of Lukla and south of Monjo. Phakding has enough hotels on both riversides. The tea houses at Phakding offers you an affordable and accessible accommodation service. If you’re travelling with a bit more budget, then for a bit more comfort there are many options for luxury accommodations too. Accommodation at Namche Bazaar Namche Bazaar is the main point to the Everest Base Camp trek. It is also a great place for acclimatization. Many trekkers spend two or three days getting adjusted to the altitude. This place is worth exploring as you’ll get the first view of Mt. Everest. Besides the natural beauty, this place has some of the best tea houses with great accommodation facilities. This is the last place where you can get moderate accommodation facilities on the trail of EBC. You’ll find a wide variety of tea houses from luxury to basic with a wide price range. Accommodation at Tengboche
Tengboche is another popular trekking route during the Everest Base Camp. Tengboche Monastery is the largest monastery situated at 3,867 m. above the sea level in the Khumbu region. There are only 4-5 hotels in Tengboche on the trail. There will be more basic tea houses with basic facilities. Even though few tea houses provide a room with attached bathrooms and hot showers. Many people want to spend a night at Tengboche to attend the morning prayers at the monastery. So, it might get crowded during the peak seasons. Accommodation at Dingboche Dingboche is a Sherpa village and it is much larger than Tengboche. This place has dozens of lodges, a handful of shops, a bakery, and even an internet cafe. Most of the trekkers spend two nights at Dingboche for acclimatization purposes. Yes of course, here all the trekkers are welcomed for every season. Accommodation at Lobuche Lobuche is the last overnight route to the Everest base camp. Basically, there are significant hotels in this village. But the accommodation here is quite basic. During peak trekking season, sometimes it can get hard to find lodges. So, in this type of situation, you might have to share the rooms with other trekkers of the same gender. Accommodation at Gorak Shep Since it is the best launching pad for an ascent of Kala Patthar, almost it is always a crowded place. In terms of accommodation, Gorakshep is pretty average. Trekking lodges are basic and even in the peak trekking season, you might have to sleep in a dining room or share a room with trekkers. Luckily, the dining room would be warmer for a little while, until the fire dies down. SEASONS: SPRING (March-May)
The months of spring are considered the best months for Everest Base Camp Trek. In spring, the weather is pretty favourably stable and perfect for high altitude climbing. During this period the entire Everest Region is blossom with seasonal flowers including Nepal’s national flower “ Rhododendron or laliguras”.And crossing the UNESCO World Heritage “ Sagarmatha National Park” in this season offers a view of endangered animals, birds, vegetation and more. The whole forest lights up with red rhododendron which is only possible in the spring season. Spring season offers panoramic views of high peaks like Mt. Everest (8848 m), Mt. Cho Oyu (8201 m), Mt Makalu (8481 m), Mt. Ama Dablam (6812 m) and more. AUTUMN(August – Early November) Along with the spring season, the Autumn season is also considered the best for EBC Trek. As for the climate, it is neither warmer at day nor too freezing cold night as winter season. It gets a little chillier in the fall than during the springtime. But that’s a fair trade for the mesmerizing views of the surrounding peaks that you get to see during this season. Also, you may get to experience light rainfall in the early days of autumn. But the views after those unannounced rainfalls are definitely threats to keep an eye on. You can find a lot of trekkers from around the world. WINTER (December- February)
The above mentioned season is not necessarily a bad season but due to cold climatic conditions the temperature falls under -17⁰C (1.4⁰F). It is off-season and the sky seems to be very clear during winter. Also, winter is just the right time if you want to avoid hustling for space with other travellers. MONSOON(June -August) Generally, trekking during the monsoon season is a challenging task. In the rainy season, the trails get muddy and even slippery at times. The biggest challenge is going to be getting in or out of the mountains. There may not be flights in or out of Lukla for days on end. You could experience torrential rains lower on the trail, making it difficult and challenging to trek in. If possible, we suggest avoiding this season of the year. There is more risk of land-slide and an overall more challenging time to be in the Everest region. Food : Nuts Trail mix (nuts/seeds/dried fruit)
Oatcakes and nut butter. Whole grain, sandwiches. Rice/pasta/quinoa salads (more substantial for lunch perhaps) Homemade banana bread. Noodles/Chocolates Energy bars Energy gels Electrolyte replacement drink mix Snacks Nepal is a multi-religious country where people follow different traditions, cultures, religions, and lifestyles. They have their language, culture and custom, food, dress, and even festivals. You can try typical Nepali foods which are much more delicious as well. Dhal Bhat and Tarkari : Dal Bhat is Nepal’s staple dish. It is also known as Dal Bhat Tarkari, or just Tarkari (curry) in many local restaurants. Yet no matter the restaurant, cafe or hotel you order it in the chances are it will never be the same. But usually always very good and very filling. The food is very rich in carbohydrates, protein and all sorts of essentials for the body. So, it may sound boring, but as the items get changed every time, they are varied and tasty. Dhido and Gundhruk :
Although the Dal and Bhat is the main food of Nepal, dhindo and gundruk is the national food of Nepal. It is prepared from buckwheat or millet flour, but wheat and corn flour are the commonly used ones. While gundruk is a fermented leafy green vegetable and it serves as curry in the dhindo and gundruk cuisine. Eating dhindo and gundruk may not be as easy as eating dal and bhat. It is very sticky in hand and in the mouth too.It is eaten by making a small ball with fingers, dipping in the curry of gundruk and swallowing. Yes, you heard it right, it is swallowed not chewed. If you chew it, it will stick between your teeth. Newari Khaja set : The Newar community of Nepal is very rich in culture and tradition. And, their foods are also as rich as their customs. Newari Khaja is probably one of the popular and favourite cuisines of Nepal. The Newar community of Nepal is very rich in culture and tradition. And, their foods are also as rich as their customs. Newari Khaja is probably one of the popular and favourite cuisines of Nepal. MOMO :
Momo is a type of steamed dumpling with some form of filling. Momo has become a traditional delicacy in Nepal. Momo is like Mount Everest – one of the symbols of Nepal. Now its popularity has spread beyond national boundaries and, thanks largely to Nepalese communities living abroad, it is growing popular in other parts of the world, too. It is found in every corner of the country and every restaurant and hotel, big or small. So how is momo prepared and what are the ingredients? Momo is made from wheat flour, vegetable oil, chopped onion, garlic, sesame, green chillies, tomatoes, meat (preferably beef), mustard powder, ginger juice and a blend of Nepalese herbal spices. During First Aid : As mentioned above, a first aid kit should include: Diamox Re-hydration Sachets (Electrobion) Antiseptic cream Water purification tablets Insect repellent Antibiotics as per doctors’ advice Medicine for allergy Medicine for infections (Eye, urinary & Abdomen) Medicine for headaches Medicine to control diarrhea Multi-vitamin tablets Throat Lozenges Plasters (Adhesive & Blister) Splint Pain relief spray, ointment & tablet. Dressing kit Thermometer Oximeter Betadine Cold and flu tablets ● ● ● ● ● ● ● ● ● ● ● ● ● ● ● ● ● ● ● ●
Hand sanitiser ● Gear Equipment 1. MICROSPIKES If you already own Microspikes, Yaktrax, or another traction system for icy conditions please bring them with you, but note that these are typically most useful in the spring trekking season. Alpine Ascents will provide a pair of traction devices at no additional charge if you do not already own these. 2. TREKKING POLES Collapsible skiing/trekking poles. Three-section, adjustable-height models are preferred. 3. HIKING BOOTS
Waterproof hiking boots designed for hiking in cool to cold conditions. Modern, lightly insulated boots with room in the toe box and good support should be stressed. Models like the Scarpa Terra GTX are ideal. 4. WOOL OR SYNTHETIC SOCKS Three pairs of medium to heavy hiking socks. These must fit over your liner socks if you plan to wear liner socks. TECHNICAL CLOTHING 1. SHORT UNDERWEAR Two to three pairs including the pair you are wearing on Day 1. Synthetic or wool fabrics only – no cotton! Bring comfortable athletic styles based on your needs and preferences (e.g., boxers, briefs, sports bras).
2. BASELAYER BOTTOM Non-cotton baselayer bottoms that should fit snugly without constriction. We recommend lighter weight baselayers rather than heavier fleece-type layers. Wool, wool blend, polyester, or other synthetic fabrics all work well. Be sure your baselayer pants are not constructed from cotton. 3. SYNTHETIC T-SHIRT One or two short-sleeved outdoor t-shirts for hiking on warm days. “Tech tees” work well for this, as they are synthetic and quick-drying. 4. LONG SLEEVE SUN SHIRT
One long-sleeved base layer top. This item must be constructed of a non-cotton material such as merino wool or polyester. Note that light-coloured, hooded sun shirts are strongly recommended for sun protection, and are worn by guides throughout most climbs. 5. SOFTSHELL PANTS Stretchy, comfortable, non-insulated softshell pants that should fit comfortably with or without your base layer bottoms. Please note that “zip-off”-style trekking pants are too light to be considered softshell pants. 6. HIKING PANTS One pair of lightweight synthetic hiking pants. Some prefer to bring zip-off styles, though that is not required. 7. HARDSHELL PANTS
Non-insulated, fully waterproof shell pants that must fit comfortably over your baselayer bottoms and softshell pants. Full-length separating size zippers are generally required; occasionally, 7/8th zippers (extending from the cuff of the pant to the upper hip) can suffice but are strongly advised against. 8. SOFTSHELL JACKET This breathable but wind-and-weather resistant jacket is a key part of a mountaineering layering system. We recommend a hooded model. This layer must fit well over your mid-layer top and baselayer top. Check out our write-up to learn more. 9.MID LAYER TOP
A midweight, form-fitting, lightweight fleece layer for use over baselayers. Hoods are optional but recommended. Grid fleeces generally provide the best warmth-to-weight ratio. Note that very light puffy jackets can also suffice as a mid-layer. 10. HARDSHELL JACKET A non hood. Must fit comfortably over your base layer, mid-layer, and softshell. -insulated, fully waterproof shell jacket with a 11. SYNTHETIC PUFFY JACKET (OPTIONAL) Light to midweight puffy jacket. Synthetic insulation is preferred for dealing with wet weather, but down fill can work with careful management. Models with a hood are useful but not required. Down sweaters or synthetic equivalents work well. 12. INSULATED DOWN PARKA
This jacket or parka should be heavily insulated with high-quality down fill. We recommend an overall parka weight between 1.5 and 2.5 pounds. For warmth, a hood is required. Down sweaters or light puffy jackets will not be sufficient. 13. INSULATED SYNTHETIC PANTS A synthetic insulated pant with full-length separating side zips. Ski pants are typically not appropriate for this layer HANDWEAR SOFTSHELL GLOVES
Midweight, lightly insulated gloves for use when mittens are too warm and liner gloves are not warm enough. Leather-palm construction is always ideal for the sake of durability. One pair of warm shell gloves with insulated removable liners. Excellent for use when conditions are too cold for softshell gloves, but too warm for expedition mittens. We recommend models with durable leather palms. HEADWEAR 1. WOOL/SYNTHETIC SKI HAT Non-cotton wool or synthetic hat that covers the head and ears comfortably. 2. SUNGLASSES High-quality, UV-blocking sunglasses with good all-around protection are recommended. A good fit is critical for comfort- try on glasses to check for a comfy fit and good light blockage. Keep in mind that high-quality lenses are an absolute must due to the mountain sun. 3. HEADLAMP
A modern outdoor LED headlamp offering 200-300 lumens of output. Freshly installed batteries plus spare batteries. Rental headlamps do not include spare batteries. Weather-resistant models are strongly preferred. PERSONAL EQUIPMENT 1.(OPTIONAL) TOWEL & SOAP A small packable towel and a small bottle of soap/shampoo can be nice to have, as showers may be purchased at times during the trip. 2.0° FAHRENHEIT SLEEPING BAG Whether filled with down or synthetic insulation, your sleeping bag should be rated to approximately 0° Fahrenheit and feature a collared hood for warmth. Be sure to include a
compression stuff sack. Weather conditions and your body temperature needs may affect what rating of sleeping bag you require. Please call with questions. 3. WATER BOTTLES Bring two one-litre capacity water bottles. Wide-mouth, hard-sided, plastic bottles are ideal. Nalgene brand bottles are recommended. Do not bring metal bottles, and do not bring soft-sided water bottles. 4. PEE BOTTLE Collapsible or hard-sided 1 litre Nalgene models can work well. If opting for a collapsible model, please pick a 1.5-2 litre model as it allows for more space while using in your sleeping bag. For longer expeditions and colder mountains (Everest, Vinson, Denali, etc..) we strongly recommend a hard-sided 1 litre Nalgene as the collapsible models tend to crack in extreme temperatures. 5. PEE FUNNEL (FOR WOMEN)