Cloud migration checklist
Utilize Nuvento, the Strategic Migration Assessment and Readiness Tool, to assess your level of cloud readiness and receive expert advice and tools to move closer to your cloud migration objectives.


Cloud migration checklist
E N D
Presentation Transcript
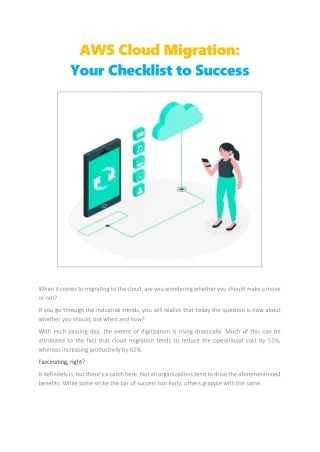
Cloud migration checklist
Phase 1: Develop and promote the position of migration architect The first step to a successful cloud migration is to establish the role of the migration architect. All planning, strategy, and completion aspects of the migration process fall under the purview of this system architect-level role.
Phase 2: Choose the degree of cloud integration Using a shallow (lift and shift) cloud integration approach or a deep cloud integration, you can move applications from an on-premises system to the cloud. With lift and shift, you may migrate apps to the cloud while making minimal changes to the servers. Deep cloud migration allows you to fully utilise important cloud capabilities while modifying your apps during the process. Compared to using serverless computing services like AWS Lambda, this would provide you advantages that are at least as great. Compared to auto scaling or dynamic load balancing, this approach is significantly more progressive.
Phase 3: Choose a single cloud or a group of clouds This choice is quite important. Once you make the decision to work with a single cloud vendor, switching to a different cloud managed services provider in the future may be challenging because you could need to start the migration process from scratch. Additionally, this has detrimental effects on your negotiation skills, particularly with regard to pricing and SLAs. If you choose multiple clouds, you gain the advantage of optimising all of your applications and the freedom to put them wherever you want in the cloud. The best course of action is to Riven your apps among different cloud providers. You can benefit from whatever they have to offer in this manner. The user experience of your application is dependent on all of the multi-cloud providers, so if any of them has problems, it could have a negative influence. One way to lessen the risks is to make your applications cloud-independent. You can change the providers of your loads.
Phase 4: Create cloud KPIs Establish your cloud KPIs and check to determine whether they meet your objectives. Your cloud KPIs should reflect the progress of your migration in order to ensure success. Additionally, it highlights any obvious, subtle, or likely issues that might be lurking in your apps. Additionally, cloud KPIs can provide a general estimate of when your migration project will likely be finished. Cloud KPI Example for User Experience Page load time, lags, session length, etc. are examples of categories. Infrastructure KPIs include disc performance, CPU and memory utilisation, and network throughput.
Phase 5: Establish performance benchmarks You can use baselines to compare present performance to expected performance following a migration. You can improve and fix any issues by using baselines. The cloud KPIs you want to track can have a baseline metric chart configured. You can gather any kind of data, including average data, data gathered over long periods of time, data gathered during peak or crucial times, and so forth. The type of data and duration should be specified in detail.
Phase 6: List and order the migration components Decide whether you want to transfer all of your applications at once or in stages. The migration order of the components must be determined. You could decide all of them using dependency graphs.
Phase 7: Finish all necessary refactoring Before your apps are moved, consider everything you want to change about them, such as refactoring. You can benefit from dynamic scaling, which will enable you to cut expenditures on cloud services and dynamic cloud capabilities.
Phase 8: Create a data migration strategy A bi-directional syncing system is an option for connecting your on-premises and cloud databases. Make your cloud-based version the primary database and make the new database accessible. A cloud data migration service like Microsoft Azure or Amazon Web Services can be used. Follow your data migration plan exactly.
Phase 9: Change the production The complexity and design of your apps, data, and data stores will determine if you should move from on-premise to the cloud. Change traffic from the on-premise stack to the cloud stack after moving the entire application to the cloud. If not, go stage by stage, test to ensure everything is functioning properly, and keep going until all applications and data have been moved to the cloud.
Phase 10: Analyze the distribution of application resources Even when the migration process is finished, resource optimization is still something you should think about. Dynamic resource distribution is tailored for the cloud. Ensure that the application has the appropriate allocation of your resources. Furthermore, cloud computing allows you to scale up and down according to your business's demands.
For more details https://nuvento.com/blog/complete-guide-f or-cloud-migration/