Download
1 / 13
0 likes | 15 Views
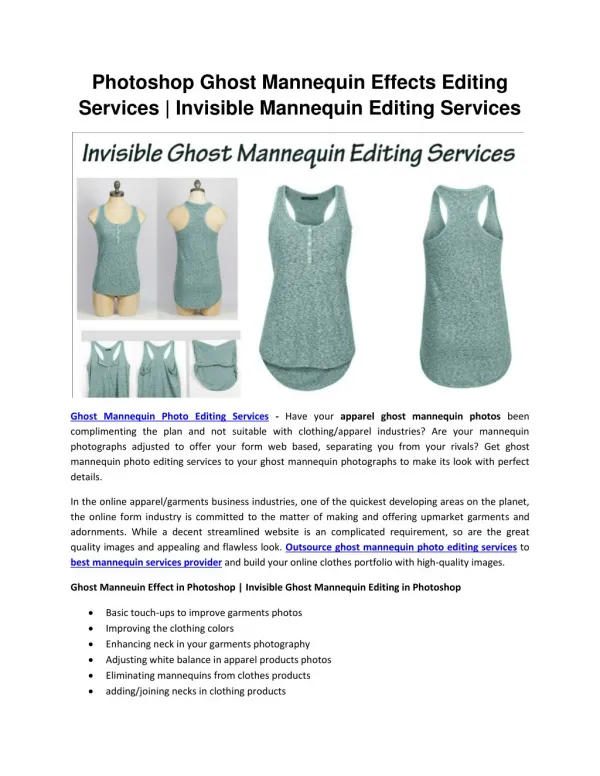
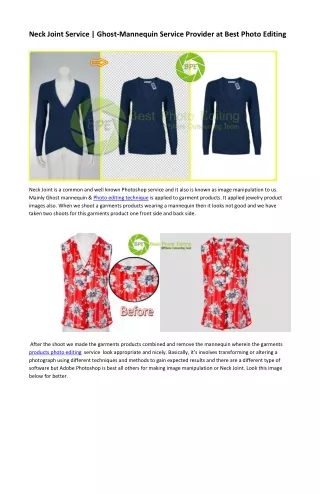
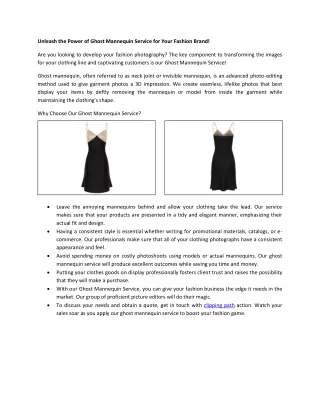
<br>Ghost mannequin retouching is a specialized service in product photography where clothing items are photographed on a mannequin, and then the mannequin is digitally removed to give the appearance that the garment is floating or being worn by an invisible model.

E N D
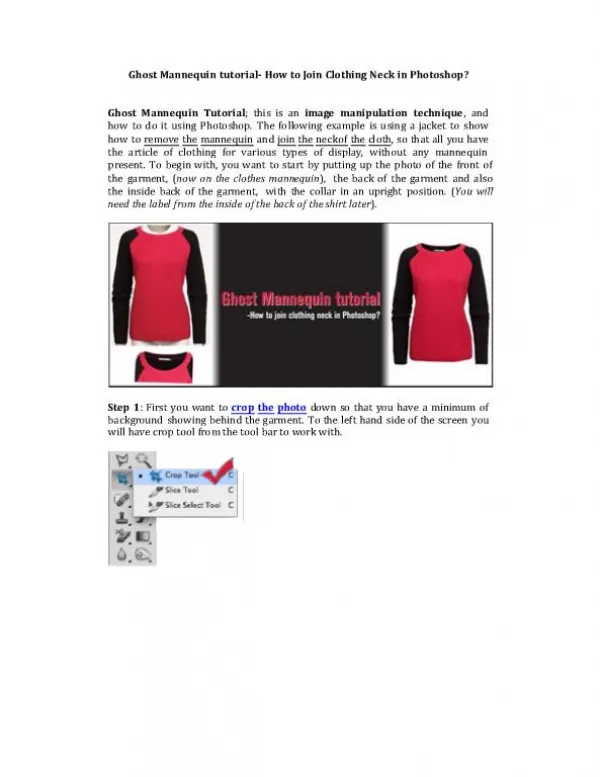
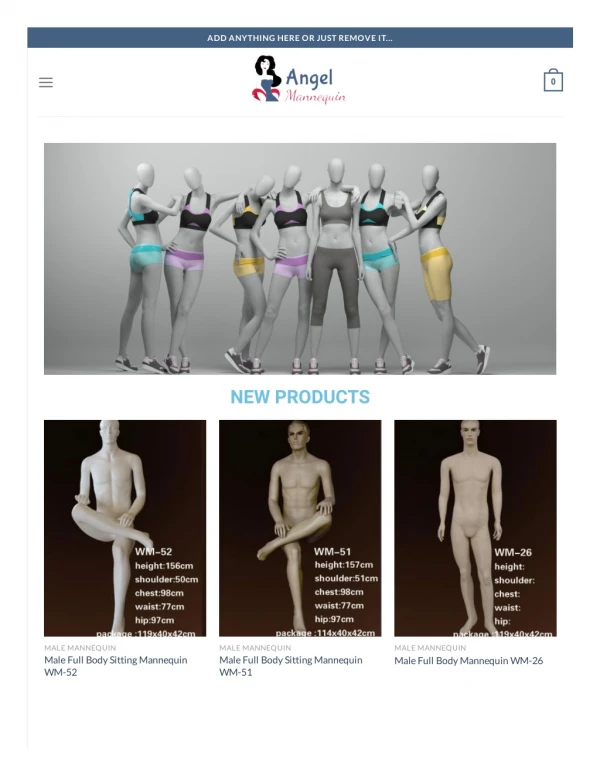
One successful and economical way to market your products is by using mannequins in your photos. Because mannequins help your products maintain their shape, product photographs can appear more consistent and professional, which will appeal to shoppers more. To avoid the distracting nature Ghost-Mannequin of mannequins, consider adding a ghost mannequin effect to your product pictures, as seen in the examples below. This kind of shot could seem hard to replicate at first, especially for amateur photographers. It becomes attainable when you tackle things one step at a time, much like most undertakings. We will use a straightforward procedure that entails blending two product photos to achieve the intended look. To improve the effectiveness of the post-production process, it's critical to comprehend how you should shoot your products.
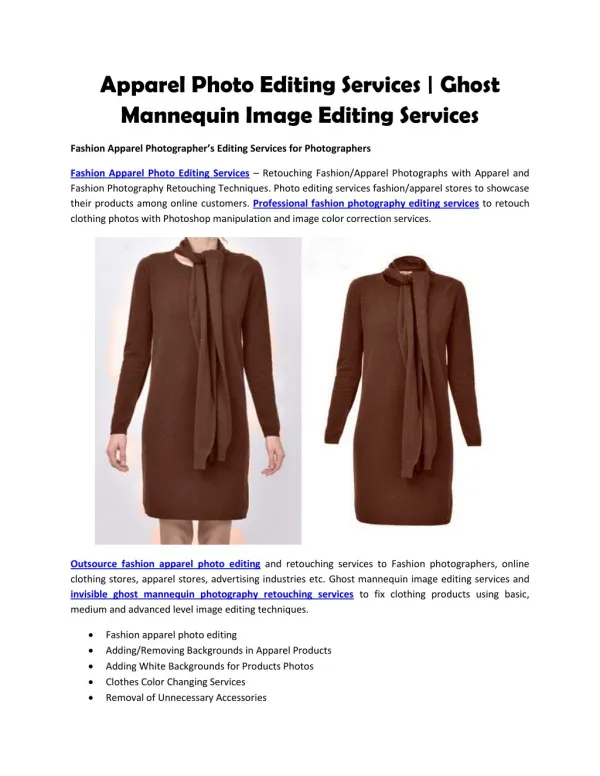
Learn how to add a "ghost mannequin effect" to your e-commerce product photos using post-production picture editing by following this easy step-by-step tutorial. How to Create the Ghost Mannequin Effect 1.Selecting and Posing a Model or Mannequin Models or mannequins are frequently used in fashion photography to highlight the distinctive fit and form of each item. Still, it's not always useful to include the model or mannequin in every picture. Retailers occasionally choose to take pictures of their products being modeled, then use Photoshop to erase the models and make the mannequins appear invisible. It might be challenging to get the hang of eliminating models and mannequins for smaller stores who handle much of their own image editing.
To achieve the effect of a "ghost mannequin" or "invisible mannequin," you must first take many photos of your product on a model or mannequin from various perspectives. One benefit of this is that you will have the option to incorporate these photos in your product galleries in addition to any "ghost" photos you make. In addition, your model should have a simple hairstyle and have long hair tied up to prevent it from blocking the product's vision. Image editing will be lot simpler with these details. There is a large selection of mannequins available. You can buy a mannequin with or without arms, hands, legs, or a neckline, depending on what you require. Make sure the limbs of your mannequin can be positioned out of frame if it has hands and arms. Because white matte mannequins can be made to blend into white backdrops and are typically non-reflective, editing the mannequin out of the photograph will be considerably simpler. Use the appropriate size or style the clothing to ensure that your product fits your mannequin or model. In addition, if your product includes sleeves, make sure the sleeves are positioned downward to block the viewer's view of them.
2.Setup and Equipment The ability to take excellent studio shots is a prerequisite for using the ghost mannequin approach. The attractiveness that the ghost mannequin effect can provide to your photos will decrease with their quality. Various factors such as camera and lighting techniques, equipment, and placement are important to consider while photographing each unique object. Here's how to take excellent product photos using the settings on your DSLR camera. Check out this expert demonstration of a ghost mannequin photoshoot from ecommerce picture studio Fotoempresas if you need some ideas. 3.Photographing the Product
The camera should be positioned directly level with the chest area when taking pictures of shirts, and across from the hip area while taking pictures of bottoms. A product may appear "tapered" and erroneous when photographed from an angle that is either too high or too low. Here are two samples of images showing mannequins wearing tank tops. The product appears unattractive in the photograph on the left because it was taken below chest height, but it looks nice in the front and rear images on the right because they were taken at chest height. The camera in the aforementioned image was set lower than chest level, which flattens the product's appearance. You can reduce distortion and gain more flexibility by moving closer to little things and further away from larger ones while taking pictures with a telephoto
zoom lens. Next, arrange the product and hang it on a white foam board. Take another picture of the front and back of the product using these foam board photos. When you combine the images, you will be able to see the interior parts of the garment, as you can see below. Make sure the inner back is exposed and the top is open on collared shirts and similar items. In some cases, you might even want to turn it inside out. Post-Processing Images: A Step-by-Step Guide If you have the right post-production software (like Adobe Photoshop) and have properly photographed your merchandise, producing a ghost mannequin effect is actually rather easy if you have the required views. You can also hire a professional editor to handle this editing task for you, and in a day or two, you'll have your ghost mannequin photos ready for sale. In the long run, outsourcing this job could save your firm a ton of time and
aggravation. However, if you have to perform the modifications yourself due to financial constraints, here are seven easy steps you can take to generate your own ghost mannequin effect in Photoshop. 1.Open Your Files in Photoshop and Create Layers Initially, you must open the images of the foam board and the mannequin in Photoshop. Make a new background layer after selecting your mannequin image. White should be added to that layer as, when you're done, it will become your background color. Labeling your layers will help you distinguish between them and stay organized. 2.Use a Selection Tool to Select the Product in the Mannequin Image
It's time to choose the item for your mannequin picture now. Select your preferred selection tool, such as the magic wand, lasso, or rapid selection, and zoom in closely. You can achieve your intended ghost-mannequin choice with the assistance of all three. Remember that the color distinction between the product and the background makes it usually easy to remove the mannequin when shooting on a white background. 3.Refine and Place Your Mask After you've chosen the entire item, tighten up your mask by erasing the mannequin and background completely.
The “Refine Edge” tool in the “Select” menu can be used to achieve this. After selecting "OK" in the "Refine Edge" dialog box, apply a mask to the layer of your shirt. Your product ought to be floating freely on the white background you first made at this point. To achieve a neat appearance, if required, somewhat more refine the mask and/or the product's edges. 4.Rinse and Repeat Previous Steps with the Foam Board Image Although this kind of product image might look a little strange at first, it's crucial to have one for your project; by taking the photo of the product from the inside out, you can complete the mannequin illusion by showing the interior rear of the item.
We guarantee that the final product will look fantastic! Make a new layer, choose the item, then make and fine-tune your mask. 5.Combine the Images Drag the foam board picture's mask to the ghost mannequin product image once both images have neat, well-defined masks. Layers should be arranged so that the foam board image is above the mannequin image. Subsequently, modify the foam board layer's orientation and dimensions to ensure that it nestles precisely behind the mannequin layer, curving gently beneath the shoulder. 6.Remove Unnecessary Parts of the Foam Board Layer
It is now a good idea to cover up your mannequin layer and remove any unnecessary foam board layer. Really, all that's needed is the triangle of the neckline between the shoulders. Take note of how the string across the back is visible in the video below. Since that item is present in the mannequin shot, it's crucial to remember to remove it from the foam board image. After completing this, make sure that everything is in alignment and that your layers are clean, paying particular attention to the neck and shoulder regions. Add Shadows and Save To give the final product some depth, apply a shadow between the two levels. Just in case, make a backup duplicate of the Photoshop file that has all the layers intact.
After saving the layer file, combine all of the layers into one file by flattening them, then save the image once more. Your image will appear realistic and professional after this last stage. A well-executed editing job will yield stunning 3D effects like the ones below, which will enhance your product photos and boost sales for your web store. Want to watch the execution of all seven steps? See the tutorial below for a detailed walkthrough of the procedure. As you can see, you can make your own professional photos of clothing products with the ghost mannequin effect if you follow the steps. You can download this comprehensive guide to ghost mannequin product photography to view examples featuring a wide range of clothing. Keep in mind that this impact on your product photos will elevate the appearance of your online store to a very professional level while also making your products appear more appealing and distinctive. Customers will view your brand more favorably, which can increase sales.
Website: https://retouchph.com/service/ghost-mannequin Email: info@retouchph.com Price List: https://retouchph.com/pricing Phone: +8801723283638 Company Address: Majhira, Shajahanpur, Bogura-5801, Bangladesh.