Download
1 / 10
0 likes | 2 Views
To delete a Gmail account on your iPhone, navigate to Settings > Mail > Accounts, select your Gmail account, and tap Delete Account. This removes the account from your device without deleting the Google account permanently.

E N D
How to Delete a Gmail Account on iPhone How to Delete a Gmail Account on iPhone: This guide provides a comprehensive overview of how to manage your Gmail accounts on your iPhone, differentiating between simply removing an account from your device and permanently deleting the Gmail service. Understanding this distinction is crucial for protecting your data and maintaining access to other Google services. We'll cover methods using the Mail app, the Gmail app, Safari, and the Google Account settings.
Deleting vs. Removing a Gmail Account Removing an Account Deleting the Service This action only removes the account from your iPhone. Your emails and data remain safely stored in your Google Account. This is a reversible process, allowing you to re-add the account to your device at any time. It's ideal if you're just switching devices or want to declutter your Mail app without losing access to your emails. This permanently deletes your Gmail service and all associated emails after a 30-day grace period. This action is irreversible once the 30 days pass, and your Gmail address cannot be reused. Your broader Google Account will typically remain active for other services like Drive or YouTube, but the Gmail component will be gone forever.
Removing Gmail via iPhone Mail App Access Settings 1 Open the Settings app on your iPhone, then navigate to Mail > Accounts. This section lists all email accounts linked to your device. Select Account 2 Tap on the Gmail account you wish to remove. This will open the account's detailed settings. Delete Account 3 Scroll to the bottom and tap "Delete Account". Confirm your decision in the pop-up prompt. Your Gmail will be removed from your iPhone, but your emails remain on Google's servers.
Removing Gmail via the Gmail App If you primarily use the Gmail app on your iPhone, the process to remove an account from the app is slightly different but just as straightforward. This method ensures the account is no longer accessible through the Gmail app on that specific device, without affecting its presence on other devices or the web. Tap Profile Picture Open the Gmail app and tap your profile picture in the top right corner of the screen. Manage Accounts Select "Manage Accounts on This Device" from the menu that appears. Remove Account Tap "Remove from This Device" next to the desired Gmail account and confirm. The account will no longer appear in your Gmail app on this iPhone.
Removing Gmail Account via Safari Browser Sometimes, managing your Gmail through a web browser on your iPhone can be the most direct approach, especially if you want to sign out of multiple accounts or prefer the web interface. This method uses Safari to access your Google Mail settings directly. Open Safari Access Menu Sign Out & Remove Launch Safari and navigate to mail.google.com. Tap the three horizontal lines (menu icon) in the top left, then select "Gmail Accounts". Choose "Sign Out of All Accounts", then click "Remove Account" for each account you want to clear from the browser's memory.
Permanently Deleting Gmail Service Deleting your Gmail service is a significant step that removes all your emails and the ability to use that Gmail address. This process is done through your Google Account settings, ensuring the change applies across all devices and web access points. Access Google Account: Go to your Google Account settings via the Gmail app (as shown in card 4) or directly through a web browser. Navigate to Data & Privacy: Find the "Data & Privacy" section and locate the option "Delete a Google service." Select Gmail: Choose Gmail from the list of services. You will be prompted to enter an alternate, non-Gmail email address for verification and future communication regarding your Google Account. Confirm Deletion: Follow the instructions in the verification email to finalise the deletion of your Gmail service. Remember, this is permanent after 30 days.
Important Notes Before Deleting Gmail Before proceeding with the permanent deletion of your Gmail service, it's critical to consider these important points to avoid irreversible data loss and understand the implications for your other Google services. Backup Your Data 30-Day Window Utilise Google Takeout to download all your Gmail data, including emails and attachments, before initiating deletion. This ensures you have a personal copy of your correspondence. Gmail emails and settings will be removed after a 30-day grace period. During this time, you may still be able to recover your account if you change your mind. Address Unavailability Google Account Stays Once permanently deleted, your Gmail address cannot be reused by anyone, including yourself, for a new account. This is a critical security measure. Deleting Gmail only removes the email service. Your broader Google Account, including access to services like Google Drive, Google Photos, and YouTube, will remain active.
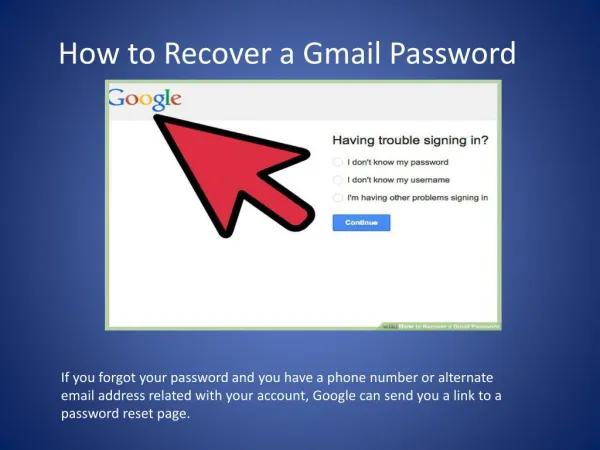
Recovering a Deleted Gmail Account If you've recently deleted your Gmail account and regret the decision, there might be a chance to recover it. Google provides a limited window for account recovery, but success depends heavily on how quickly you act. Timeliness is Key: Account recovery is only possible within a limited timeframe after deletion, typically within the 30-day grace period. The sooner you attempt recovery, the higher your chances of success. Visit Recovery Page: Go to the official Gmail recovery page. You'll need to follow the prompts, providing as much information as possible to verify your ownership of the account. Follow Instructions: Google will guide you through a series of steps, which may include verifying your identity via a linked phone number or recovery email.
Additional Tips for Managing Gmail on iPhone Beyond just removing or deleting, there are several ways to better manage your Gmail experience on your iPhone, whether you're looking for temporary solutions or inbox organisation. Temporarily Disable Mail Sync Organise Your Inbox Device vs. Google Account Before any significant changes, consider using tools like Clean Email or the Gmail app's built-in organisation features to declutter your inbox. This makes future management easier. Remember, removing an account from your iPhone does not affect the data or status of your Google Account itself. Your emails, contacts, and other Google services remain intact on the cloud. Instead of removing an account entirely, you can simply disable mail sync in your iPhone's Mail settings. This stops new emails from appearing without deleting the account from your device.
Summary & Best Practices Navigating Gmail Management with Confidence Removing Gmail from your iPhone is a simple, reversible process that only affects its presence on your device, keeping your data safe on Google's servers. Permanent deletion of the Gmail service requires careful steps within your Google Account and is largely irreversible after a brief window. Always back up your data using Google Takeout before any permanent deletion to prevent data loss. Choose the appropriate method based on your goal: a quick device tidy-up or a complete removal of the service.