Download
1 / 2
20 likes | 41 Views
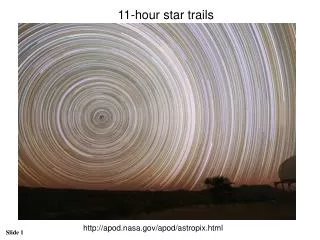
Learn how to capture the star trails. One of the best ways to make an image of star trails is to take multiple exposures and combine them in post processing. For more details visit us http://thephotographersblog.com/startrails-editing-startrails-de/ or contact us 020 25445315/ 91 9881009999

E N D
STARTRAILS STARTRAILS EDITING: EDITING: STARTRAILS.DE STARTRAILS.DE This application has a very simple and mediumistic user interface with amazing features for stacking the star trail images. You have always heard over and over from your photographer friends that you should “SHOOT RAW”. The biggest advantage of shooting in RAW is capturing all the data from the sensor. The question we always ask ourselves is should we shoot RAW while capturing star trail images? You should shoot the star trail images in RAW; you will need to carry a lot of memory cards to do so but then the amount of flexibility the RAW images will give you while editing the images in post processing is huge. Startrails.de does not allow you to edit RAW images, you will have to convert the RAW images into JPEG and then import these multiple star trail images in startrails.de. For further stacking. Adobe Light room is considered as the best software for basic adjustments like color correction, lens distortion removal and adjusting the contrast and exposure of RAW images. Below are all the features of the software Startrails.de which can be useful for stacking star trail images. 1.Open images: This tool is used for browsing the folder in the desktop where you have saved the images and importing the same. Once the images are loaded in the image section on the left, you can uncheck the unwanted images like the ones with harsh foreground light. 2.Open Dark Frames: Dark frames are used along with the star trail images to reduce noise in the images. You can simply browse the folder where you have saved the dark frames using this tool. 3.Save image: You can save the final star trail stacked image in your system using this tool. You can save the image in BMP, JPG, TIFF formats. www.thephotographersblog.com
4.Average Foreground: When you use this tool the images will be averaged to get a good signal to noise rate. The resulting image then is lightened and combined with the star trail image in blend mode lighten. 5.Star trails: This tool is used to stack your star trail images. You will have an option to use two blend modes as mentioned below. a.Lighten (with gaps, faster): You can also choose Falling stars option along with Lighten blending mode this will give comet like effect in your final star trail image. We also have option to save each image for crescent trails in startrails.de software in this mode. You can use these crescent images in time-lapse video. Watch this amazing star trail time-lapse created using the crescent images. b.Lighten-Screen-Blend (LSB, without gaps, slower): You can select this option if your star trails have gaps between 2 stars. This happens while changing batteries or due to incorrect setting configuration in interval meter while shooting. 6.Video: This is an amazing feature; you can create time-lapse videos using this tool. All you have to do is select the frame rate and your time-lapse video will created and saved on your hard drive. www.thephotographersblog.com