Download
1 / 2
20 likes | 30 Views
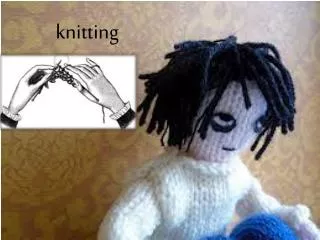
Circular knitting is an easy way to knit seamless projects. From smallest socks to sleeves, hats, necks and more, round knitting creates a project without visible seams. To knit in a circle, the options include double pointed needles (DPNs) where you knit with a set of four or five needles.

E N D
How to Knit a Gauge Swatch for Circular Knitting Projects? Circular knitting is an easy way to knit seamless projects. From smallest socks to sleeves, hats, necks and more, round knitting creates a project without visible seams. To knit in a circle, the options include double pointed needles (DPNs) where you knit with a set of four or five needles. Or, circular knitting needles with two needle tips joined by fixed or interchangeable cables. Knitting a gauge swatch is an important step in making a project. A gauge is a measure of stitches that helps calculate the amount of yarn, how the knitting will look and in a way how the yarn fiber works. And, as the rule goes, the key to get an accurate knitting gauge is to work your swatch in the same way that you plan to work the knitted piece. This means for a project knit in the round, you need to knit the gauge swatch too in the round. In this blog, we’ll take you through the process of knitting a gauge swatch. How to Knit a Gauge Swatch? A gauge swatch is a small fabric of knitting. Simple start by casting on stitches. If you are following a pattern you will get the information on knitting needle size and even lengths (for circular knitting needles). You can ofcourse knit a flat swatch and measure the stitches. Or, you can make a circular swatch. The speed- swatching technique allows you to make a larger swatch with a handy shortcut. This means that knitting a swatch in the round will not be time consuming or time taking. So grab your circular needle (any length is fine), and get started! Circular knitting needles length and size are different so don’t get it wrong. Step 1 - Cast on stitches as you regularly would on the knitting needle. Make sure your swatch will be at least 4″-6″ wide and the same in height. The bigger you can make it, the more accurate it will read.
Slide the cast-on stitches across the other end of the needle tip and position the working yarn closer to the cable of the circular needle. Step 2 - Hold the working yarn loosely around the back of the swatch (WIP) and knit onto the free needle. Work all the way across. Step 3 - When you get to the end of the row, slide the stitches back to the other needle. Remembering to keep the working yarn loose across the back of your work, begin knitting again across the row. Step 4 - Repeat steps 2 and 3 until you are done with your swatch. Bind off the stitches. The back of your knitted gauge swatch will find that the yarn floats. If they are too tight and are tugging on your knitting, simply cut them; they won’t unravel, and you’ll get a more accurate read when laying flat. Don’t forget to block this gauge swatch for the best results. Wash or spray with water. Once dry, simply measure your stitches and rows .With a tape measure, mark an inch on the swatch. Count the stitches on hand, if you have more stitches than mentioned in the swatch, go up a needle size and if you have lesser stitches than the swatch, go down a size. Source: https://ext-6117053.livejournal.com/316.html