Download
1 / 26
290 likes | 1.36k Views
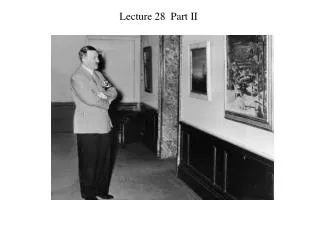
AE4131 ABAQUS Lecture Part II. Patrick Roberts gt0398b@prism.gatech.edu x5-2773 Weber 201. Overview. What is ABAQUS CAE ? Why learn ABAQUS CAE ? Online Tutorials Sample problem Some helpful hints. What is ABAQUS CAE ?.

E N D
AE4131ABAQUS LecturePart II Patrick Roberts gt0398b@prism.gatech.edu x5-2773 Weber 201
Overview • What is ABAQUS CAE? • Why learn ABAQUS CAE? • Online Tutorials • Sample problem • Some helpful hints
What is ABAQUS CAE? ABAQUS CAE provides a complete modeling and visualization environment for ABAQUS analysis products. With direct access to CAD models, advanced meshing and visualization, and with an exclusive view towards ABAQUS analysis products, ABAQUS/CAE is the modeling environment of choice for many ABAQUS users. (From www.abaqus.com)
Why learn ABAQUS CAE? • Building input files by hand for large or complex models are too difficult. • Build most models very quickly • Gives you a method to import models created by other software packages. • Allows for Python scripting.
ABAQUS CAE files • ABAQUS CAE creates a binary file with a .cae file extension. • When viewing your results it uses the .odb and .fil files • CAE created an input file to run the analysis. • You can import an input file to CAE to manipulate the model.
ABAQUS CAE structure • In CAE you make parts, then assemble those parts into a model which is then analyzed. • To work through these step you will work with individual modules in CAE.
CAE layout Menu bar Toolbar Title bar Context bar Message area or command line interface Canvas and drawing area Prompt area Viewport Toolbox area
ABAQUS CAE modules • Part – Create individual parts • Property – Create and assign material properties • Assembly – Create and place all parts instances • Step – Define all analysis steps and the results you want • Interaction – Define any contact information • Load- Define and place all loads and boundary conditions • Mesh – Define your nodes and elements • Job – Submit your job for analysis • Visualization- View your results
Online tutorials ABAQUS CAE has three very good tutorials • Simple 3D cantilever beam • Two hinges/ rigid pin assembly • Viewing and working with your output
Starting ABAQUS CAE You can start ABAQUS CAE from the START menu or with a command line by typing abaqus cae in a Command window. TIP:You should open a Command Window, navigate to the directory you want to use, and finally, start ABAQUS CAE via command line. This way all your results files will end up in this directory (where you want them!).
Plane stress problem • To start learning ABAQUS CAE we will work through building a cantilevered beam that is subjected to a pressure load on the top of the beam of 0.5 MPa. • This will be a plane stress problem so it will have unit thickness. The length of the beam is 200 mm, height is 25 mm.
Part Module • Create a new part as • 2-D planar • Type : Deformable • Basic feature: shell • Approximate size:
Property Module • We will add the material Steel and give it values of 209 × 103 MPa and Poisson's ratio of 0.3. • We will create a section called BeamSection and give it a category of solid, type Homogeneous. • We then assign this material to this section.
Assembly Module • We will create one instance of this beam.
Step Module • We will add a step after the system created Initial step called Load Step. • The procedure type is General and the type is Static. • For the output we want stresses, strains, displacements, forces/reaction.
Load Module • We want to fully constrain (encastre) the left end of the beam. Fixed boundary conditions must be placed in the system created Initial step. We will call this boundary condition Fixed. • The pressure load must be added in the step we created earlier called Load Step. Call this load Pressure and it has a value of 0.5 and is applied to the top of the beam.
Mesh Module • First we need to decide on the Mesh controls. In this case we will use quadrilateral. • Next we choose element type. Under Family you will see Plane stress highlighted. If we choose linear with reduced integration we will be using the following element. • CPS4R: A 4-node bilinear plane stress quadrilateral, reduced integration, hourglass control.
Mesh Module (cont.) • We need to define how course/fine the mesh will be by the use of seeds. • The system will suggest a seed value. To make the mesh finer enter a smaller number. Larger numbers will make the mesh more course. • The system suggested 20 so we’ll choose 15.
Mesh Module (cont.) When we mesh this instance we get the following.
Job Module • We will create a job called 2DPlaneStressBeam • Once this has been created just submit the job. • The analysis should only take a couple of minutes.
Visualization Module • Once your analysis is complete we want to see the results. • If we look at Von Mises stress distribution we see
Additional Results To see additional results choose Field Output and you can choose the type of output you would like to see. It will only show you what you initially choose in the Step Module. All of the results files are in the directory you started CAE in. For any errors, warning or other system data on how the analysis ran look at those files.
Some additional tips • If you want to capture an image for later placement in a paper you need bring up the view you want to capture, then print to a file. If you are using Word then use the TIFF format. If you use Latex use the eps format.