Download
1 / 16
160 likes | 545 Views
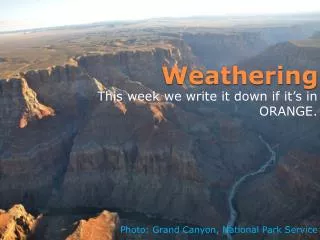
Weathering with Artist Oils. Rick Watson November 8, 2008. Basics. Identify the materials and show the techniques for weathering with artists oils . This method is a simple way to quickly weather cars with a rust like appearance.

E N D
Weathering with Artist Oils Rick Watson November 8, 2008
Basics Identify the materials and show the techniques for weathering with artists oils. This method is a simple way to quickly weather cars with a rust like appearance. You cannot ‘over weather’ the cars, if you think the weathering is too heavy, you can correct it immediately and not ruin your model. Each car takes 10 minutes or less!
Materials • 1 - Flat paint brush ½” wide • You don’t need an expensive one – average will work • 1 - Marble floor tile • Go to Home Depot or Lowes and find one that’s cheap • 1 - Tube of ‘Burnt Umber’ artist oil • I only use oils, not acrylics. I cannot comment on results with acrylics • One tube goes a very long way • Turpentine • If you prefer, you can use Turpenoid which is odorless Turpentine • 1 – Working container for Turpentine • I prefer a glass jar with lid • Toothpicks • A drop cloth or other material to cover you working area • This can splatter! • Paper towels
Preparation WORK IN A VENTILATED AREA! • Spread out your drop cloth to cover the working area. • There is usually splatter. Wear some ‘splatterable’ • clothes as well. • Pour turpentine into the jar about ¼ full. • Get your brush, paint, and toothpicks. Some paper • towels are handy too. • Lay your tile down in the center of your work area. • Grab some rolling stock to weather!
Get Started Apply a small amount of the oil paint onto the tile. Load your brush with turpentine. Using your brush, grab a very small amount of paint on the end.
Basic Technique Using vertical strokes, drag the paint brush from the top to the bottom of the car side. Don’t worry about excess at the bottom. Using this method, do this on all four sides of the car and the roof.
Basic Technique This will be the initial coat which will slightly dull the car’s paint. Make sure your strokes are vertical as much as possible. ** If the rust colored paint seems too thick, load up the brush with turpentine and redo the vertical strokes. This will lessen the effect of the weathering.
Wash Comparison The initial wash results have a subtle rust color. The car color and lettering are toned down by the wash.
Adding Side Rust Lightly dip the tip of the brush in the oil paint. Load the brush with Turpentine. Blot if too wet.
Adding Side Rust Draw the loaded brush down to lessen the rust. Continue on the sides and ends of the car. The car body is complete. Now, on to the roof.
Adding Roof Rust Dip the brush end in paint and blot the roof in various spots. Load the brush with Turpentine. Spread out the rust.
The Rust is Complete • Some additional options: • - Use the same technique on the trucks. • Paint the wheels a rust like color. I prefer boxcar red. • Use an airbrush to add weathering to the trucks and • underframe.
Keep the Rust from Pooling The combination of Turpentine and Oil will collect at the bottom of the car side. Blot on a paper towel when the brush is getting full. Use your brush to absorb the excess.
Extra Rust Use a toothpick to add specfic spots or horizontal lines. Use the brush to draw the rust streaks down.
Questions? • Step up to the table to: • View complete models • See the difference between • New models • Washed models • Rusted models