Download

1 / 8
0 likes | 15 Views
If you own an LG washing machine, knowing how to remove the pulsator will help solve common problems like strange noises, reduced washing efficiency or dirt buildup under the drum. This can look technical, but the process is simple and manageable. The guide below will talk about how to remove LG washing machine pulsators by making it easy to maintain the appliance and keep it running at its best.<br><br>Visit: https://www.lg.com/in/laundry/semi-automatic-washing-machines/p7510rbaz/

E N D
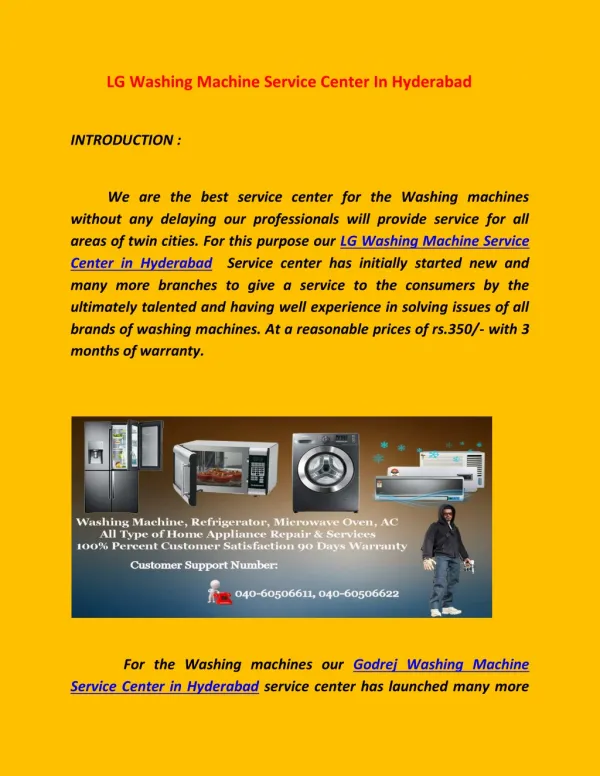
Introduction • Like any other household appliance, a washing machine also needs regular maintenance to make sure it continues to run smoothly. One of the often overlooked maintenance tasks is the removal and cleaning of the pulsator of a semi-automatic washing machine. It is a small yet powerful component that distresses and rotates clothes in the wash cycle, which makes it essential for effective cleaning • If you own an LG washing machine, knowing how to remove the pulsator will help solve common problems like strange noises, reduced washing efficiency or dirt buildup under the drum. This can look technical, but the process is simple and manageable. The guide below will talk about how to remove LG washing machine pulsators by making it easy to maintain the appliance and keep it running at its best..
What is a Pulsator, and Why Remove It? • The pulsator is placed at the bottom of the drum of the washing machine, which is an essential component to move the garments around during the wash cycle. To ensure a complete washing, it moves back and forth, producing water currents that raise and tumble the garments. Debris, fabric softener or detergent leftovers get collected under the pulsator over time causing foul smells or reducing washing performance. Sometimes the pulsator can wear out or shatter and needs to be replaced. • Removal of the pulsator is a proper solution to these problems, whether it needs to be repaired or cleaned the machine. Even though you will not do it regularly, understanding removing the part is essential to maintain the excellent operation of your washing machine.
Step-by-Step Guide to Removing the Pulsator • Step 1: Unplug the Washing Machine Safety always comes as a priority. Before starting any repair, remove the washing machine's plug from an electrical outlet. By following this step you can work on the internal parts without worrying about getting any electric shock. • Step 2: Remove the Agitator Cap or Bolt Cover Take off the cover or cap that is located in the pulsator's center. A head screwdriver can be used to remove the cap effortlessly from the LG washing machine which is screwed in. If it's secured with a straightforward clip, then remove it gently with a flat tool like a butter knife or flathead screwdriver.
Step-by-Step Guide to Removing the Pulsator • Step 3: Loosen and Remove the Pulsator Bolt When the cap is removed, you can see the bolt which has secured the pulsator. The bolt can be removed and loosened with the help of a socket wrench. It can be a little tight, so take time and press firmly. Store the bolts in a container so that they can’t get lost. • Step 4: Lift the Pulsator Out After removing the bolt, the pulsator can be carefully lifted out of the machine drum. If it gets stuck then don't put force to remove it. Years of usage lead to the collection of filth which is difficult to remove. Wiggle the pulsator back and forth or take the help of a soft cloth to take a better hold and carefully remove it. After removing it, check if dirt or debris accumulated and needs to be cleaned from the place under the pulsator.
Step-by-Step Guide to Removing the Pulsator • Step 5: Clean or Replace the Pulsator If you are taking out the pulsator for cleaning purposes, it is time to clean both the pulsator and the space under it. Use a soft cloth, warm water and some detergent to remove dirt or leftovers. If the pulsator is damaged then replace it immediately. Make sure to get the correct replacement part for a particular LG model that you have. • Step 6: Reinstall the Pulsator To reinstall, follow the reverse of the removal steps. Use a socket wrench, secure the pulsator with the bolt after lining it up with the central post and place the drum back into the machine. After placing the bolt tightly, replace the cap or cover. Plug the machine back in, and now you can start doing laundry again.
Conclusion Initially, removal of the pulsator from your LG washing machine can look intimidating but if you have the right tools and some patience, it’s a task that any homeowner can easily handle. Whether you're thinking of deep cleaning or replacing the damaged part, this simple maintenance step can majorly improve the machine’s performance. By routinely maintaining the pulsator, you guarantee smooth operation, exceed the washer’s lifespan and neglect bigger issues down the line. Keep this guide in hand when you have to perform a little extra care and have cleaner clothes and a more efficient appliance.