Constructing Concrete Forms and Reinforcement
240 likes | 859 Views
Reinforced concrete - concrete slabs or structures that are strengthened with embedded ... 6. Five gallon concrete mixer, HoBar 12. Float or trowel concrete surface. ...

Constructing Concrete Forms and Reinforcement
E N D
Presentation Transcript
Slide 1:Constructing Concrete Forms and Reinforcement
Slide 2:Definitions of terms associated with form construction:
A. Footer form (footing) - a continuous slab of concrete that provides a solid, level foundation for block and other masonry. B. Construction joint - place where one pouring of concrete stops and another starts. C. Control joint - planned break which permits concrete to expand and contract without cracking. D. Reinforced concrete - concrete slabs or structures that are strengthened with embedded steel rods or wire mesh. E. Wale - a heavy plank extending along the sides of wooden concrete forms for reinforcement of the 2@ x4" studs. �
Slide 3:Selecting materials for concrete forms.
A. Metal forms B. Synthetic materials C. Wood (most commonly used). It should be straight, sound lumber, free of knots, decay and other defects.
Slide 4:Well constructed concrete forms should be:
A. Substantial enough to retain their correct shape when filled. Freshly mixed concrete exerts great pressure since concrete weighs from 130 to 150 lbs. per cubic foot. B. Tight to prevent the escape of the water-cement paste, because the loss of water will change the strength of the remaining mixture. C. Constructed so they can be easily filled from a truck or wheelbarrow. D. Easily removed after the concrete has hardened.
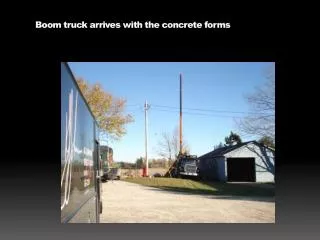
Slide 5:Construction of forms.
A. Use soft, clean, straight lumber. $ Use spruce 2" x 4" or 2" x 6" for form because it will not warp as bad as yellow pine. $�Use green lumber when possible because it does remove the water from the fresh concrete like kiln dried lumber will. B. Sharpen stakes evenly so they can be driven in straight. C. Place stakes about 30 inches apart along the outside of the form for 4 inch thick concrete. Place the stakes close when the concrete is more than 4 inches thick. D. Use a transit or level to adjust the height of forms for the desired slope or Afall@ of the slab. E. Drive nails through the form and into, but not through, the stakes. F. Be sure the stakes do not stick up above the top of the form. If they do, saw them off so they are level with or tapered down from the form. G. For smooth walls use plywood panels.
Slide 6:Types of points.
A. Isolation joints $������ Used to separate floors from points of abutment with walls columns, or building footings. B. Control joints $������ May be properly called crack control joint. $������ To prevent random cracking, predetermine the crack location by making a crack control joint or by sawing into the floor to make a weakened plane so that the crack will occur where you want it. C. Construction joints $������ Created where concrete stopped and later was started again. $������ Most construction joints are actually a combination of a control joint and a construction joint.
Slide 7:Types of reinforcement
A. Steel bars $������ Steel reinforcing bars have ridges that increase the bond between the concrete and the steel. $������ Bars may be ordered by number or by diameter. It is available in diameters from 1/4 to 1 inch and over. They may be purchased in 20, 40, or 60 foot lengths. The size bars needed for the job depends on the amount of tensile strength needed in the concrete. $������ Rebar should be lapped 24 times its diameter. $������ Rods may be placed in concrete slabs in cross-sectional pattern and wired together. $������ Reinforcing bars should be free of rust, dirt, oil or other materials that will reduce adhesion by the concrete.
Slide 8:Types of reinforcement
B. Welded wire fabric $������ Generally available in a 6 by 6 inch pattern and consist of number 6, 8, or 10 gauge wire. $������ Used for jobs requiring relatively light reinforcement. $������ Used to help reduce the cracking due to changes in temperature and moisture in the concrete. $������ Reinforcement wire fabric needs to be placed so it is protected by an adequate coverage of concrete. $������ Lap welded wire a minimum of 13 inches or at least one full spacing plus two additional inches. C. Fiberglass fibers $������ Fibers may be mixed in concrete mixtures for increased tensile strength. $������ By using the fibers in the mixture the fibers are mixed completely from the top to the bottom of the slab. $������ Cost is comparable to the price of welded wire fabric.
Slide 9:Footings and foundations
A. No substitute for an adequate foundation, which is the key part of every building. B. Adequate footing provides a stable base and directly affects both the life and performance of the building. C. Protects against rats, mice termites, water and the elements. D. Foundation consists of: $������ Its bed B the earth giving support $������ Its footing B the widened part of the structure resting upon the bed $������ Its wall B the structural part resting upon the footing. E. The size of the footing depends on the load-carrying capacity of the soil and the weight of the building and its contents.
Slide 10:Footings and foundations Load-carrying capacities of Soils
Slide 11:Footings and foundations
F. Approximate ratio of foundations size to the wall it supports. $������ Footing thickness the same as foundation wall thickness. $������ Footing width is equal to twice the thickness of the foundation wall. G. Foundation should be reinforced with rebar to increase the strength of the concrete.
Slide 12:Care of concrete forms
A. Forms should be coated with used motor oil. B. Use paraffin oil diluted with kerosene or benzene if the concrete is to be painted or stuccoed. C. Form must be braced to prevent bulging. D. Form should not be removed until the concrete is strong enough to stand alone (time varies with weather). E. Do not saw into the top of the form. F. Do not allow concrete trucks to bump or run over the forms. G. Be careful in removing forms as to not damage concrete.
Foundation Formwork � A. Stake G. Tie, Snap B. Brace H. Spreader C. Tie, 1" x 4" I. Tie, Wire D. Sheathing J. Footing E. Wale K. Key F. Holder L. Marker Nail Joints Commonly � Joints Commonly Used in Concrete ConstructionSlide 16:Control Joints
Slide 17:Reinforcing Affects: Strength of Concrete Structures Reinforce Concrete to Increase Tensile Strength
Slide 18:Reinforcing For Concrete
Steel Reinforcing Bars (Re-Rod) 20' Lengths Sizes � Number 2 3 4 5 6 7 8 9* 10* 11* Inches 1/4 3/8 2 5/8 3/4 7/8 1 1 1 1/8 1 1/4 � � * Equivalent to Square Cross Section Area � Tensile Strength 70,000 - 90,000 PSI � Installation Lap at least 24 X the diameter Not less than 12 inches
Slide 19:Reinforce For Concrete
Wire Fabric Mesh 5' X 150' Rolls 6" X 6" 10, 8, 6 & 4 Gage � 4" X 4" 13, 10 & 4 Gage � T Tensile Strength Installation 60,000 - 70,00 PSI Overlap 1 mesh plus � 2 inches
Slide 20:Concrete is strengthened greatly by the addition of steel rods or wire mesh
Slide 21:The footer should be as thick as the wall resting on it is wide. The footer should also be at least twice as wide as the wall. Concrete footers are placed below the frost line to provide a solid base for masonry walls.
Slide 22:Patio Block 1' X 1'
Construction Procedure 1. Determine quality of sand with silt and organic matter test. (Quality Concrete manual page 4 and 5). 2. Determine moisture in sand (pages 8 and 9) & make corrections in mix if needed. 3. Weigh sand & gravel & place in mixer. 4. Weigh cement and place in mixer. 5. Mix dry ingredients. Materials 6. Measure water and add to mixer. 1. 7 lbs. grey Portland cement 7. Mix the concrete. 2. 20 lbs. washed sand 8. Oil patio block mold. 3. 3 lbs. or 3 pints water 9. Fill mold three-fourths full and vibrate or 4. Quality Concrete manual, HoBar Shake #164 10. Fill mold and vibrate or shake 5. Fiberglass mold, HoBar #1273 11. Screed concrete level with bottom or mold. 6. Five gallon concrete mixer, HoBar 12. Float or trowel concrete surface. #M-58 13. Keep concrete in mold for 20-40 hours. 7. Scale and measure 14. Place plywood pallet on concrete surface. 8. Brush and form oil 15. Turn mold and pallet over. 9. Vibrating table, Quality Concrete 16. Gently tap mold with rubber mallet. manual, page 27 17. Lift mold from concrete. 10. Screed 18. Place in water tank for curing or cover with 11. Wood float, magnesium float or steel trowel, HoBar No=s. M-44, M-145 & MMX-64 Name: 12. Exterior plywood pallet 13. Colored pigment, if desired Date: Evaluation: Operation Teaches: ability to . . . Evaluation Score Sheet (Points) 1. Determine organic matter, test on sand. Item Possible Earned 2. Determine silt test on sand. 1. Silt test 10 3. Determine moisture content of sand. 2. Organic matter test 10 4. Weigh and measure ingredients. 3. Moisture content of sand 10 5. Mix concrete. 4. Proper mix 10 6. Oil the mold. 5. Proper mixing procedure 10 7. Screed and vibrate concrete. 6. Surface appearance & finish 10 8. Finish the surface of the concrete. 7. Cleaning of equipment and 10 9. Remove patio block from the mold. molds 10. Cure the patio block. 8. Safety & work habits 10 11. Color concrete by sprinkling, topping or Total 100 total thickness method, if preferred.