Download
1 / 2
0 likes | 2 Views
Thatu2019s exactly where I was until I realized that structure, not additional plants, was what was lacking. Not the dull sort, but the kind that truly defines your garden, frames it, and brings your labors to life. And thatu2019s when using garden edging with rocks comes in handy.<br>u200b<br>Visit -u00a0https://marootasandstonequarry.com.au/how-to-create-stylish-garden-edging-with-rocks-a-step-by-step-guide/

E N D
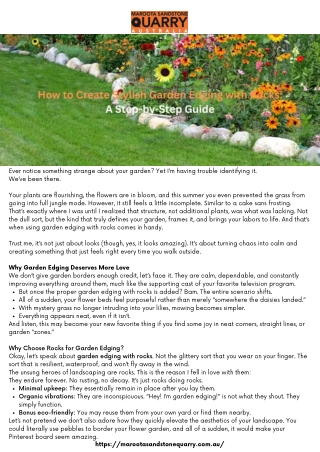
Ever notice something strange about your garden? Yet I’m having trouble identifying it. We’ve been there. Your plants are flourishing, the flowers are in bloom, and this summer you even prevented the grass from going into full jungle mode. However, it still feels a little incomplete. Similar to a cake sans frosting. That’s exactly where I was until I realized that structure, not additional plants, was what was lacking. Not the dull sort, but the kind that truly defines your garden, frames it, and brings your labors to life. And that’s when using garden edging with rocks comes in handy. Trust me, it’s not just about looks (though, yes, it looks amazing). It’s about turning chaos into calm and creating something that just feels right every time you walk outside. Why Garden Edging Deserves More Love We don’t give garden borders enough credit, let’s face it. They are calm, dependable, and constantly improving everything around them, much like the supporting cast of your favorite television program. But once the proper garden edging with rocks is added? Bam. The entire scenario shifts. All of a sudden, your flower beds feel purposeful rather than merely “somewhere the daisies landed.” With mystery grass no longer intruding into your lilies, mowing becomes simpler. Everything appears neat, even if it isn’t. And listen, this may become your new favorite thing if you find some joy in neat corners, straight lines, or garden “zones.” Why Choose Rocks for Garden Edging? Okay, let’s speak about garden edging with rocks. Not the glittery sort that you wear on your finger. The sort that is resilient, waterproof, and won’t fly away in the wind. The unsung heroes of landscaping are rocks. This is the reason I fell in love with them: They endure forever. No rusting, no decay. It’s just rocks doing rocks. Minimal upkeep: They essentially remain in place after you lay them. Organic vibrations: They are inconspicuous. “Hey! I’m garden edging!” is not what they shout. They simply function. Bonus eco-friendly: You may reuse them from your own yard or find them nearby. Let’s not pretend we don’t also adore how they quickly elevate the aesthetics of your landscape. You could literally use pebbles to border your flower garden, and all of a sudden, it would make your Pinterest board seem amazing. https://marootasandstonequarry.com.au/
Picking the Right Rocks: Style Meets Function All right, so not every rock is made equally. Selecting the best ones isn’t about what your neighbor or the cheapest one utilizes. What suits your vibe is what matters. A brief summary is as follows: River rocks are round, smooth, and somewhat artistic. Excellent if you want soft, smooth looks or curves. You get more of that “clean border” energy from flagstone or flat rocks, which stack well. Crushed stone or gravel is ideal for walkways, infill spaces, and controlling weeds. Large boulders: Do you want drama? Be brave. Sydney sandstone blocks are for the people who make statements. You may also mix and combine. Really, regulations are great, but your garden is your garden. Before you pick, ask yourself: What colors are in my garden already? Do I want something sleek or wild and natural? Am I doing this alone, or do I have a strong friend who owes me a favor? Step-by-Step: Installing Garden Edging with Rocks Let’s discuss the details. And don’t worry, this isn’t one of those jobs that need a shed-sized toolbox or an engineering degree. You’ll need a shovel (and maybe a little attitude). Use a rope or a garden hose to mark your boundary. For the base, use gravel or sand. Gloves (unless you have rough hands) Landscape cloth (useful but not necessary) A level or tamper (or, if you’re a stickler for tradition, simply your foot) Step-by-Step Breakdown: 1. Map it Out Mark the location of your desired edge with your hose or string. Desire curves? Do it. Straight lines? There are no incorrect responses here. 2. Start Digging Just a trench, not a moat. It should be between 3 and 6 inches deep. Imagine it as creating a comfortable little bed for your pebbles. 3. Add a Base Layer Add a little sand or gravel. This prevents things from changing over time and prevents you from having to redo it the following spring. 4. Place Your Rocks This is a fun part. It’s far less stressful than a puzzle. Arrange each rock as you intend. Make adjustments till something fits if it doesn’t. 5. Backfill & Level To keep the rocks steady, throw some gravel or soil behind them. Use your foot to tap them. You’ll thank yourself later if you repair them now, if they wobble. 6. Step Back & Admire Look at you. You’ve officially leveled up your garden. Conclusion Ultimately, using rocks for garden edging with rocks is more than simply aesthetics. It all comes down to how your environment feels. https://marootasandstonequarry.com.au/