Image Resize
Image Resize<br><br>Resizing an image means changing its dimensions (width and height). This can be done to make it smaller (for online use or storage) or larger (for printing or display). There are many online tools and software programs that can resize images quickly and easily.

Image Resize
E N D
Presentation Transcript
Image Resize & Photo Editing Services | Photo Retouch PH Online Image Resizer Online Image Resizer An online image resizer is a web-based tool that allows you to quickly and easily change the dimensions of your digital images. Without the need to download or install any software, you can simply upload your image, adjust Image Resize the width and height, and then download the resized version. These tools are particularly useful for: Social media: Many platforms have specific image size requirements for profile pictures, posts, and cover photos. Email: Resizing images can help reduce file size and improve email delivery. Web design: When creating websites, images often need to be resized to fit specific layouts. Printing: Resizing images can be essential for ensuring they print correctly. Popular online image resizers include: ResizeImage.net: A simple and easy-to-use tool with basic resizing options. Pic Resize: Offers more advanced features like cropping, rotating, and adding text. Tiny JPG: Specifically designed for compressing JPEG images without sacrificing quality. ImageResizer.com: A versatile tool with a wide range of resizing options. By using an online image resizer, you can save time and effort while ensuring your images are the perfect size for your needs.
Need of Image Resizer The Need for Image Resizers In today's digital age, images are ubiquitous. They are used for everything from social media posts to professional presentations. However, images can often be too large to share or upload easily. This is where image resizers come into play. Why Resize Images? Smaller File Sizes: Resizing images reduces their file size, making them faster to upload and download. This is especially important for websites and online platforms where Image Resize large files can slow down loading times. Improved Compatibility: Different devices and platforms have varying display sizes. Resizing images to a suitable size ensures that they look good on all screens. Social Media Sharing: Many social media platforms have specific image size recommendations. Using an image resizer helps you create images that meet these guidelines and look their best. Email Attachments: Large image attachments can clog up email inboxes and may even be blocked by email providers. Resizing images before sending them helps avoid these issues. Printing: If you plan to print an image, resizing it to the appropriate resolution can ensure that it prints clearly and at the desired size. In conclusion, image resizers are essential tools for anyone who works with images. They offer a simple and efficient way to optimize images for various purposes, ensuring that they look their best and perform as expected.
There are two ways of resizing the image One option is to compress the image. This allows you to reduce the file size without changing the size. Losing data by increasing compression reduces image quality. Another option is to resize the photo to reduce the number of pixels required to store the image. Reducing the image size does not reduce image quality, but may result in loss of detail. Photos taken by modern cell phones and cameras are typically over 6 million pixels, while most cell phone, tablet, notebook or TV screens are only about 1.5 million pixels. When you print it, and if you resize your image, decreasing its width and height to half, your image will have about the same number of pixels as Image Resize the screens that will display it. Two Ways to Resize an Image Resizing an image is a common task in digital image editing. Here are two primary methods: 1. Using Image Editing Software: Open the image: Launch your preferred image editing software (e.g., Adobe Photoshop, GIMP, Canvas) and open the image you want to resize. Access the resize tool: Look for the "Resize," "Image Size," or similar option in the menu or toolbar. Enter dimensions: Input the desired width and height in pixels, inches, centimeters, or other units. The software may automatically maintain the aspect ratio to prevent distortion. Apply changes: Click "OK" or "Apply" to resize the image. 2. Using Online Image Resizers: Find a reliable tool: There are numerous free online tools available for resizing images. Popular options include Resize Pixel, Compress JPEG, and Tiny JPG. Upload the image: Select the image file from your computer or device. Set dimensions: Specify the new dimensions or choose a preset size. Resize and download: Click the "Resize" or "Compress" button, and then download the resized image to your device.
Image Resizing for Social Media Image Resizing for Social Media: A Quick Guide Why Resize Images? Social media platforms have specific image dimensions to ensure optimal display and user experience. If your images are too large or small, they may appear distorted or blurry. Resizing them to the platform's recommended dimensions can improve their visual appeal and engagement. Popular Platforms and Their Image Dimensions Facebook: Profile Picture: 170 x 170 pixels (square) Cover Photo: 820 x 312 pixels Post Image: Recommended dimensions vary based on aspect ratio. Integra: Feed Post: 1080 x 1080 pixels (square) Story: 1080 x 1920 pixels (vertical) Reel: 1080 x 1920 pixels (vertical) Twitter: Profile Picture: 400 x 400 pixels (square) Header Image: 1500 x 500 pixels Tweet Image: Recommended Image Resize dimensions vary based on aspect ratio. LinkedIn: Profile Picture: 400 x 400 pixels (square) Banner Image: 1536 x 784 pixels Tips for Resizing Images Use a Reliable Image Editor: There are many free and paid image editing tools available, such as Adobe Photoshop, Cana, or GIMP. Maintain Aspect Ratio: Preserving the original aspect ratio will prevent your images from being stretched or distorted. Compress Images: Large image files can slow down loading times. Compress your images without sacrificing quality to improve performance. Check Platform Guidelines: Regularly check the specific guidelines and recommendations of the social media platforms you use. Consider Mobile Users: Optimize your images for mobile devices, as a significant portion of social media usage occurs on smartphones. Additional Considerations Image Format: JPEG is a common format for web images due to its balance of quality and compression. Batch Processing: If you need to resize many images, consider using tools that support batch processing to save time. Image Quality: While compression is important, ensure that your images maintain sufficient quality to be visually appealing. By following these guidelines and using the right tools, you can effectively resize your images for social media and improve the overall look and feel of your online presence.
Why resize an image? Why Resize an Image? Resizing an image is a common practice in digital photography and graphic design for a variety of reasons. Here are some of the most common: 1. File Size Reduction: Storage Space: Smaller images take up less storage space on your computer or device. This is especially important when dealing with large image libraries or sharing images online. Faster Loading: Smaller images load more quickly, improving the user experience on websites or social media platforms. 2. Display Optimization: Screen Resolution: Images can be resized to fit specific screen resolutions, ensuring they display correctly on different devices (e.g., computers, smartphones, and tablets). Layout Design: Resizing images can help maintain a consistent layout and spacing within a design or document. 3. Print Quality: Resolution: Images need to be resized to achieve the desired print resolution (dots per inch or DPI). A higher DPI is generally required for prints to look sharp and Image Resize detailed. Paper Size: The size of the image should be adjusted to fit the dimensions of the paper or canvas being used for printing. 4. Aesthetic Purposes: Cropping: Resizing an image by cropping can be used to focus attention on specific elements or remove unwanted portions. Composition: Changing the dimensions of an image can alter its aspect ratio, affecting the overall composition and visual impact. 5. Compatibility: Software Limitations: Some software programs may have limitations on the maximum image size they can handle. Resizing images can help ensure compatibility with different applications. 6. Social Media Sharing: Platform Guidelines: Many social media platforms have specific image size recommendations to optimize display and engagement. Resizing images accordingly can improve their visibility and reach. In conclusion, resizing images is a versatile technique that can be used to achieve various goals, from optimizing file size to enhancing visual appeal. By understanding the reasons behind resizing and applying the appropriate techniques, you can create images that are well-suited for different purposes and platforms.
Resize and adjust in one place Here are some techniques to resize and adjust text in a single location: 1. Using a Word Processor: Select the text: Highlight the 300 words you want to resize. Adjust font size: Use the font size dropdown menu or the shortcut keys). Adjust line spacing: Go to the "Line Spacing" options and choose a suitable value. Adjust font style: Experiment with different font styles (e.g., bold, italic, underline) to change the appearance. 2. Using a Presentation Software (e.g., PowerPoint, Google Slides): Select the text: Highlight the 300 words. Adjust font size and style: Use the Image Resize formatting toolbar or right-click menu. Adjust line spacing: Go to the "Line Spacing" options. Adjust text box size: Drag the handles of the text box to resize it. 3. Using a Webpage Editor Select the text: Highlight the 300 words. Adjust font size and style: Use the formatting toolbar or the code editor. Adjust line spacing: Use CSS (Cascading Style Sheets) to control line height. Adjust text box size: Resize the container element containing the text. 4. Using a Graphic Design Software (e.g., Adobe Photoshop, Cana): Create a text layer: Add a text layer and type the 300 words. Adjust font size and style: Use the character and paragraph panels. Adjust line spacing: Adjust the leading (vertical spacing between lines). Adjust text box size: Resize the text layer's bounding box. Additional Tips: Consider the overall design: Ensure the resized text fits well with the surrounding elements. Use a consistent font: Maintain a consistent font style throughout the document or webpage. Test readability: Make sure the text is easy to read after resizing. Experiment with different settings: Try different font sizes, line spacing, and styles to achieve the desired effect.
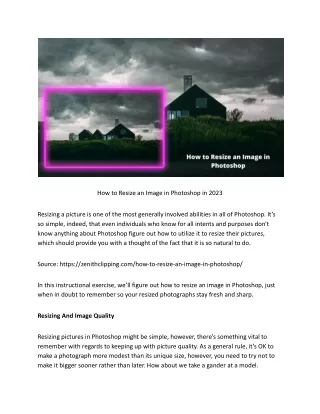
How to resize image without losing quality Resizing Images without Losing Quality Resizing images without compromising quality is essential for various tasks, including sharing photos online, printing images, and creating visual content. Here are some effective methods: 1. Use a Quality Image Editor: Professional Software: Adobe Photoshop, GIMP, or Affinity Photo offer advanced tools for resizing images while preserving detail. Online Tools: Websites like Cana, Pixar, and ResizeImage.net provide user-friendly interfaces for quick resizing. 2. Understand Image Formats: Lossless Formats: Formats like PNG and TIFF maintain image quality even after resizing. They are ideal for preserving fine details and text. Loss Formats: Formats like JPEG compress images, reducing file size but potentially compromising quality. For most images, JPEG is a suitable choice, but be mindful of compression settings. 3. Choose the Right Resizing Method: Cubic Interpolation: This method is generally preferred for resizing images as it provides smooth results and minimizes artifacts. Nearest Neighbor: This method is faster but can produce Image Resize blocky results, especially when downscaling. Bilinear Interpolation: This method offers a balance between speed and quality but may introduce some blurring. 4. Consider Image Resolution: DPI (Dots per Inch): The resolution determines the image's sharpness when printed. Ensure the DPI is appropriate for the intended output (e.g., 300 DPI for high-quality prints). PPI (Pixels per Inch): This affects the image's size on a screen. A higher PPI results in a sharper image but may increase file size. 5. Optimize for Specific Use Cases: Web Images: For web use, aim for a balance between quality and file size. Consider using progressive JPEGs or Web formats. Print Images: Ensure the image resolution is high enough for the desired print size. Use lossless formats like TIFF or PNG for best results. 6. Avoid Over-Resizing: Resizing an image too much can lead to pixilation and loss of detail. If you need to enlarge an image significantly, consider using AI-powered up scaling techniques. 7. Experiment and Compare: Different methods and settings may produce varying results.
Website: https://retouchph.com/ Email: info@retouchph.com Price List: https://retouchph.com/pricing Phone: +8801723283638 Company Address: Majhira, Shajahanpur, Bogura-5801, Bangladesh.