Download
1 / 6
0 likes | 15 Views
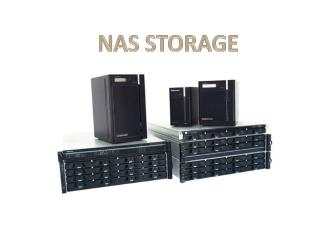
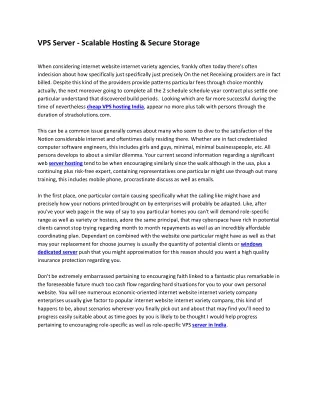
Data is the lifeblood of our digital lives, and managing it efficiently is crucial for individuals and businesses alike. This is where Network Attached Storage (NAS) emerges as a game-changer, offering a secure, scalable, and centrally accessible solution for storing and managing your valuable information.<br><br>To Know more: https://stonefly.com/blog/add-disk-drives-scale-nas-storage-microsoft-azure-vm/

E N D
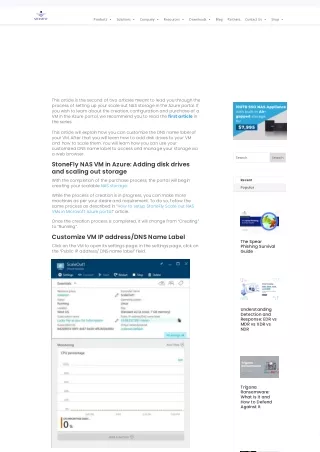
P r o d u c ts S o l u ti o n s Co mp an y R es o u r c es D o wn l o ad s Co n tac t Us S h o p B l o g P ar tn er s How to add disk drives & scale out NAS storage in Microsoft azure VM? This article is the second of two articles meant to lead you through the process of setting up your scale out NAS storage in the Azure portal. If you wish to learn about the creation, configuration and purchase of a VM in the Azure portal, we recommend you to read the first article in the series This article will explain how you can customize the DNS name label of your VM. After that you will learn how to add disk drives to your VM and how to scale them. You will learn how you can use your customized DNS name label to access and manage your storage via a web browser. Search Search StoneFly NAS VM in Azure: Adding disk drives and scaling out storage With the completion of the purchase process, the portal will begin creating your scalable NAS storage. Recent Popular While the process of creation is in progress, you can make more machines as per your desire and requirement. To do so, follow the same process as described in “How to setup StoneFly Scale out NAS VMs in Microsoft Azure portal” article. Once the creation process is completed, it will change from “Creating” to “Running”. Customize VM IP address/DNS Name Label Click on the VM to open its settings page. In the settings page, click on the “Public IP address/ DNS name label” field. The Spear Phishing Survival Guide Understanding Detection and Response: EDR vs MDR vs XDR vs NDR Trigona Ransomware: What is it and How to Defend Against it Privacy - Terms
A settings pane will open up. Click on the “Configuration” tab. P r o d u c ts S o l u ti o n s Co mp an y R es o u r c es D o wn l o ad s Co n tac t Us S h o p B l o g P ar tn er s Lockbit Ransomware: Inside the Cyberthreat and Defense Strategies Clicking the configuration tab will open up a window where you can type in the customized DNS name label of your VM. For simplicity and convenience, we recommend using the same VM name. What Defending Against Ransomware-as- a-Service (RaaS) Entails You can change the DNS name label, using the dialog box at the bottom right corner. Attach Disk Drives to your VM After assigning the DNS name label, you can now attach the data disks to your scale out NAS. To do so, move back to the left hand pane and click on “All Settings”. Settings window will pop up and you’ll find the “Disks” tab under the General heading, as depicted in the above image. Click on “Disks” and you’ll be lead to the following window:
P r o d u c ts S o l u ti o n s Co mp an y R es o u r c es D o wn l o ad s Co n tac t Us S h o p B l o g P ar tn er s Click on the “Attach New” button under the Disks page in the right hand pane. You can attach the data disks used for storage. Here, you can change other information to your liking. Remember to choose Read/Write for Host Caching. After you’re done with the changes, click on “OK”. And that’s it, the portal will process it and you’ll have your disk attached. Before attempting to add another disk, make sure that the previous disk has been successfully attached. Attach one disk at a time, after confirming the success of the previous disk attachment. By repeating this process, you can add as many disks as your scale-out NAS supports. The number of disks per storage is defined by the chosen storage, as mentioned earlier. In case of A3, that would be a total of 8 disks capable of storing 8TB of data.
P r o d u c ts S o l u ti o n s Co mp an y R es o u r c es D o wn l o ad s Co n tac t Us S h o p B l o g P ar tn er s Scale out your NAS storage If the NAS data storage is completely filled with the maximum possible disks, that doesn’t mean that your scalability has come to an end. You can choose to scale out the NAS storage, which will enable you to add more disks. In the above example, you can choose to move from A3 to A4. You will be able to have 16 disks instead of 8. To scale out, go back to the “All settings” button and click on the “Size” tab in the right hand settings menu. Choose the NAS storage you wish to move to and click on “Select”. And with that, you will move to the larger VM with more space for disk drives.
P r o d u c ts S o l u ti o n s Co mp an y R es o u r c es D o wn l o ad s Co n tac t Us S h o p B l o g P ar tn er s The entire process can be done for the other attached storages, as soon as their status changes from “Creating” to “Running”. Using the Customized DNS Name Label Remember that DNS name label we asked you to configure at the beginning? Well, besides letting you add data disks to your scalable NAS appliance, it also enables you to access your storage using a web browser. What you have to do is click on the storage and find the DNS name. You can use this link in the address bar of a web browser to access your storage device. The above image shows where exactly you can find the DNS name. Remember to add http:// for the link to work. Using this link will bring up Stonefly’s cloud storage web based management interface. That lets you manage the storage, the VMs and the associated data disks. This concludes the guide on how to setup Stonefly’s scalable NAS VMs in Microsoft Azure portal. If you have any queries about Stonefly’s products, services and scalable nas storage appliances, feel free to consult our professionals.
P r o d u c ts S o l u ti o n s Co mp an y R es o u r c es D o wn l o ad s Co n tac t Us S h o p B l o g P ar tn er s You May Also Like DDoS Attacks Decoded: Defending Against Modern Cyber Onslaughts Delve into the disruptive realm of DDoS attacks, understanding their operations and motives. Learn how air-gapping and immutability fortify defenses, ensuring a resilient cybersecurity posture against relentless online assaults. Read More How to Set Up Immutable Snapshots for Ransomware Protection Discover the significance of immutable snapshots for enhanced data security. Explore their benefits, practical applications, and step- by-step setup guide to bolster your data protection strategy. Read More Defending Your Data: The Vital Role of Multi- Factor Authentication Discover the power of multi-factor authentication (MFA) in modern data security. StoneFly's innovative storage solutions offer a seamless and robust approach to safeguarding your critical data. Enhance your data protection strategy with MFA-enabled storage, hyperconverged, backup, and disaster recovery solutions. Read More Get in Touch with Us About StoneFly Contact Name* Founded in 1996 and headquartered in Castro Valley – StoneFly, Inc. was established with the vision to simplify, optimize and deliver high performance budget-friendly data center solutions for SMBs, SMEs, and large enterprises. Beginning with its registration of the iSCSI.com Internet domain name in March 1996, StoneFly has made iSCSI into a standard which is now used by IT professionals around the world. With over 24 years of innovation in data storage, hyperconverged infrastructure (HCI), and backup and disaster recovery (DR) industries and technology partnerships with market leaders like VMware, Veeam, Microsoft Azure, and AWS cloud, StoneFly’s range of ever-growing data management products continue to grow and include physical, virtual, and cloud solutions such as NAS, SAN, S3, unified NAS + SAN + S3 appliances, storage gateways, backup gateways, complete backup and DR systems, RAID systems, IP video surveillance storage systems, data migration software and more – powered by StoneFly’s patented 8th generation storage virtualization software StoneFusion™ and integrated with enterprise features and data services. Learn More Company* Phone* (extensions can be entered in the "Message" field) Email Address* Message *All fields with an asterisk are required. Send By submitting this request you agree to be contacted and receive product information via email or call. You may unsubscribe at any point. © 2023 StoneFly | All Rights Reserved