Asus RT-AC68A Router Setup - Simple Guide
20 likes | 23 Views
Asus RT-AC68A Router Setup - Get rapid assistance from our technical panal to Setup Asus RT-AC68A Wireless Router and establish successful Router Setup

Asus RT-AC68A Router Setup - Simple Guide
E N D
Presentation Transcript
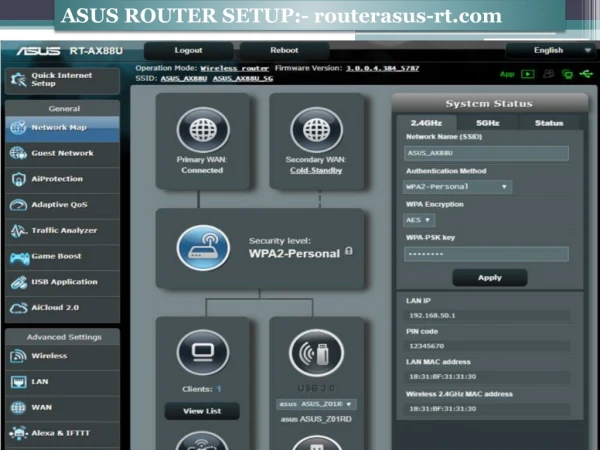
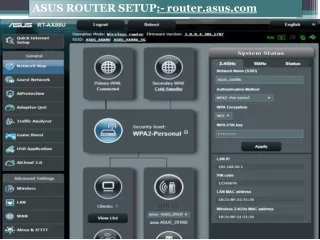
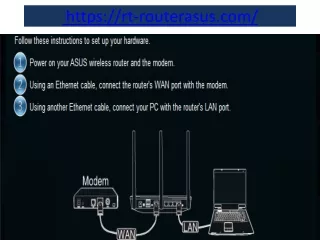
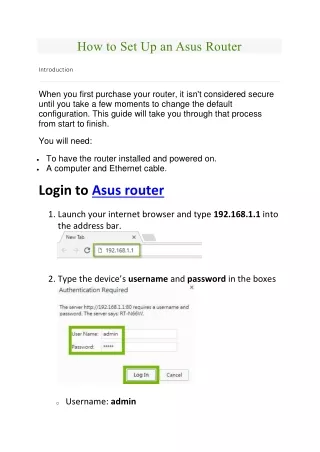
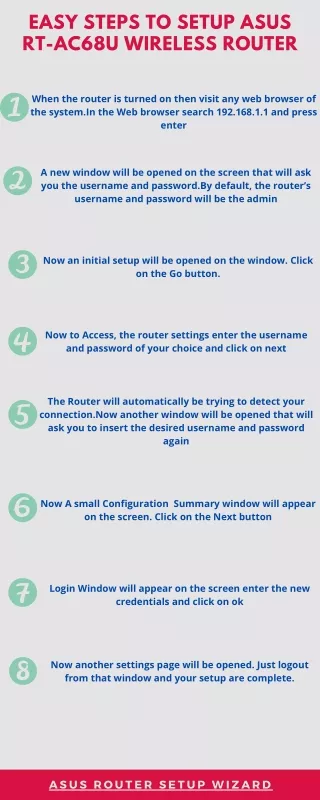
Asus RT-AC68A Router Setup - Simple Guide In this tutorial, you’ll learn the steps involved in the Asus RT-AC68A router setup for the first time. Asus RT-AC68A is a wireless router powered by Broadcom BCM4709A0 that is compatible with IEEE 802.11 a/b/g/n/ac standards. This router provides a maximum speed of 1900 Mbps and comes with Open VPN support. It also offers a guest network that allows you to create a separate network for your guest. The router has 4 LAN and 1 WAN ports along with built-in NAS functionality. The default IP address of this router is 192.168.1.1 and the username & password are admin.Now, let’s see how to perform the Asus RT-AC68A Router Setup. The below section explains how to set up this router via a wired connection. Step 1: Position Asus Router Unpack Asus RT-AC68A Router. Place the modem closer to your router. Avoid placing any metal objects between the router and the modem. Make sure that the modem and the router are placed in a location where the network coverage is high. Step 2: Physical setup Get the bundled cable and use itto connect your Asus Router to your desktop or laptop. Make sure to connect the cable to the LAN port of the router. Connect the power cable to your router and press the Power button to turn it on.
Once the router’sPower, Wi-Fi, LAN, and Internet lights are turned on, you’re ready to perform the web-based setup. Read More