Download
1 / 2
20 likes | 29 Views
Thermostat housing seal : How can you tell if the seal needs to be replaced? The easiest way to tell if your seal is damaged is to look for leaks around your thermostat. You may be able to see water dripping from this area if it is damaged. You may also see discoloration on the walls surrounding your thermostat if it has leaked recently. It is best to get this repaired as soon as you notice it to prevent any further damage to your walls or your heating and cooling unit. Replacing the seal is a simple process that can be completed in under an hour and will prevent water from damaging your walls

E N D
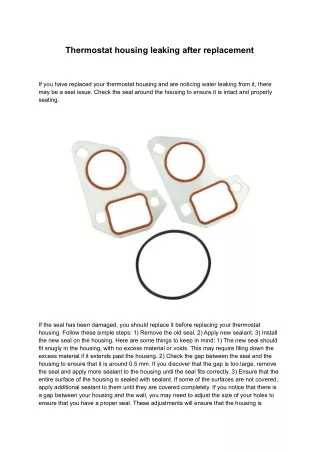
Thermostat housing leaking after replacement If you have replaced your thermostat housing and are noticing water leaking from it, there may be a seal issue. Check the seal around the housing to ensure it is intact and properly seating. If the seal has been damaged, you should replace it before replacing your thermostat housing. Follow these simple steps: 1) Remove the old seal. 2) Apply new sealant. 3) Install the new seal on the housing. Here are some things to keep in mind: 1) The new seal should fit snugly in the housing, with no excess material or voids. This may require filing down the excess material if it extends past the housing. 2) Check the gap between the seal and the housing to ensure that it is around 0.5 mm. If you discover that the gap is too large, remove the seal and apply more sealant to the housing until the seal fits correctly. 3) Ensure that the entire surface of the housing is sealed with sealant. If some of the surfaces are not covered, apply additional sealant to them until they are covered completely. If you notice that there is a gap between your housing and the wall, you may need to adjust the size of your holes to ensure that you have a proper seal. These adjustments will ensure that the housing is
properly sealed to the wall. By following these steps, you will be able to ensure that your thermostat housing is properly sealed and prevent future leaks. Thermostat housing seal : Why is the seal important? Well, without it, you can lose quite a bit of heat and that could be costly in terms of your energy bill. As a home owner, it is not uncommon to change the batteries in your thermostat every so often. As a result, you may accidentally damage the seal during this procedure, or you might simply forget about it once it has been installed. In some cases, water damage can lead to mold which can damage the structure of your home over time. By replacing the seal as soon as it is damaged, you can help prevent water damage from wreaking havoc on your home. If you do notice a leak from your thermostat housing, it is recommended to get it repaired as soon as possible to prevent further damage to your home or your belongings. Product Link: https://www.totalperformance.net.au/LS-Water-Pump-Mounting-Gasket-Set-O-ring-thermostat-seal-LS 1-LS2-LS3-HOLDEN-COMMODORE-12630223