Download
1 / 13
130 likes | 153 Views
Maintaining a submersible pump is crucial for ensuring its longevity and efficiency. Regular cleaning not only prevents clogs and blockages but also optimizes the pump's performance. In this comprehensive guide, we will take you through the step-by-step process of cleaning a submersible pump, equipping you with the knowledge to keep your pump running smoothly for years to come.

E N D
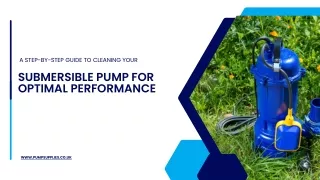
A STEP-BY-STEP GUIDE TO CLEANING YOUR SUBMERSIBLE PUMP FOR OPTIMAL PERFORMANCE WWW.PUMPSUPPLIES.CO.UK
INTRODUCTION Maintaining a submersible pump is crucial for ensuring its longevity and efficiency. Regular cleaning not only prevents clogs and blockages but performance. In this comprehensive guide, we will take you through the step-by-step process of cleaning a submersible pump, equipping you with the knowledge to keep your pump running smoothly for years to come. also optimizes the pump's WWW.PUMPSUPPLIES.CO.UK
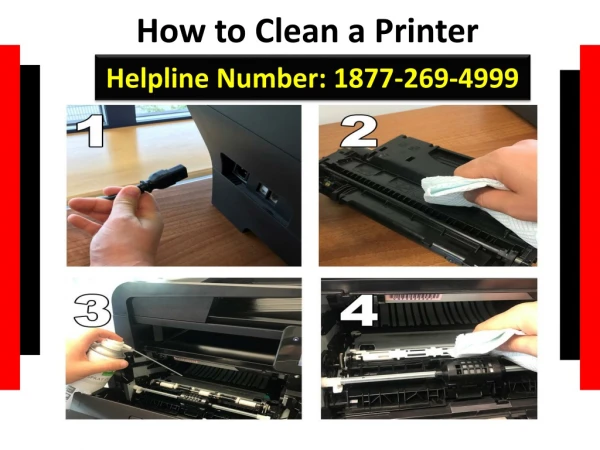
STEP 1: SAFETY FIRST Before you start cleaning your submersible pump, it's essential to prioritize safety. Make sure the pump is disconnected from the power source to avoid any accidents or electrical shocks. Also, wear protective gloves and goggles throughout the cleaning process. WWW.PUMPSUPPLIES.CO.UK
STEP 2: PUMP REMOVAL If your submersible pump is easily detachable, remove it from its installation location carefully. This step might require specific tools or equipment, depending on the pump model. Refer to the manufacturer's instructions for guidance on the removal process. WWW.PUMPSUPPLIES.CO.UK
STEP 3: INSPECTION AND PRE- CLEANING Once the pump is detached, carefully inspect it for any visible debris, dirt, or mineral deposits. Use a brush or a soft cloth to remove loose particles from the pump's exterior. If you notice any significant damage or wear, consult a professional for repairs or replacements. WWW.PUMPSUPPLIES.CO.UK
STEP 4: DISASSEMBLY To thoroughly clean the submersible pump, disassemble it according to the manufacturer's instructions. This step may involve removing the impeller, diffuser, and other internal components. Take note of the disassembly order to ensure you can reassemble the pump correctly. WWW.PUMPSUPPLIES.CO.UK
STEP 5: CLEANING THE COMPONENTS With separately. Use a mild detergent or a specialized pump cleaner recommended by the manufacturer. Gently scrub away any accumulated dirt, grime, or mineral deposits using a soft brush or cloth. Ensure you clean all the nooks and crevices thoroughly. the pump disassembled, clean each component WWW.PUMPSUPPLIES.CO.UK
STEP 6: CLEARING CLOGS AND BLOCKAGES If you encounter clogs or blockages during the cleaning process, carefully remove them using a small brush or a toothpick. Be gentle to avoid damaging the pump's delicate parts. Pay particular attention to the impeller and inlet areas, as these are common spots for debris accumulation. WWW.PUMPSUPPLIES.CO.UK
STEP 7: RINSE AND DRY Once you have cleaned all the components, rinse them thoroughly with clean water to remove any remaining cleaning solution or residue. Ensure that no soap or detergent is left behind, as it can cause damage to the pump's operation. After rinsing, allow the components to air dry completely before reassembling. WWW.PUMPSUPPLIES.CO.UK
STEP 8: REASSEMBLY AND INSTALLATION Once the components are dry, carefully reassemble the submersible pump in the reverse order of disassembly. Make sure each piece fits snugly and is secured according to the manufacturer's instructions. Double-check that all seals and gaskets are in place to prevent any leaks. WWW.PUMPSUPPLIES.CO.UK
STEP 9: FINAL INSPECTION AND TESTING Before reinstalling the submersible pump, perform a final inspection to ensure everything is properly assembled. Check for any loose connections, damaged parts, or signs of wear. Once you are confident in the pump's condition, reconnect it to the power source and conduct a test run to verify its functionality. WWW.PUMPSUPPLIES.CO.UK
Regularly cleaning your submersible pump is an essential maintenance task that should not be overlooked. By following these step-by-step instructions, you can effectively clean your pump and maintain its optimal performance. Remember to consult the manufacturer's guidelines for specific instructions and always prioritize safety throughout the cleaning process. With proper care and maintenance, your submersible pump will continue to operate efficiently and provide reliable service for years to come. WWW.PUMPSUPPLIES.CO.UK
TIMMERMAN INDUSTRIES THANK YOU FOR YOUR ATTENTION WWW.PUMPSUPPLIES.CO.UK