Download
1 / 45
450 likes | 1.02k Views
Introduction to Programming RIS 2.0 RCX Code. Starting the RCX Programming Environment. Double Click on the RCX icon Once the program is loaded, create a new user, or select an existing one Click on “Program” Click on “Freestyle”. Starting the RCX Programming Environment.

E N D
Introduction to Programming RIS 2.0 RCX Code robofest 2005
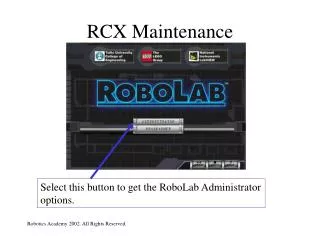
Starting the RCX Programming Environment • Double Click on the RCX icon • Once the program is loaded, create a new user, or select an existing one • Click on “Program” • Click on “Freestyle” robofest 2005
Starting the RCX Programming Environment robofest 2005
Mission 1: Drive Forward (with Timer) • Go Forward for 5 seconds • Stop robofest 2005
Saving your work • Go to File • Click on Save • Type in File Name. i.e. “First Mission” robofest 2005
Downloading and Running • 5 different programs can be loaded onto the RCX at once • Select which slot you want to use by clicking on “Settings” and selecting one of the 5 slots • Make sure that the robot’s IR port is facing towards the IR tower, and click “Download” • When the download is finished, you will hear a beep • You can now run the program by pressing the grey “Prgm” button on the RCX to select the slot you programmed • And press the green “Run” button robofest 2005
Driving in Reverse • Use the “Set Direction” block under “Small Blocks” robofest 2005
After changing the directions, turn on the motors for 3 seconds robofest 2005
Turning • Set the direction of one motor to “Forward” and the direction of the other motor to “Back” robofest 2005
Repeat For • Play a beep 3 times • Uses the “Repeat For” block. • “Repeat For” specifies the number of times a certain action is to be performed. • i.e. Repeat Beep For 3 Times robofest 2005
Repeat For robofest 2005
Light Sensor • Mounted to the front of the robot, facing the ground • Allows detection of lines, white or black, as well as detecting lamps, lasers, and other light sources • Use the “View” button on the robot to view the light sensor value over the black line. Remember or write down this value. robofest 2005
Using the light sensor • Select “Wait Until” from the “Wait” column • Select “Light” and click “Next” • Select Input Port # to which the light sensor is connected. Press “Next”. • Select “Bright” if looking for white line, “Dark” if looking for black line. Press “Next”. robofest 2005
Click on “Manual” and enter a value for the line. Usually it’s the value from using the “View” button – 5 for a white line, or the value from using the “View” button + 5 for a black line robofest 2005
Mission 2: Detect Edge • When the light sensor detects an edge, beep three times robofest 2005
Mission 3: Detect Light and Beep • When the light sensor detects a bright light source, beep • Repeat forever robofest 2005
Mission 4: Drive Forward and Stop • Go forward until the edge of the board/table • Stop robofest 2005
Mission 4 Solution robofest 2005
Touch Sensor • Touch sensor is attached to the bumper • When the bumper is pressed the touch sensor is activated robofest 2005
Using the Touch Sensor • Turn on the motors • Select the “Wait Until” block from the “Wait” column or “Repeat Until” from the ”Repeat” column • Make sure “Touch” is selected and press “Next” • Choose Input Port # to which the touch sensor is connected, and press “Next” • Make sure “Press” is selected, which will allow the robot to react when the touch sensor is pressed. Press “Next” again. • Press “Done” • Turn off the motors robofest 2005
Mission 5: Touch Sensor • If the touch sensor is pressed once, turn on the left motor • If the touch sensor is pressed twice, turn off the left motor, and turn on the right motor • If the touch sensor is pressed three times, turn on both motors • If the touch sensor is pressed four times turn both motors off • Repeat Forever robofest 2005
Mission 6: Yes or No Statements • If the Light Sensor is detecting the edge then play Beep #1 • Otherwise play Beep #2 • Repeat Forever robofest 2005
Mission 7: Right-Handed Line Follow with Touch Sensor • If light sensor sees black - turn right, otherwise – turn left • Repeat the process until the bumper is hit • Stop robofest 2005
Mission 7: Right-Handed Line Follow with Touch Sensor robofest 2005
Mission 8: Line Follow and Stop • Follow the black line, until robot reaches edge of the board • Stop robofest 2005
Mission 8: Line Follow and Stop robofest 2005
Mission 9: Left-Handed Line Follow • If light sensor sees black - turn left, otherwise – turn right • Repeat the process until the bumper is hit • Stop robofest 2005
Mission 9: Left-Handed Line Follow robofest 2005
Mission 10: Sensor Stacking • Stack touch sensor on top of light sensor • Follow the line, when touch sensor is activated stop. When the stacked touch sensor is pressed the value on Port 2 will read 100. When the touch sensor is not pressed the value for the light sensor will be read. robofest 2005
Mission 10: Sensor Stacking robofest 2005
Sensor Stacking With Tasks robofest 2005
Mission 11: Line Counter with Variables • Go forward • Count each line as the robot crosses it • When the robot crosses the 3rd line, stop. • Uses variables to count number of lines robofest 2005
Mission 11: Line Counter with Variables robofest 2005
Mission 12: Proximity Sensor (simple method*) • Use the IR Transmitter and Light sensor to create a Proximity Sensor • Constantly generate IR messages, and use the Light Sensor to detect the reflected IR beam (*) There is another better method to check fluctuations of the light intensity robofest 2005
Mission 13: IR Communications • One RCX is sending a message, the other is receiving it • Confirm that the message has been received by beeping robofest 2005
Transmitter Solution robofest 2005
Receiver Solution robofest 2005
This PowerPoint will be posted online at http://www.robofest.net/resources.htm robofest 2005