Download
1 / 19
190 likes | 293 Views
We provide complete technical printer support for canon printer. you can call on canon printer helpline number for any kind of technical issues like Ink cartridge errors, Paper jam, Unable to print etc.

E N D
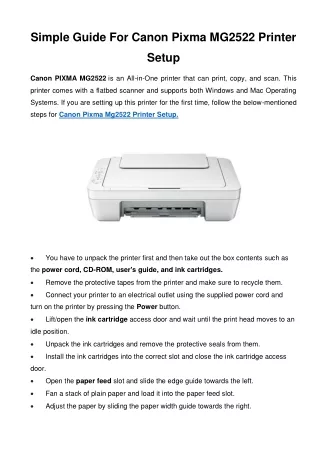
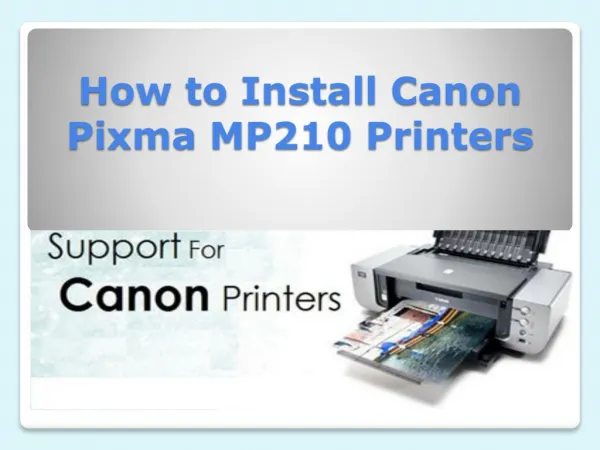
The Pixma MP210 All-in-One inkjet printer was released by cannon in 2004. It can be used as a standard all-in one printer and also can perform many tasks such as scanning, photocopying and creating prints of your digital photos. Moreover, the MP210 is enables to prints a 4-by-6-inch on special photo paper in just a minute. At Canon printer customer support NZ, we have provided you step by step instruction that will help you to install the Pixma MP210 in just a few minutes.
In order to assist our customers on call we have provided Canon printer support number. There are some basis things that you will require to install Pixma MP210 like USB cable and Pixma software.
Unpack the Pixma MP210 from the box and lay all of the contents out on a flat, dry surface Step-1
Open the paper output tray and lift up on the top portion of the MP210 -- the scanning unit -- until a small latch drops into place to support the scanner Step-2
Remove any protective packaging from inside the machine and lift up on the scanning unit again to release the support latch and return it to its original position Step-3
Connect the power cord to the back of the Pixma MP210 and plug the other end into a wall power outlet Step-4
Press the power button to turn the printer on. When the light on the power button stops flashing, open the scanner unit and put its support lever in place. The print cartridge holder moves to the center Step-5
Remove the ink cartridges from their protective packaging and take the protective tape off of each cartridge Step-6
Insert the black cartridge into the left slot and the color cartridge into the right slot. The slots are labeled "B" for black and "C" for color Step-7
Close the lid and wait for the printer to initialize the new cartridges, which takes about two minutes Step-8
Turn the printer off. Insert the Pixma Setup CD into your computer Step-9
Click "Continue" when the User Account Control window appears, then choose "Easy Install" from the main setup window Step-10
Click "Install" to confirm the setup options, then click "Yes" to accept the license agreement. Step-11
Connect the Pixma MP210 USB cable to the back of the machine and plug the other end of the USB cable into your computer when prompted by the setup program. Step-12
Turn the printer on and wait while the setup program configures it Step-13
Click "Next" to begin aligning the print heads, then click "Next" again on the "Setup Complete" screen. Register the printer now, if desired. The serial number is located inside the machine, under the scanner lid. Step-14
For any Technical issues Dial Canon Printer Support Number NZ +64-09-2805551 • Original Source: http://bit.ly/2ePE62n Contact