Download

1 / 5
0 likes | 1 Views
Mastering product photography techniques with the proper camera settings is a journey that combines technical knowledge, creative thinking, and attention to detail. You can showcase its true beauty and purpose by learning to control your camerau2019s aperture, shutter speed, ISO, and lighting. Remember, great product photography is not just about capturing an object; itu2019s about presenting it in a way that communicates quality, inspires confidence, and connects with viewers.

E N D
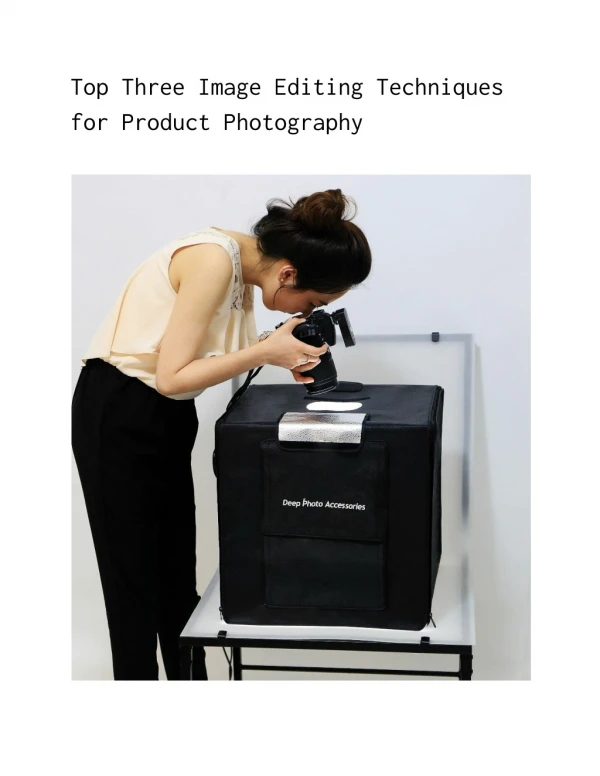
Learn Product Photography Techniques with Camera Settings Introduction Product photography is crucial in today’s visual marketplace, where first impressions can determine whether a customer clicks “buy” or continues scrolling. Capturing the true essence of a product requires more than just a good camera; it demands a solid understanding of photography techniques, lighting, composition, and camera settings. Mastering these elements permits showcasing a product’s best features and creating professional, appealing, and trustworthy images. Whether you're a beginner learning the basics or an aspiring commercial photographer looking to refine your skills, mastering product photography techniques and camera settings is foundational to your success. Understand the Importance of Product Photography Before exploring technical details, it's crucial to understand the importance of product photography. High-quality images significantly impact customer perception. Photography provides the essential connection in online shopping, where customers can't physically examine items. A well-lit, detailed image conveys reliability, while a poor one can lead to doubt. Product photography is about more than just attractiveness; it's about storytelling. Each product has a unique purpose, texture, and design that should be visually communicated. By mastering photography techniques, you can effectively showcase these qualities and build trust with every shot. Setting Up for Success: The Right Equipment
To start, you need the appropriate equipment and setup. While having a high-end camera can be beneficial, the true difference comes from how well you utilize it. Here are the essentials to focus on: Camera: The ideal camera is a DSLR or mirrorless camera with manual mode, which allows you to adjust ISO, shutter speed, and aperture. Lens: Use a macro or prime lens (50 mm or 100 mm) for sharp focus and detailed close-up shots. Tripods: By stabilizing your camera, you can get crisper, more reliable shots. Lighting: Good lighting is essential; utilize softboxes or diffused natural light to minimize harsh shadows. Backdrop: To keep the attention on the product, select a simple, neutral background such as white, gray, or black. Mastering camera settings Understanding camera settings is essential for effective product photography. Here’s how to fine-tune each setting for optimal results: Aperture (f-stop): The aperture affects the depth of field. For product photography, settings between f/8 and f/16 are ideal, ensuring the entire product is sharp and details are clear. Shutter Speed: Using a tripod allows for slower shutter speeds. Start at 1/125 seconds and adjust to attain the right exposure in controlled lighting. ISO: Keep the ISO low, ideally at 100 or 200, to minimize noise and maintain clarity. There's no need for a higher ISO with a stable camera.
White Balance: Proper white balance ensures accurate colors. Set it manually or select a preset based on your lighting, like daylight or tungsten. Focus: Use manual focus for precision, as autofocus may struggle with reflective surfaces. Take your time to ensure sharpness on key product features. Lighting Techniques for Product Photography Lighting is essential in defining a product’s texture, shape, and color. Here are a few effective lighting techniques to consider. Soft Lighting: To minimize shadows and produce a polished appearance, use lightweight, diffused lighting. A softbox or diffuser can help distribute light evenly. Backlighting: For transparent items like glass bottles, backlighting enhances their appearance and adds a premium feel. Side Lighting: Unique textures in materials such as metal, wood, or fabric can be shown with side lighting. Avoiding Reflections: To minimize reflections on glossy or metallic products, adjust light angles, use polarizing filters, or tilt the item slightly. By implementing these techniques and understanding your camera settings, you can create compelling product images that attract customers and enhance their shopping experience. Composition and styling tips Composition plays a critical role in how a viewer perceives your product. Even with perfect camera settings, poor composition can diminish the impact of your image.
Rule of Thirds: Divide your frame into a 3x3 grid and position the product along the intersecting lines. This technique creates balance and naturally draws attention to the subject. Background and props: Use minimal props that complement the product rather than distract from it. For example, a watch could be placed on a leather surface to suggest luxury and sophistication. Angles: Experiment with different shooting angles. A flat lay (top-down) perspective works well for collections, while a 45-degree angle often provides a realistic and appealing view. Consistency: For catalog or e-commerce photography, maintain consistent framing, lighting, and backgrounds across all items being captured. This consistency gives your portfolio or website a professional and cohesive look. Post-Processing for Perfection Post-processing is the process of transforming your unprocessed photos into polished, usable images. Software like Adobe Lightroom or Photoshop allows you to fine-tune brightness, contrast, color balance, and sharpness. However, moderation is key; the goal is to enhance the image, not alter it. Ensure that the final image accurately represents the real product. You could digitally fix small details, such as dust spots or uneven lighting. Consistent color tones and
brightness across multiple images contribute to your brand’s visual identity and professionalism. Practice and experimentation Learning product photography is an ongoing process. Each product presents unique challenges, such as reflective jewelry, textured fabrics, or transparent bottles. Experimenting with camera settings, light placement, and backgrounds will help you discover what works best for various goods. Over time, you will get used to making any item look its best through the lens. Conclusion Mastering product photography techniques with the proper camera settings is a journey that combines technical knowledge, creative thinking, and attention to detail. You can showcase its true beauty and purpose by learning to control your camera’s aperture, shutter speed, ISO, and lighting. Remember, great product photography is not just about capturing an object; it’s about presenting it in a way that communicates quality, inspires confidence, and connects with viewers. With patience, practice, and guidance, you can elevate your skills and create images that impress and tell compelling visual stories. For More Information Mail: info@indianphotoacademy.com Call/WhatsApp: +91-9880744779 Website: https://www.indianphotoacademy.com/