Download
1 / 8
80 likes | 116 Views
You must sign up for several services before publishing your app on Google Play: You must purchase access to the Google Play Developer Console platform

E N D
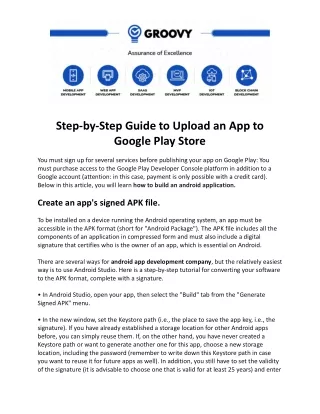
Step-by-Step Guide to Upload an App to Google Play Store You must sign up for several services before publishing your app on Google Play: You must purchase access to the Google Play Developer Console platform in addition to a Google account (attention: in this case, payment is only possible with a credit card). Below in this article, you will learn how to build an android application. Create an app's signed APK file. To be installed on a device running the Android operating system, an app must be accessible in the APK format (short for "Android Package"). The APK file includes all the components of an application in compressed form and must also include a digital signature that certifies who is the owner of an app, which is essential on Android. There are several ways for android app development company, but the relatively easiest way is to use Android Studio. Here is a step-by-step tutorial for converting your software to the APK format, complete with a signature. • In Android Studio, open your app, then select the "Build" tab from the "Generate Signed APK" menu. • In the new window, set the Keystore path (i.e., the place to save the app key, i.e., the signature). If you have already established a storage location for other Android apps before, you can simply reuse them. If, on the other hand, you have never created a Keystore path or want to generate another one for this app, choose a new storage location, including the password (remember to write down this Keystore path in case you want to reuse it for future apps as well). In addition, you still have to set the validity of the signature (it is advisable to choose one that is valid for at least 25 years) and enter
at least one other data in the certificate (for example, your name and surname or company name). • After establishing a new storage location for the signature or having opted for an existing one and entered the respective passwords, continue with the next step by clicking "Next." Indicate whether this is a test version of the software (debug) or a finished app (release) and enter the location folder for the signed APK file. Once you have chosen the release version via the "Build type" option, you must enter the field below if you want to release a free or paid app. If you're going to offer both a free and a paid version, you can choose both (by clicking on the CTRL key on Windows and Linux, while on Mac, you use the command key). After you have finished the configuration, confirm by clicking on "Finish." The signed APK file will be generated in your chosen folder and ready to be used in the Play Store. Sign up for Google You must sign up for numerous Google accounts before you can create android app or build a pwa application and upload it to the Google Play Store. • Essential for all subsequent steps is a general Google account. • Once logged in with this Google account, go to the Google Play Developer Console and register there: it is necessary to create an account on this platform to upload apps to the Play Store. To sign up as a Google Play Developer the first time, you must pay by credit card. After completing the payment, you must finally enter the requested information, and your Developer Console is ready. The "developer name" on the Google Play Store coincides with the app's owner, but you can still change it. • If you upload a paid Android app or want to make money with the app in another way (e.g., through in-app purchases, subscriptions, etc.), you need a merchant account on the Google payment centre, which can be created just as quickly. Go to the Google Play Developer Console section in the "Merchant Account" section. Click on "Configure the
merchant account," and you will be redirected to the page to create a payments profile, where you can enter all the data relating to your business (such as company name, headquarters, etc.). How to add apps to Google Play After registering for all required Google services, you can submit your app to the Google Play Store. However, the app will not be directly available on the Google Play Store after loading it because every app entered is checked by Google before publication. The time required for this operation varies from case to case, but usually, the loaded app is available in the app store within a few hours. Through the Google Play Developer Console, your app gets uploaded. After signing in to the platform, select "Add new application" from the menu under "All Applications." At this point, enter the default language and the name of the app (you can change both information later). The process continues with the store card, the compilation of a questionnaire to classify contents, and the configuration of prices and their distribution. For everything to go well, don't forget to devote yourself to version management, where you will need to add APKs. So before uploading the app, you must know how to upload the app to the play store. Manage versions In this menu, you can upload signed APKs for your app. You have several options: • You can set up an alpha or beta version of your software if it is still being tested. Here you can choose whether to carry out an open or closed test. If you opt for a closed test, you can determine the people who will have to test your app by sending an email (these mail must have a Google account or one on Google Apps).
• If your app has already been tested and you want to go to the publication of the Android app, you can directly choose the production version and then click on "Confirm implementation." After creating a version, find all the information related to the app, including the version name, implementation details, APK details, version history, etc. Your app is now in the Developer Console but is not yet available on the Google Play Store. Insert Store Listing Details An important part of the app publishing process is the store listing, where you enter all the information that users will later see on the app page in the Google Play Store. • You can modify the language and app title in the "Product information" section. You must also enter a short description, which presents the app, and a complete, more exhaustive description; both texts appear after posting on the app details page in the Play Store. • Each item within the Play Store also requires a certain number of "graphic resources." Therefore you must provide at least two screenshots that will serve to explain in the best way how your app works in the Play Store. The images must be in a precise format. • The next section is about "Languages and Translations," where other languages and translations can be added. If you do not opt for translation, you can give users the option to translate the app automatically with Google Translate. It is also possible to insert localized images and videos, which will be shown to users if the language preferences correspond to the language added by you. • The app's content is better defined under "classification" after the photographs have been uploaded. In the "type of app "field, determine whether your Android app is a game or another type of application. Finally, in the category section, indicate the theme of the application.
• Then, you need to enter an email address, "Contact information," while the information on the site and the telephone number are optional. • The configuration of the store profile is concluded with the section "Privacy Policy." Entering privacy policies is essential if the app requires sensitive user and device data access. However, each app must contain information on the storage and processing of personal data, regardless of the type and amount of data collected. Create an app's privacy policy on a site and then enter the URL in the appropriate field. Content classification for apps and games In this section, it is established, thanks to the questionnaire above, whether the apps are suitable for users of all ages or not or whether particular contents must be blocked or filtered for specific geographical areas. Before starting with the evaluation of the app contents, enter an email address email to be contacted if necessary for clarification. • First, choose the category, as you have already done in the store profile, and then start filling out the questionnaire. Don't be rushed and take all the time you need; make sure that the information provided corresponds to reality. In case of incorrect information about the contents of the app, Google can block or even delete the application from the Play Store. • Once you have answered all the questions, finish the questionnaire by clicking on "Apply classification to my app." Then you can see the set age limit, and based on your answers, the age limit of your app in different countries is communicated. • If you have nothing to object to in the classification of your app, confirm the classification and close this section.
Pricing and distribution of the app Google also needs information regarding your app's pricing policy. • If you want to publish a free Android app, you will manage this part very quickly: in this case, it will be enough to indicate that your app must be distributed at no cost to users. In addition, enter the countries where you can download your app. After you have checked the box for "viewing guidelines" and confirmed compliance with the export laws of the United States (Google is a US company, so this entry is present), save your draft again and have finished your app's configuration. If you have chosen to make your app available for free, offering it for a fee is no longer possible afterwards. • If, on the other hand, you want to publish a paid app in the Play Store, some information will still be needed. In this regard, Google commissions 30% of the net amount for each transaction. Especially in the case of new and still unknown apps, it is advisable to allow users to get an overview of the application before they have to pay to use it. Therefore the freemium apps present themselves as a good alternative to the classic paid apps: here, the basic application is free, and the other functions are available only after paying the required amount. After you decide whether to offer your app for a fee or for free, save the draft again. If you have not forgotten to enter any information in any part of the procedure (in this case, there will be a green check mark next to the menu items in the left sidebar), you can publish the app by clicking on "Confirm implementation." To meet your objectives, you can also work with the best progressive web app development company in USA. Optional settings and app upload Before confirming the launching app on the play store, however, there are also other settings that you can configure. In addition to making the in-app products available, you
can also set advertisements on the app or decide that an automatic translation of the app description in the Play Store and the app contents be carried out. These and other settings can be configured under the menu items "In-app products" and "Services and API." However, compared to those indicated above, these items are not mandatory to allow the publication of your app. Conclusion As soon as all the information is complete and the setup is finished, you can now upload your app to the Play Store. I hope this article will help you get all the solutions that you were looking for. You can also get support from Groovy Web for better development and other procedures. Contact Details:- Business Name:- Groovy Web Website:- https://www.groovyweb.co/ Email:- hello@groovyweb.co Facebook:- https://www.facebook.com/groovyweb.co Instagram:- https://www.instagram.com/groovyweb.co Twitter:- https://twitter.com/groovywebco LinkedIn:- https://www.linkedin.com/company/groovyweb